Microsoft Teams is a proprietary business communication platform developed by Microsoft, as part of the Microsoft 365 family of products. Teams primarily competes with the similar service Slack, offering workspace chat and videoconferencing, file storage, and application integration, and is used by hundreds of thousands of organizations across the world.
While some companies have policies that instruct users not to send sensitive information through cleartext channels, like Microsoft Teams, I’ve came across many organizations that do not adopt this behavior. A compromised Office 365 account could lead to all kinds of trouble, including giving an attacker access to communicated passwords, AWS keys, or PII through Microsoft Teams. To help counter this, companies may implement strict Conditional Access Policies and require MFA in order to gain access to a user’s Office 365 account. But what if I told you that you didn’t need the Office 365 account to read messages sent in Microsoft Teams?
Follow along and I’ll show you how access to a hard drive could be all an attacker needs to gain access to your “secret” Teams chats.
Where do Microsoft Teams messages live?
It’s no secret that Microsoft Teams is a cloud-based collaboration tool, so there is no doubt that the data sent to/from Microsoft Teams is stored in Microsoft’s cloud. However, it turns out that chat messages sent through Microsoft Teams also gets stored locally on a filesystem in the following location.
%AppData%\Microsoft\Teams\IndexedDB\https_teams.microsoft.com_0.indexeddb.leveldb

Within this directory is a .log file that contains a lot of information. At first glance, you may think the file just contains a bunch of computer gibberish, but sorting through the data can reveal some valuable secrets.

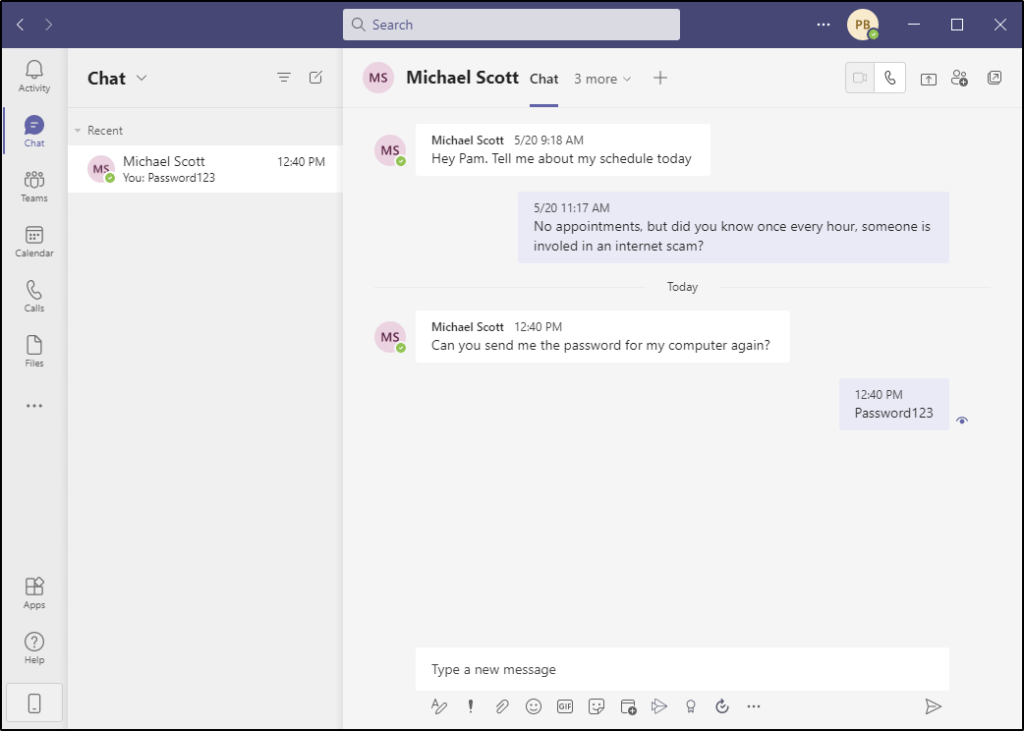
Let’s prove a concept.
So take a scenario where an end-user asks another end-user for help signing into an account. In this case, Michael Scott is asking Pam for his computer login since he can never remember. He sends the message through Teams, perhaps on his phone, and Pam replies.
Now let’s go review that log file on either one of their computers that has Teams up and running. Any user that has local administrator access to this computer would be able to access this file, even for other users on the system.
Surely there is a way to parse this data natively in Windows, but the following command works very nicely in Linux, so I will just copy the log file off the system and place it onto my Kali box.
cat teams.log | grep \<div\> -A 2 | grep '\<div\>\|display' | cut -d ">" -f 2 | cut -d "<" -f 1 | uniq | sed 's/imdisplayname//g' | tr -d \" The output of the command isn’t the most graceful, but there’s enough text here to make out the gist of the conversation.

@_Xenov made a PowerShell parser that you can find below, or on GitHub.
$firstString = "<div"
$secondString = "div>"

$importPath = "$Env:AppData\Microsoft\Teams\IndexedDB\https_teams.microsoft.com_0.indexeddb.leveldb\*.log"

$text = Get-Content $importPath

#Sample pattern
$pattern = "(?<=$firstString).*?(?=$secondString)"

$output = [regex]::Matches($text,$pattern).value

$hash = @{}
echo $output | %{if($hash.$_ -eq $null) { $_ }; $hash.$_ = 1}
Why do we care?
Armed with this information, why does this matter? This is an important attack vector for the following reasons.
Organizations that communicate credentials over Microsoft Teams. As a Penetration tester, I’ve seen passwords, social security numbers, addresses, AWS keys, sensitive admin panels, and much more be communicated through Microsoft Teams. All of this could be potentially accessible to any user who gains access to a system or hard-drive that has ran the software.
Organizations that give everybody local admin rights. Many organizations still provide end-users local admin rights on their computer systems. Imagine a scenario where an end-user is compromised and runs a piece of malware that made it through the email security filter. This would allow a remote, unauthenticated threat actor full access to the filesystem, and therefor, any Microsoft Teams chat logs on this system.
Organizations that assign multiple users to the same system. Given that a user has a local admin rights, they’d have read access to any other user’s AppData directory. This would allow them to read the messages of other users on the same system as them, without ever generating access logs or needing to authenticate to Office 365.
Old hard drives that aren’t properly encrypted or wiped. When’s the last time you discarded a computer or hard-drive? Did you wipe it first? Did you ensure that all blocks on the drive has been rewritten? Did you have encryhption enabled before-hand? If the answer to any of these questions is “no”, then the next owner of that hard-drive may be able to read your Teams chat history.
Where do we go from here?
I’ve only performed very little research on this so far, and I’m left with many questions.
- How long do these chat messages stay in the log file?
- Is this limited to only chat messages, or can we extract details about Team Channel updates as well?
- What about attachments or images being transferred?
- Can scripts or tools be written to easily parse this in a much more efficient manner?
While I will continue to research this and develop my own tools, this is where I look to the community. If you know of security research on this topic, or a tool that is already developed that can easily parse these log files, please let me know.
This article may be updated as time goes on.