I’ve made a handful of articles on attacking LLMNR within Active Directory environments, but I’ve never made anything that helps IT Admins mitigate this vulnerability. This post intends to serve as a guide for patching this vulnerability that is enabled by default in Windows.
Keep in mind that we need to not only disable LLMR, but also NBT-NS.
Table of Contents:
- What is LLMNR & NBT-NS?
- Great! So how can I exploit this?
- Eek. So how do we patch this?
- Disable LLMNR via Group Policy
- Disable LLMNR via Command Line
- Disable NBT-NS via Registry
- Disable NBT-NS via PowerShell
What is LLMNR & NBT-NS?
Crowe.com does a fantastic job at giving you a high-level overview of what NetBIOS & link-local multicast name resolution do. Instead of reinventing the wheel, I will simply provide an excerpt from their website below.
“NetBIOS and LLMNR are protocols used to resolve host names and facilitate communication between hosts on local networks. NetBIOS is generally outdated and can be used to communicate with legacy systems. LLMNR is designed for consumer-grade networks in which a domain name system (DNS) server might not exist.”
If none of this sounds familiar, I highly recommend checking out the below link and reading more about these protocols before moving on.
https://www.crowe.com/cybersecurity-watch/netbios-llmnr-giving-away-credentials
Great! So how can I exploit this?
When a computer requests access to a legitimate network resource, it usually follows a set of pre-defined queries. LLMNR and NetBIOS come into play as last resort options when other methods (such as DNS or local hosts files) don’t prove helpful. Since LLMNR & NetBIOS will attempt name resolution via broadcasted requests to the broadcast-domain, we can set up tools to listen for these requests and respond back pretending to be the intended recipient.

If you’re interested in learning how attackers abuse this protocol, check out one of my guides below.
- Part One: Capture Net-NTLM Hashes.
- Part Two: Crack Net-NTLM Hashes.
- Part Three: Relay Net-NTLM Hashes.
Eek. So how do we patch this?
Disable LLMNR via Group Policy
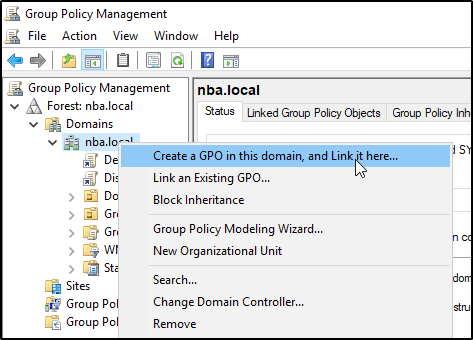
In Windows Active Directory, resolving this problem is as simple as applying a GPO. Sign into your Domain Controller and navigate to the Group Policy Management Editor. You’ll want to right click on your FQDN and select Create a GPO in this domain, and Link it here.
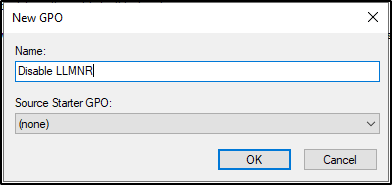
Go ahead and give it a name and click OK.
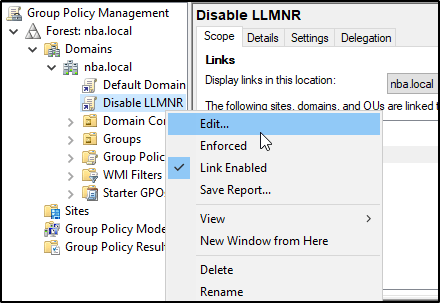
Then you’ll want to right-click on it and select Edit.
Now we just need to navigate to the following policy.
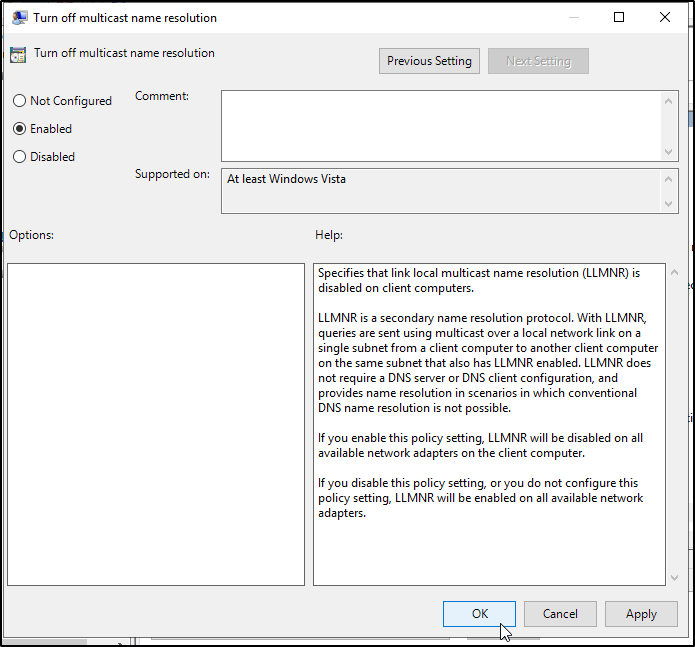
Computer Configuration -> Administrative Templates -> Network -> DNS Client -> Turn Off Multicast Name Resolution
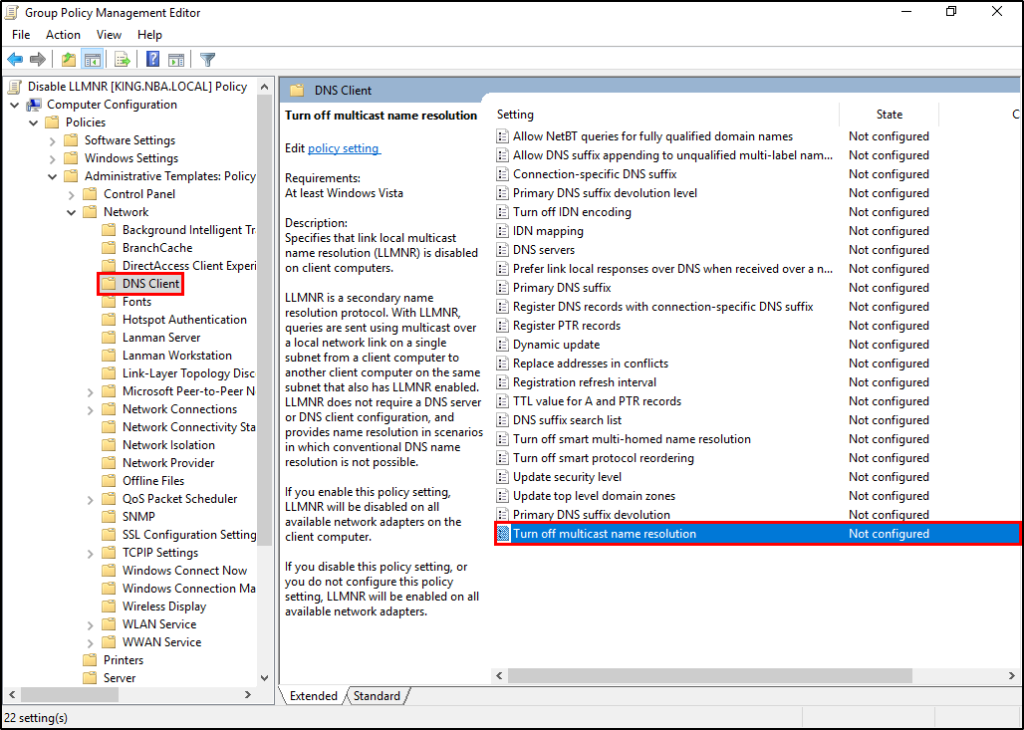
Enable the policy by changing its value to Enabled.
Disable LLMNR via PowerShell / Command Line
But what do you do if you aren’t working with a Windows Active Directory domain? You can still patch this problem using the command line.
REG ADD  “HKLM\Software\policies\Microsoft\Windows NT\DNSClient”
REG ADD  “HKLM\Software\policies\Microsoft\Windows NT\DNSClient” /v ” EnableMulticast” /t REG_DWORD /d “0” /f
Disable NBT-NS via Registry
Open the registry by typing Regedit in the run dialogue. Navigate to registry key at the following location.
Computer\HKEY_LOCAL_MACHINE\SYSTEM\CurrentControlSet\Services\NetBT\Parameters\Interfaces\
From here, we’ll be presented with multiple keys, each represents a network interface. You’ll want to adjust the NetbiosOptions value on each from the default of zero, to a value of 2.

Disable NBT-NS via PowerShell
To take care of the above mention step via PowerShell, you can run the following commands.
$regkey = "HKLM:SYSTEM\CurrentControlSet\services\NetBT\Parameters\Interfaces"
Get-ChildItem $regkey |foreach { Set-ItemProperty -Path "$regkey\$($_.pschildname)" -Name NetbiosOptions -Value 2 -Verbose}

That’s it! You should be all set.
