General Blog

Have a WebApp? Here Are Three HTTP Headers Leaking Your Server Information

This post intends to discuss the three most common HTTP headers that leak server information. While these headers don’t do anything to help protect against attacks, they can be used by attackers to enumerate the underlying technologies behind the application during the early enumeration phase of an attack.

If you’d like to learn more about HTTP headers that can help mitigate a range of attack vectors, check out my previous post What are Web Application HTTP Security Headers? When do you use them?


SERVER

What does this header do?
This header contains information about the software used by the back-end server (type and version).

EXAMPLE:

We’re able to identify that this webserver is running IIS 8.5 based on the Server header.


X-POWERED-BY

What does this header do?
It contains the details of the web framework or programming language used in the web application. 

EXAMPLE:

We’re able to identify example what PHP version is being used on this webserver by it’s X-Powered-By header.


X-ASPNET-VERSION

What does this header do?
As the name suggests, it shows the version details of the ASP .NET framework. This information may help an adversary to fine-tune its attack based on the framework and its version.

EXAMPLE:

We’re able to identify exactly what ASP .NET version is running on this webserver based on the X-AspNet-Version header.


Why do we care? What can do we do about it?

Why is this dangerous?
Because these headers can leak software information, this allows an attacker to know what exact web technologies are in place and what their associated version(s) are. Armed with this information, they can then hunt for public known exploits on those versions.

What is your recommendation?
The server information can be masked by re-configuring the webserver to read something other than the actual server technologies in place.

General Blog

What are Web Application HTTP Security Headers? When do you use them?

This post intends to serve as a guide for some of the most common HTTP Headers web applications use to prevent exploitation of potential vulnerabilities. Within this article, you will discover the name of the various headers, along with their use case and various configuration options.

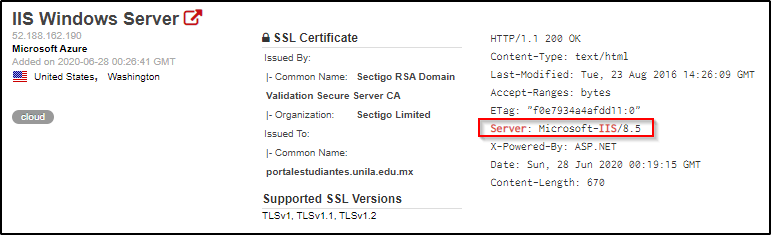
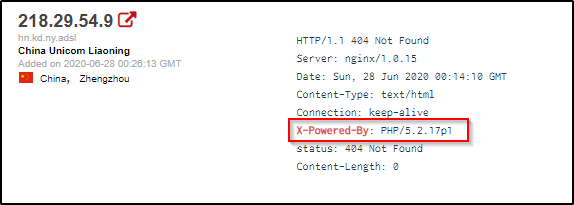
If you’d like to learn more about which headers may be leaking information about the software running on your webserver, check out my other post titled Have a WebApp? Here Are Three HTTP Headers Leaking Your Server Information.

Table of Contents:

  • Strict-Transport-Security
  • Content-Security-Policy
  • Access-Control-Allow-Origin
  • Set-Cookie
  • X-Frame-Options
  • X-XSS-Protection
  • Additional Resources

STRICT-TRANSPORT-SECURITY

What does this header do?
HTTP Strict Transport Security instructs the browser to access the webserver over HTTPS only.

Why would we use this?
By enforcing the use of HTTPS, we’re ensuring that users accessing the web page has a secure, encrypted connection. This can also help users notice whether or not they are victim to man in the middle attacks if they receive certificate errors when a valid certificate is in place on the webpage.

What values can we set this header to?
There are 3 directives for this header:

  • Max-Age : Default value of 31536000. This is the maximum age (time) for which the header is valid. The server updates this time with every new response to prevent it from expiring.
  • IncludeSubDomains : This applies control over subdomains of the website as well.
  • Preload : This is a list that is maintained by Google. Websites on this list will automatically have HTTP enforced in the Google Chrome browser.

CONTENT-SECURITY-POLICY

What does this header do?
Content Security Policy is used to instruct the browser to load only the allowed content defined in the policy. This uses a whitelisting approach which tells the browser from where to load the images, scripts, CSS, applets, etc.

Why would we use this?
If implemented properly, we would be able to prevent exploitation of Cross-Site Scripting (XSS), Clickjacking, and HTML Injection attacks. We do this by carefully specifying where content can be loaded from, which hopefully isn’t a location that attackers have control of.

What values can we set this header to?
The values can be defined with the following directives:

  • default-src
  • script-src
  • media-src
  • img-src
EXAMPLE:

Content-Security-Policy: default-src 'self'; script-src runscript.com; media-src online123.com online321.com; img-src *;

This is would be interpreted by the browser as:

  • default-src 'self' : Load everything from the current domain.
  • script-src runscript.com : Scripts can only be loaded from runscript.com
  • media-src online123.com online321.com : Media can only be loaded from online123.com and online321.com.
  • img-src * : Images can be loaded from anywhere.

ACCESS-CONTROL-ALLOW-ORIGIN

What does this header do?
This header indicates whether the response can be shared with requesting code from the given origin.

Why would we use this?
This is used to take a whitelisting approach on which third parties are allowed to access a given resource. For example, if site ABC wants to access a resource on site XYZ (and is allowed to), XYZ will respond with a Access-Control-Allow-Origin header with the address of site ABC to instruct the browser that this is allowed.

What values can we set this header to?
The following directives can be used:

  • * : For requests without credentials, you can specify a wildcard to tell browsers to allow requesting code from any origin to access the resource.
  • <origin> : Specifics a single origin.
  • null : This should not be used.

SET-COOKIE

What does this header do?
This response header is used to send cookies from the server to the user agent, so the user agent can send them back to the server later. One important use of cookies is to track a user session, and can oftentimes contain sensitive information. Because of this, there are additional attributes that we can set for securing the cookies.

Why would we use the additional attributes?
Using these additional attributes can help protect the cookies against unauthorized access.

What values can we apply?
While there are many attributes for a cookie, the following are most important from a security perspective.

  • Secure : A cookie set with this attribute will only be sent over HTTPS and not over the clear-text HTTP protocol (which is susceptible to eavesdropping).
  • HTTPOnly : The browser will not permit JavaScript code to access the contents of the cookies set with this attribute. This helps in mitigating session hijacking through

X-FRAME-OPTIONS

What does this header do?
This header can be used to indicate whether or not a browser should be allowed to render a page in a <frame>, <iframe> or <object>.

Why would we use this?
Use this to avoid clickjacking attacks. Without clickjacking protections, an adversary could trick a user to access a malicious website which will load the target application into an invisible iframe. When the user clicks on the malicious application (ex. a web-based game), the clicks will be ‘stolen’ and sent to the target application (Clickjacking). As a result, the user will click on the legitimate application without his consent, which could result in performing some unwanted actions (ex. delete an account, etc).

What values can we set this header to?
There are 3 directives we can use:

  • deny : This will not allow the page to be loaded in a frame on any website.
  • same-origin : This will allow the page to be loaded in a frame only if the origin frame is same.
  • allow-from uri : The frame can only be displayed in a frame on the specified domain/origin.

X-XSS-PROTECTION

What does this header do?
This header enables the Cross-site scripting (XSS) filter built into most recent web browsers.

Why would we use this?
The sole purpose is to protect against Cross-Site Scripting (XSS) attacks.

What values can we set this header to?
There are 3-modes that we can set this header to:

  • 0; : Disables the XSS filter.
  • 1; : Enables the filter. If an attack is detected, the browser will sanitize the content of the page in order to block the script execution.
  • 1; mode=block : Will prevent the rendering of the page if an XSS attack is detected.

Additional Resources

This is nowhere near an exhaustive list of the different security headers that you should be using. Should you like to learn more or dive into this topic deeper, I’d recommend checking out the following websites:

Essential HTTP Headers for Securing Your Web Server

Mozilla’s HTTP Headers Documentation

General Blog

My Top 3 OSCP Resources (Ippsec, TheCyberMentor, & 0xdf)


I have seen many people ask the community for help regarding good resources and figured I should create this post to share my two cents on the topic. I started this journey about 6-8 months ago and have soaked in a ton of content during that time.


 TheCyberMentor

Use this when first starting out! He has a pentesting for noobs series that goes through the HackTheBox materials and it’s fantastic for learning basic methodologies and things you need to know from ground zero. He’ll walk you through some easy boxes and hold your hand as you’re exploring this for this first time. His material is heavy on Metasploit, which is a tool that you’ll want to be familiar with, but don’t rely on it too much as you can’t use it more than once on the OSCP exam.

Link to his YouTube

Link to his Twitter


Ippsec

I swear this man is a god and the amount of knowledge that he has obtained on the topic of hacking is tremendous. I believe that his content is developed with a more intermediate target audience in mind, so he doesn’t always explain the basic stuff like TheCyberMentor does. Start with TCM, and move to Ippsec once you’ve got the basics down. Don’t sleep on Ippsec!!! His videos are long, and there are plenty out there, but he teaches so much. I’ll spend hours dissecting 15mins of his video just taking notes so I can use tips he’s shown me later.

Link to his YouTube

Link to his Twitter


0xdf

Their blog posts are some of the best written HackTheBox write-ups I’ve come across. They do a great job at breaking down multiple attack avenues and explaining the concepts. If you’d rather skim through a blog than watch a video, this is the place to go. Their posts are easy to follow, and I’ve learned some awesome tricks while going through them.

Link to their blog

Link to their Twitter


Obviously this is far from an exhaustive list, but it should provide a great starting point for those entering this journey with us. I’d love to hear about which resources you use as well!

General Blog, General IT, Windows Updates/Patches

Patching CVE-2020-0601 | Windows CryptoAPI Spoofing Vulnerability

As I’m sure you’ve heard, there were a handful of critical vulnerabilities announced in this week’s Patch Tuesday. Included in the list of vulnerabilities is a flaw within CryptoAPI that would allow an attacker to digitally sign malicious software updates as the legitimate creator of the software. While Microsoft lists this vulnerability with a severity level of Critical, an attacker would need to first insert themselves as a Man in The Middle to be able to intercept a device’s software update request and return back a digitally signed malicious executable.

Table of Contents
– Affected Operating Systems
– KB’s Needed to Patch Vulnerability

If you have the time, I’d highly recommend the below Webcast on this topic from the SANS Institute’s YouTube page. It goes above any beyond any level of detail I would be able to.


Affected Operating Systems

  • Windows 10
  • Windows Server 2016
  • Windows Server 2019

Note: Windows 7 and older are NOT vulnerable. The Windows Update Service itself is NOT vulnerable.


Patching CVE-2020-0601

Microsoft’s official documentation on this topic can be found at the below link. https://portal.msrc.microsoft.com/en-US/security-guidance/advisory/CVE-2020-0601

The exact patch that you need depends on the exact OS Build of Windows 10 you’re running. Below is a list of the related KBs and which Operating System they patch. This list is current as of this blog’s posted date.

I recommend searching for your Build of Windows 10 by using Ctrl+F and typing the version (I.E 1909, 1903, etc.)


ArticleKB4528760
Download Linkhttps://www.catalog.update.microsoft.com/Search.aspx?q=KB4528760
Operating System(s)Windows Server, version 1903 (Server Core installation)
 Windows Server, version 1909 (Server Core installation)
 Windows 10 Version 1903 for 32-bit Systems
 Windows 10 Version 1903 for ARM64-based Systems
 Windows 10 Version 1903 for x64-based Systems
 Windows 10 Version 1909 for 32-bit Systems
 Windows 10 Version 1909 for ARM64-based Systems
 Windows 10 Version 1909 for x64-based Systems

ArticleKB4534273
Download Linkhttps://www.catalog.update.microsoft.com/Search.aspx?q=KB4534273
Operating System(s)Windows Server 2019
 Windows Server 2019 (Server Core installation)
 Windows 10 Version 1809 for 32-bit Systems
 Windows 10 Version 1809 for ARM64-based Systems
 Windows 10 Version 1809 for x64-based Systems

ArticleKB4534293 
Download Linkhttps://www.catalog.update.microsoft.com/Search.aspx?q=KB4534293
Operating System(s)Windows Server 2016, version 1803 (Server Core Installation)
 Windows 10 Version 1803 for 32-bit Systems
 Windows 10 Version 1803 for ARM64-based Systems
 Windows 10 Version 1803 for x64-based Systems

ArticleKB4534276 
Download Linkhttps://www.catalog.update.microsoft.com/Search.aspx?q=KB4534276
Operating System(s)Windows 10 Version 1709 for 32-bit Systems
 Windows 10 Version 1709 for ARM64-based Systems
 Windows 10 Version 1709 for x64-based Systems

ArticleKB4534271 
Download Linkhttps://www.catalog.update.microsoft.com/Search.aspx?q=KB4534271
Affected O/SWindows Server 2016
 Windows Server 2016 (Server Core installation)
 Windows 10 Version 1607 for 32-bit Systems
 Windows 10 Version 1607 for x64-based Systems

General Blog, Pentesting

Top Ways Penetration Testers Get Domain Admin

Very brief post, but will be expanded on with additional details as time allows.

  • Breached Credentials
  • Credential Stuffing & Password Spraying
  • LLMNR & NBT Poisioning
  • Relay Attacks
  • Null Sessions on Domain Controller(s)
  • Token Impersonation on Low Priv Boxes
  • MiTM6 to Exploit IPv6
  • Kerberoasting
  • MS17-010 and Poor Patch Management
  • SYSVOL Credentials and GPP
  • Lack of Segmentation of Administrative Privileges
  • Insecurely Stored Credentials (Office Documents, Outlook Notes, etc.)
  • Default Credentials on Databases/Networked Devices

References

https://medium.com/@adam.toscher/top-five-ways-i-got-domain-admin-on-your-internal-network-before-lunch-2018-edition-82259ab73aaa
https://hunter2.gitbook.io/darthsidious/other/war-stories/domain-admin-in-30-minutes
https://adsecurity.org/?p=2288
https://www.pentestpartners.com/security-blog/top-10-stupidest-ways-weve-got-domain-admin/
https://chessict.co.uk/media/4712/12-common-vulnerabilities-found-during-penetration-testing.pdf

General Blog, General IT, Windows Updates/Patches

How To Activate Windows 7 Extended Security Updates (ESU)


This post intends to serve as a guide on activating a purchase ESU license key on a Windows 7 box. I’m making the assumption that you have already gone through the procedure to purchase the Windows 7 ESU key and have access to it.

If you haven’t, you should be able to purchase one through a distributor (such as Ingram Micro) and link it to your Office 365 tenant as a subscription-item. If you are a partner and need details on procuring Windows 7 ESUs through the Partner Center, see Purchasing Windows 7 ESUs as a Cloud Solution Provider

Table of Contents
– Installation Prerequisites
– Manual Installation and Activation
– Automating via Batch Script
– Additional References


Installation Prerequisites

There are some updates that you’re going to need to ensure are installed on your system(s) first. The official Microsoft documentation links to older KB’s, but those have been replaced by newer ones. As of this post’s creation dates, here are the latest KB’s that you will need.

2019-03 Servicing Stack Update for Windows 7 for x86/x64-based Systems (KB4490628)

2019-08 Security Update for Windows 7 for x86/x64-based Systems (KB4474419)

2019-12 Servicing Stack Update for Windows 7 for x86-based Systems (KB4531786)

Once three above three are confirmed on your system, you should be able to install this final prerequisite.

2019-12 Security Monthly Quality Rollup for Windows 7 for x86-based Systems (KB4530734)


Installation and Activation

One the prerequisites are installed, you can follow these steps to activate Extended Security Updates (ESU) for machines that are connected to the internet.

1) First, locate and Copy the ESU Key to your clipboard.

2a) Open an Elevated Command Prompt window and run the following command.
slmgr /ipk <ESU KEY>

After a few moments, you should get a message confirming that the product key was installed.

2b) If you are unable to interact with the desktop GUI, you can leverage the cscript command to write the output to the console.
cscript "c:\windows\system32\slmgr.vbs" /ipk <ESU KEY>

3a) Now that the key is on the system, we need to locate its Activation ID so we can activate the key in a future step. Run the following command:
slmgr /dlv

3b) While the command above will present the Activation ID to us, it’s not easy to copy. Let’s run the command again, but leverage cscript so we can copy the Activation ID value from the console.
cscript "c:\windows\system32\slmgr.vbs" /dlv

4) With the Activation ID copied, let’s move forward with the activation.
slmgr /ato <ESU ACTIVATION ID>

5) Once you have activated the ESU product key, you can verify the status at any time by running the following command and referencing the License Status value.
slmgr /dlv


Automating the Process via Batch Script

The ESU license is activated — Great! Now how do we automate this process for the rest of our machines? Lets create a quick batch script that we can then push out via a RMM solution and/or GPO logon scripts.

Note: I am not a scripting expert, but I was able to piece the following together. Please reach out or leave comments below if you see necessary improvements. Make sure you pass a value for the %Key% variable, or replace the variable in your script with your actual key.

@echo off
cscript "c:\windows\system32\slmgr.vbs" /ipk %Key%
for /f "tokens=*" %%a in ('cscript C:\WINDOWS\system32\slmgr.vbs /dlv ^| findstr /b ^"Activation ID: ^"') do set actID=%%a
set actID=%actID:Activation ID: =%
cscript "c:\windows\system32\slmgr.vbs" /ato %actID%
cscript "c:\windows\system32\slmgr.vbs" /dlv

Troubleshooting Tip:
While the above script worked for me, the value that gets returned for %actID% may be incorrect for you if you have multiple products installed on your system, such as a previous ESU or OEM license. If you notice that your License Status still shows Unlicensed after running the script, the %actID% is likely populated with another product installed on your system.

EDIT: A user on Reddit sent in a tip that the ActivationIDs should remain the same across all machines for this year’s ESU. I haven’t verified if that’s the case or not, but that should resolve issues related to pulling down the incorrect %actID%. Updated batch script could be as follows in that case:

@echo off
cscript "c:\windows\system32\slmgr.vbs" /ipk %Key%
cscript "c:\windows\system32\slmgr.vbs" /ato %actID%
cscript "c:\windows\system32\slmgr.vbs" /dlv


Additional References

Check out Microsoft’s official documentation on this topic, including information on how to activate the ESU on machines without internet connectivity.

https://techcommunity.microsoft.com/t5/windows-it-pro-blog/how-to-get-extended-security-updates-for-eligible-windows/ba-p/917807


Stay Involved

Get new content delivered directly to your inbox.